STITCH LINE
tent setup instructions

 MODEL 2000008346 Before you begin
• Read all instructions before set up.
• Select a level site clear of rocks, branches, and other hard or sharp objects, to install your tent.
![]() WARNING: Keep clear of overhead power lines.
WARNING: Keep clear of overhead power lines.
• Do not set up your tent under trees because of potential lightning strikes or falling tree limbs in inclement weather.
• Secure with all stakes and guylines provided to prevent property damage or personal injury.
•For best results in windy conditions, position narrow end of tent into the wind.
• Do not drop tent. | Fig. 6 |
• Do not bounce tent bag on its end to remove tent, as these |
|
actions may damage the frame. |
|
• THIS RECREATIONAL PRODUCT REQUIRES A MINIMUM OF TWO |
|
PEOPLE TO ASSEMBLE. |
|
• Under no circumstances should this product be used to cover automobiles, marine products or similar items.
CAUTION: Avoid pinch points when opening and closing the tent frame.
Description | Repair Kit | Description | Repair Kit |
|
| |
Plastic Clip 16 mm | 5010000845 | Plastic Corner Joint | 5010000851 |
|
| |
Plastic Clip 20 mm | 5010000846 | Fabric Joint Cover | 5010000856 |
|
| |
Fabric Repair Kit | 5010000852 |
|
|
|
| |
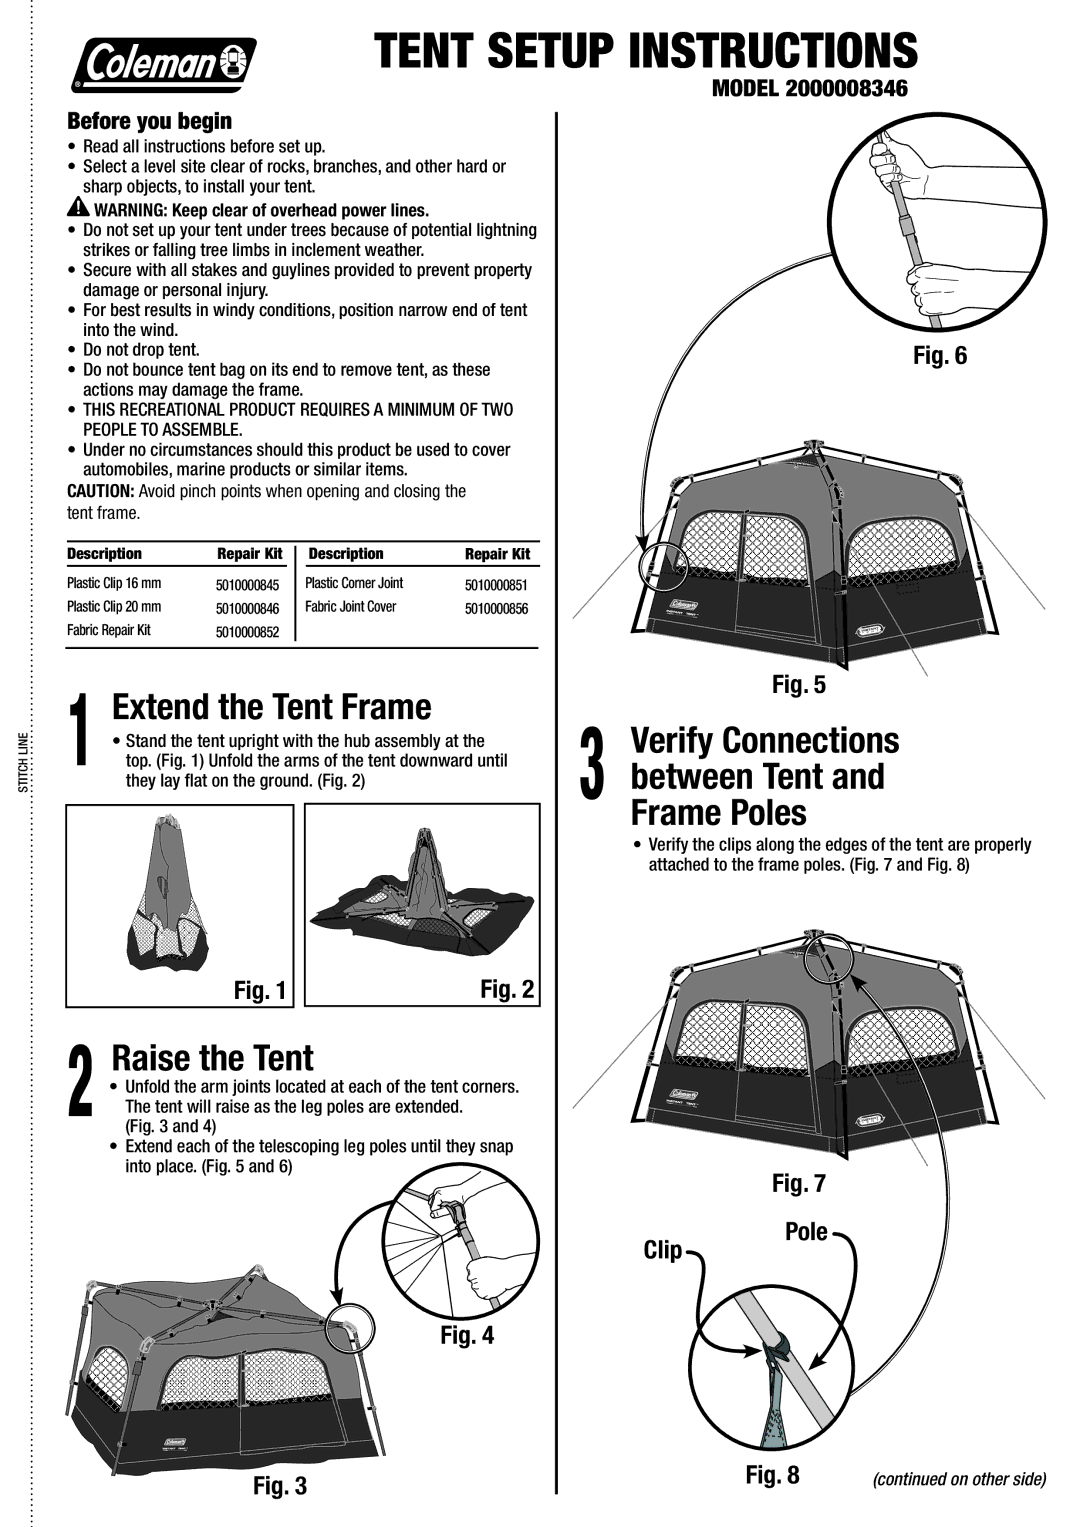
1 | Extend the Tent Frame |
|
| Fig. 5 | ||
| 3 | Verify Connections | ||||
top. (Fig. 1) Unfold the arms of the tent downward until | ||||||
| • Stand the tent upright with the hub assembly at the |
| ||||
| they lay flat on the ground. (Fig. 2) |
| between Tent and | |||
|
|
|
|
| Frame Poles | |
|
|
|
|
|
| • Verify the clips along the edges of the tent are properly |
|
|
|
|
|
| attached to the frame poles. (Fig. 7 and Fig. 8) |
|
| Fig. 1 |
| Fig. 2 |
|
|
2 | Raise the Tent |
|
• Unfold the arm joints located at each of the tent corners. |
| |
The tent will raise as the leg poles are extended. |
| |
(Fig. 3 and 4) |
| |
| • Extend each of the telescoping leg poles until they snap |
|
| into place. (Fig. 5 and 6) | Fig. 7 |
|
|
Clip
Fig. 4
Pole
Fig. 3 | Fig. 8 | (continued on other side) |
|
|