Pole support
To Light
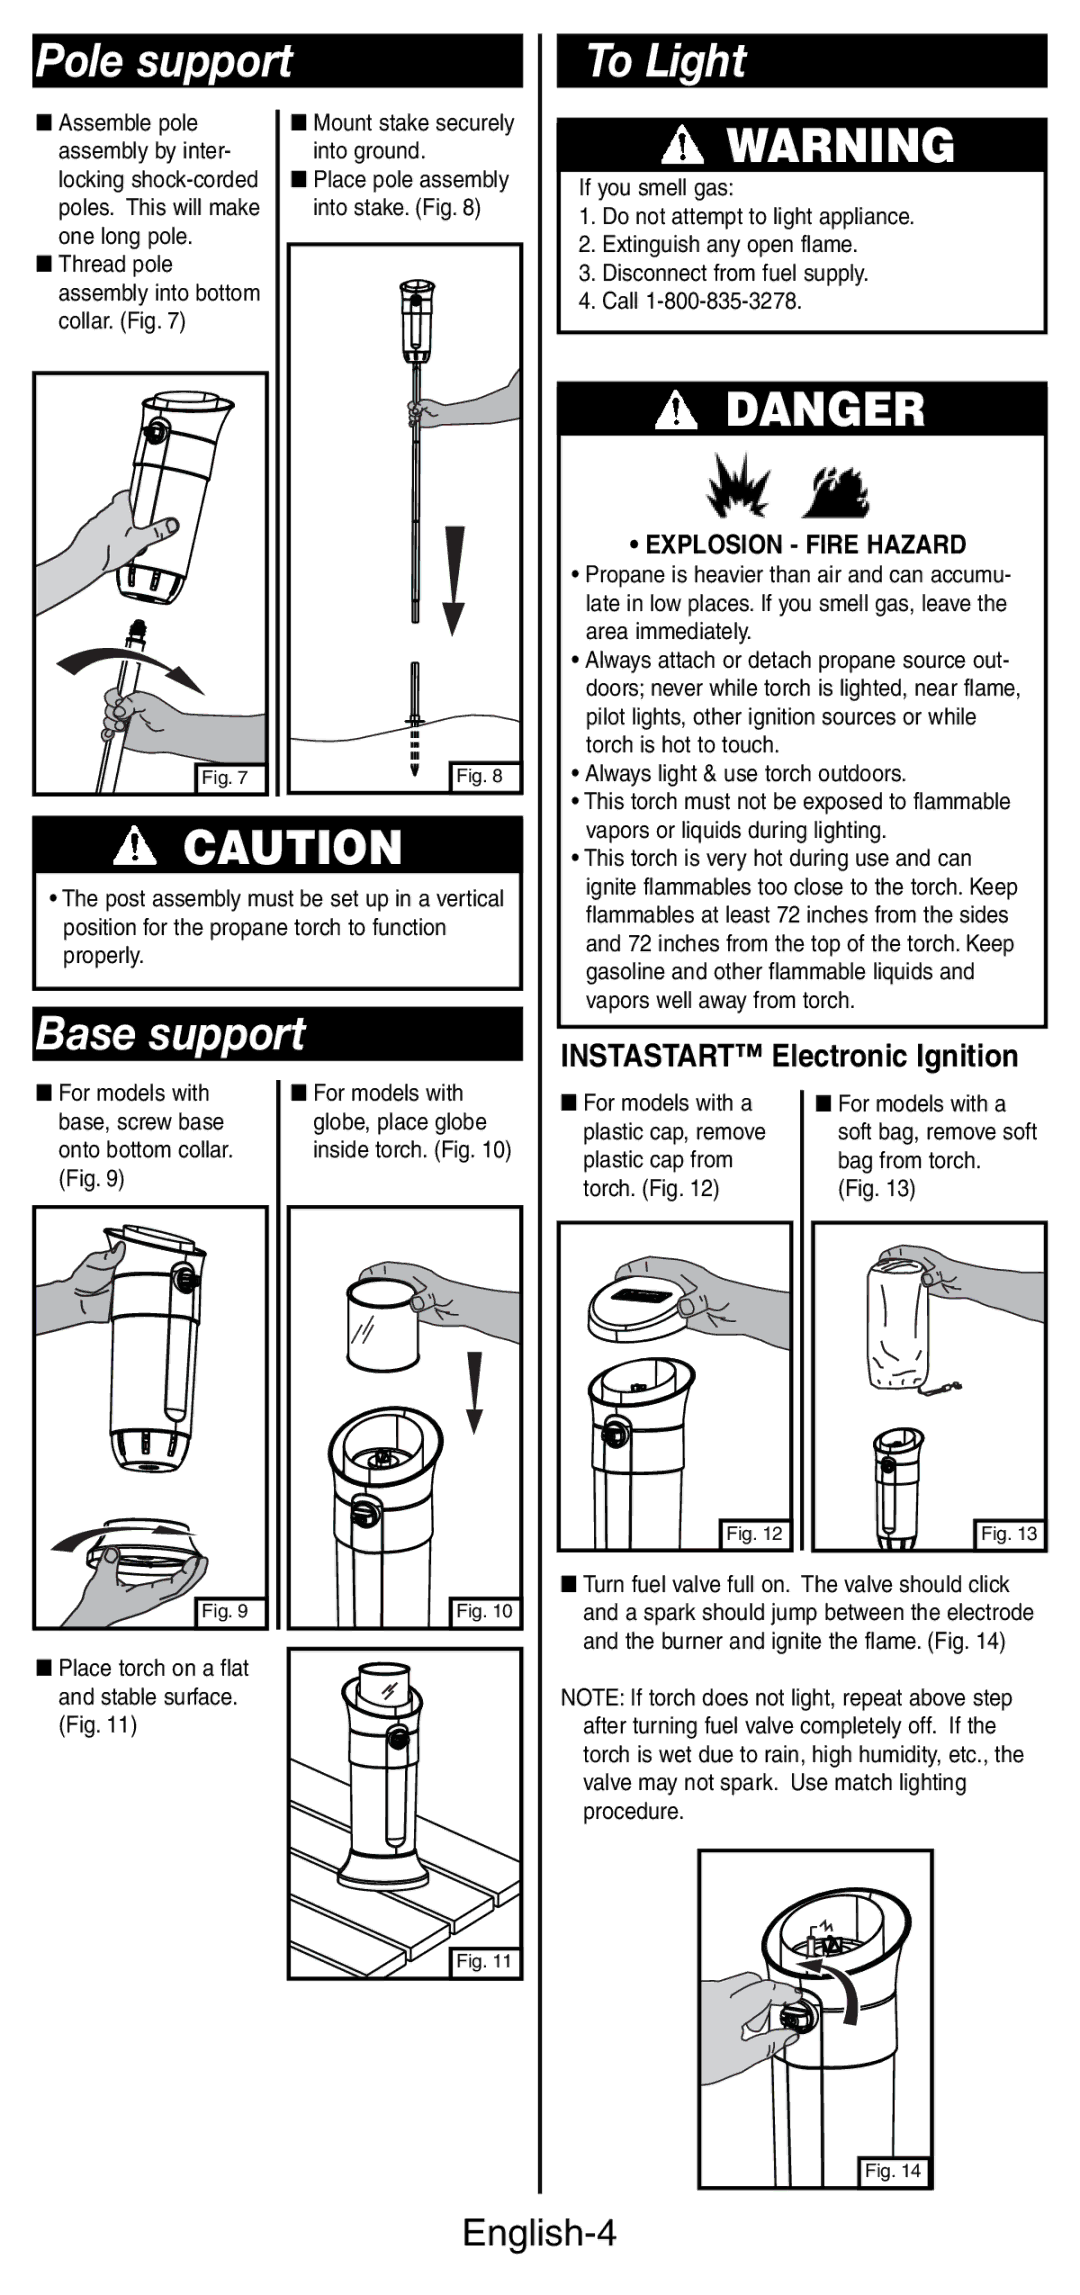
■Assemble pole assembly by inter- locking
■Thread pole assembly into bottom collar. (Fig. 7)
Fig. 7 |
■Mount stake securely into ground.
■Place pole assembly into stake. (Fig. 8)
Fig. 8 |
![]() WARNING
WARNING
If you smell gas:
1.Do not attempt to light appliance.
2.Extinguish any open flame.
3.Disconnect from fuel supply.
4.Call
![]() DANGER
DANGER
• EXPLOSION - FIRE HAZARD |
• Propane is heavier than air and can accumu- |
late in low places. If you smell gas, leave the |
area immediately. |
• Always attach or detach propane source out- |
doors; never while torch is lighted, near flame, |
pilot lights, other ignition sources or while |
torch is hot to touch. |
• Always light & use torch outdoors. |
• This torch must not be exposed to flammable |
![]() CAUTION
CAUTION
•The post assembly must be set up in a vertical position for the propane torch to function properly.
Base support
vapors or liquids during lighting. |
• This torch is very hot during use and can |
ignite flammables too close to the torch. Keep |
flammables at least 72 inches from the sides |
and 72 inches from the top of the torch. Keep |
gasoline and other flammable liquids and |
vapors well away from torch. |
INSTASTART™ Electronic Ignition
■For models with base, screw base onto bottom collar. (Fig. 9)
■For models with globe, place globe inside torch. (Fig. 10)
■For models with a plastic cap, remove plastic cap from torch. (Fig. 12)
Fig. 12 |
■For models with a soft bag, remove soft bag from torch.
(Fig. 13)
Fig. 13 |
■Place torch on a flat and stable surface. (Fig. 11)
Fig. 11 |
■Turn fuel valve full on. The valve should click and a spark should jump between the electrode and the burner and ignite the flame. (Fig. 14)
NOTE: If torch does not light, repeat above step after turning fuel valve completely off. If the torch is wet due to rain, high humidity, etc., the valve may not spark. Use match lighting procedure.
Fig. 14 |
