Assembly (cont.)
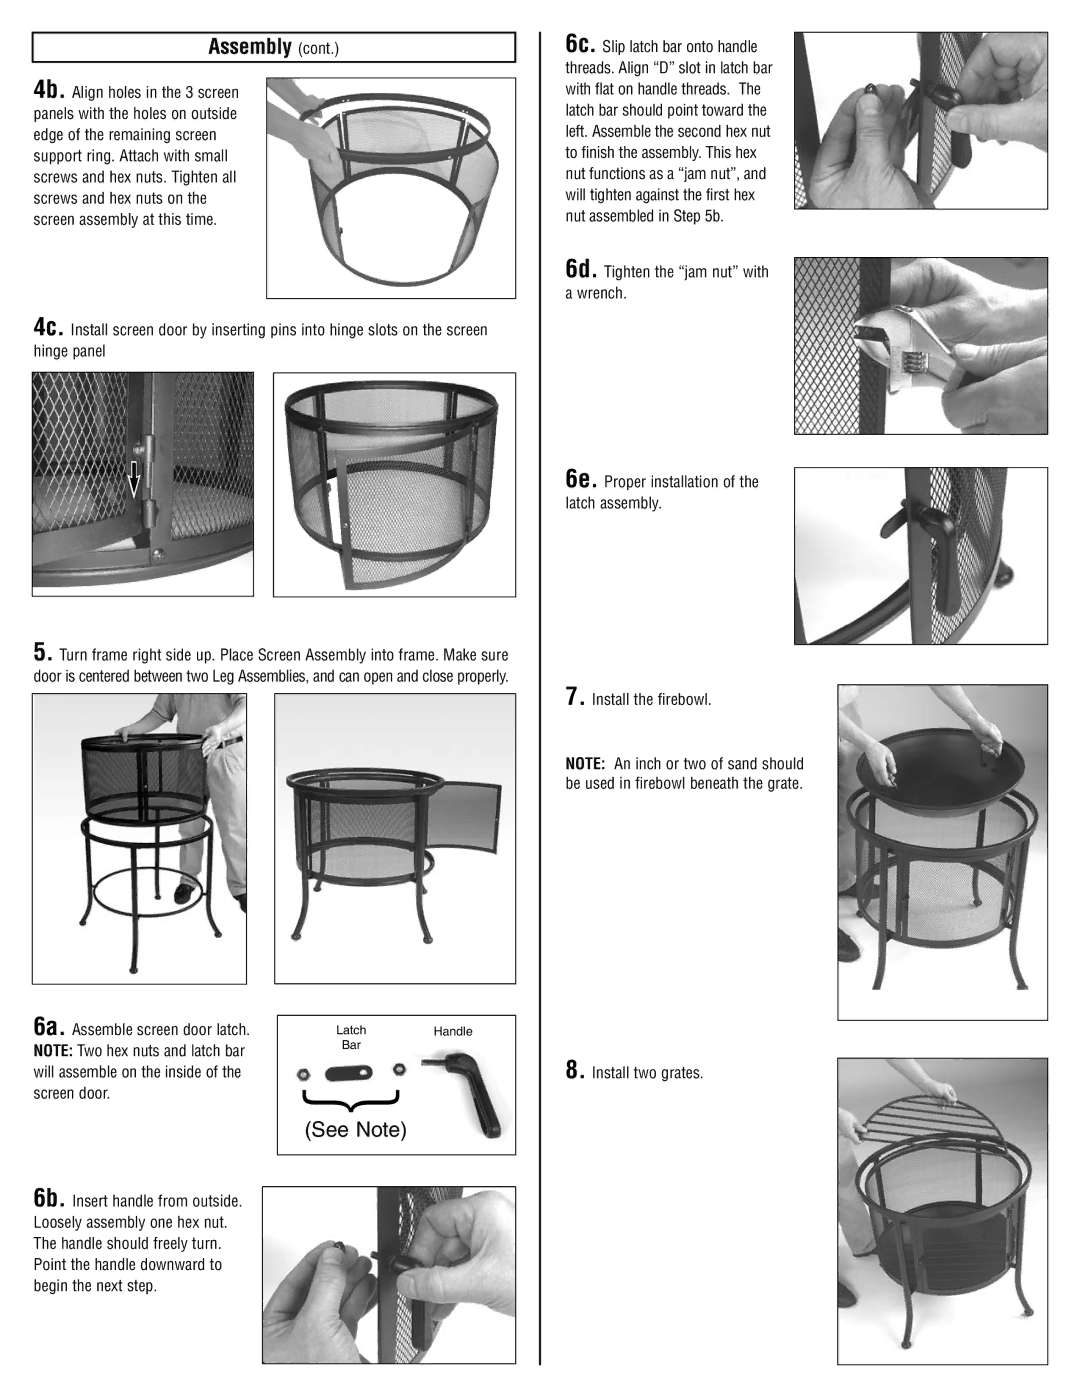
4b. Align holes in the 3 screen panels with the holes on outside edge of the remaining screen support ring. Attach with small screws and hex nuts. Tighten all screws and hex nuts on the screen assembly at this time.
4c. Install screen door by inserting pins into hinge slots on the screen hinge panel
5. Turn frame right side up. Place Screen Assembly into frame. Make sure door is centered between two Leg Assemblies, and can open and close properly.
6c. Slip latch bar onto handle threads. Align “D” slot in latch bar with flat on handle threads. The latch bar should point toward the left. Assemble the second hex nut to finish the assembly. This hex nut functions as a “jam nut”, and will tighten against the first hex nut assembled in Step 5b.
6d. Tighten the “jam nut” with a wrench.
6e. Proper installation of the latch assembly.
7. Install the firebowl.
NOTE: An inch or two of sand should be used in firebowl beneath the grate.
6a. Assemble screen door latch. NOTE: Two hex nuts and latch bar will assemble on the inside of the screen door.
6b. Insert handle from outside. Loosely assembly one hex nut. The handle should freely turn. Point the handle downward to begin the next step.
Latch | Handle |
Bar |
|
{
(See Note)
8. Install two grates.