14’x14’ 3 Room Dome Tent
Instructions apply to Part Number 9271-141
When You Are Ready To Set Up Your Tent
position the end of tent into the wind.
Part No.
Center Tent
Poles
Part No.
Side Tent
Poles
Part No.
Rainfly Pole
Rainfly Part No.
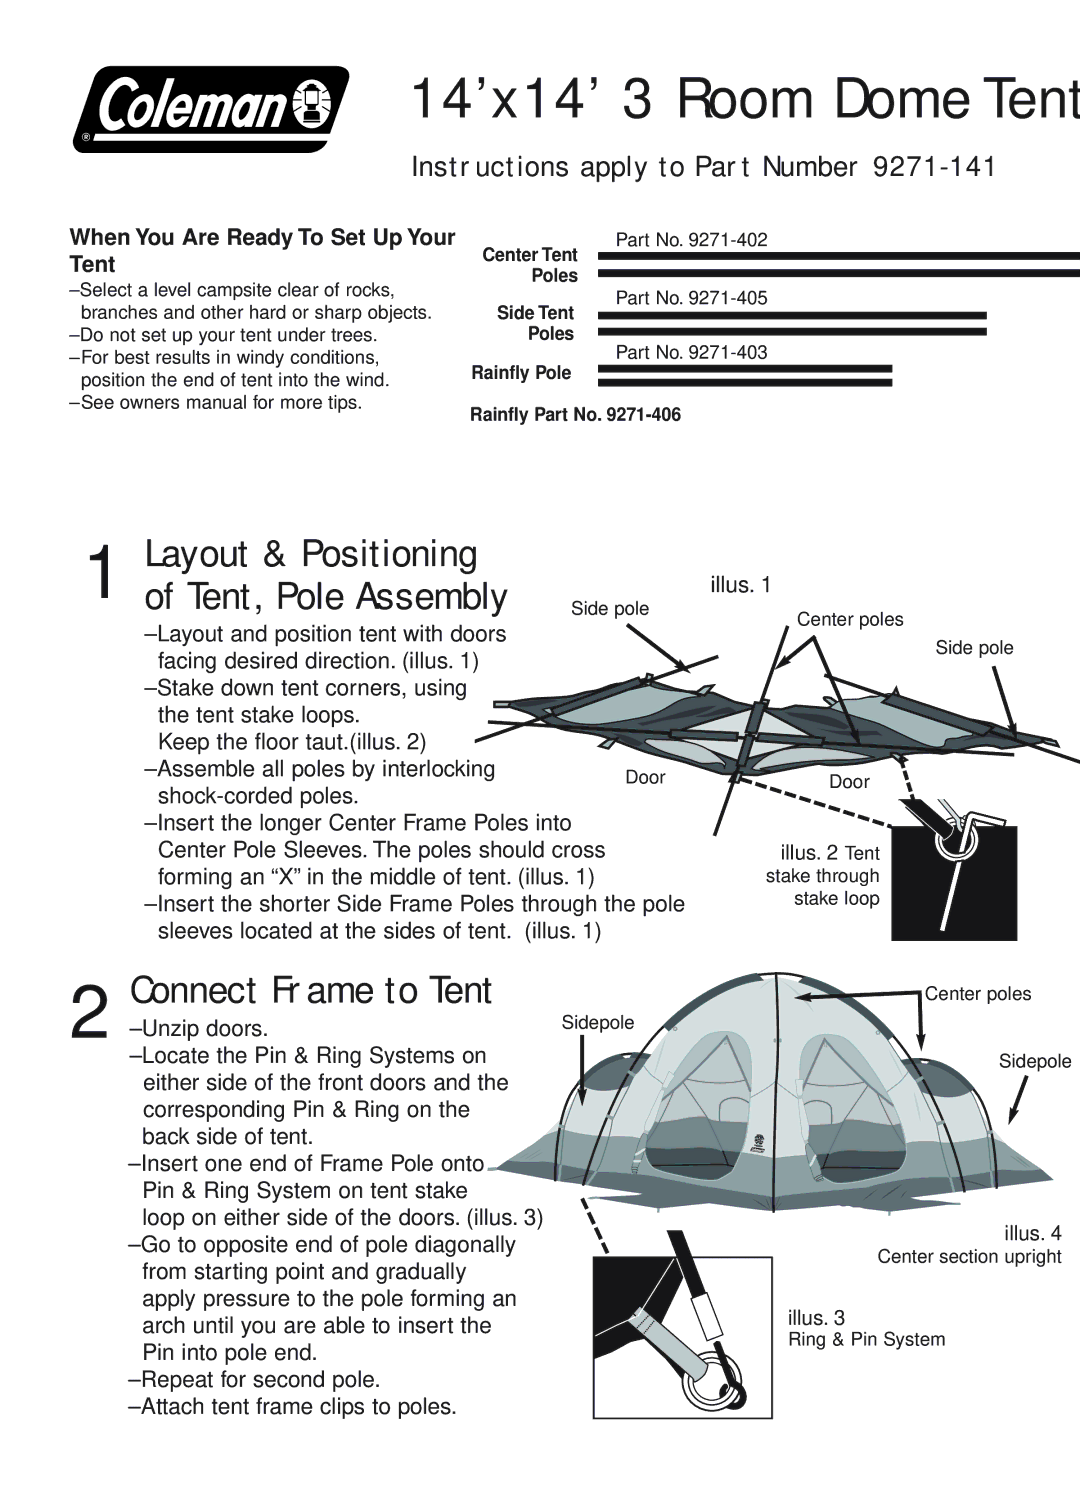
Layout & Positioning |
|
|
|
1 of Tent, Pole Assembly |
| ||
Side pole | |||
|
|
| |
|
|
| |
facing desired direction. (illus. 1) |
|
|
|
|
|
| |
the tent stake loops. |
|
|
|
Keep the floor taut.(illus. 2) |
|
|
|
|
|
| |
| Door |
| |
|
| ||
|
|
| |
Center Pole Sleeves. The poles should cross | |||
forming an “X” in the middle of tent. (illus. 1) | |||
sleeves located at the sides of tent. (illus. 1) | |||
illus. 1
Center poles
Side pole
Door
illus. 2 Tent
stake through stake loop
2 | Connect Frame to Tent |
|
|
|
Sidepole |
| |||
|
| |||
|
|
|
| |
|
|
|
| |
| either side of the front doors and the |
|
|
|
| corresponding Pin & Ring on the |
|
|
|
| back side of tent. |
|
|
|
|
|
|
| |
| Pin & Ring System on tent stake |
|
|
|
| loop on either side of the doors. (illus. 3) |
|
|
|
|
|
|
| |
| from starting point and gradually |
|
|
|
| apply pressure to the pole forming an |
|
|
|
| arch until you are able to insert the |
|
|
|
| Pin into pole end. |
|
|
|
|
|
|
| |
|
|
|
| |
![]() Center poles
Center poles
Sidepole
illus. 4
Center section upright
illus. 3
Ring & Pin System