| Krypton 2™ | |
| part number | |
POLE ASSEMBLY PARTS |
| |
Main Tent Poles (Red) | Rainfly | |
Part No. | Part No. | |
Side Poles (Silver) |
| |
Part No. |
| |
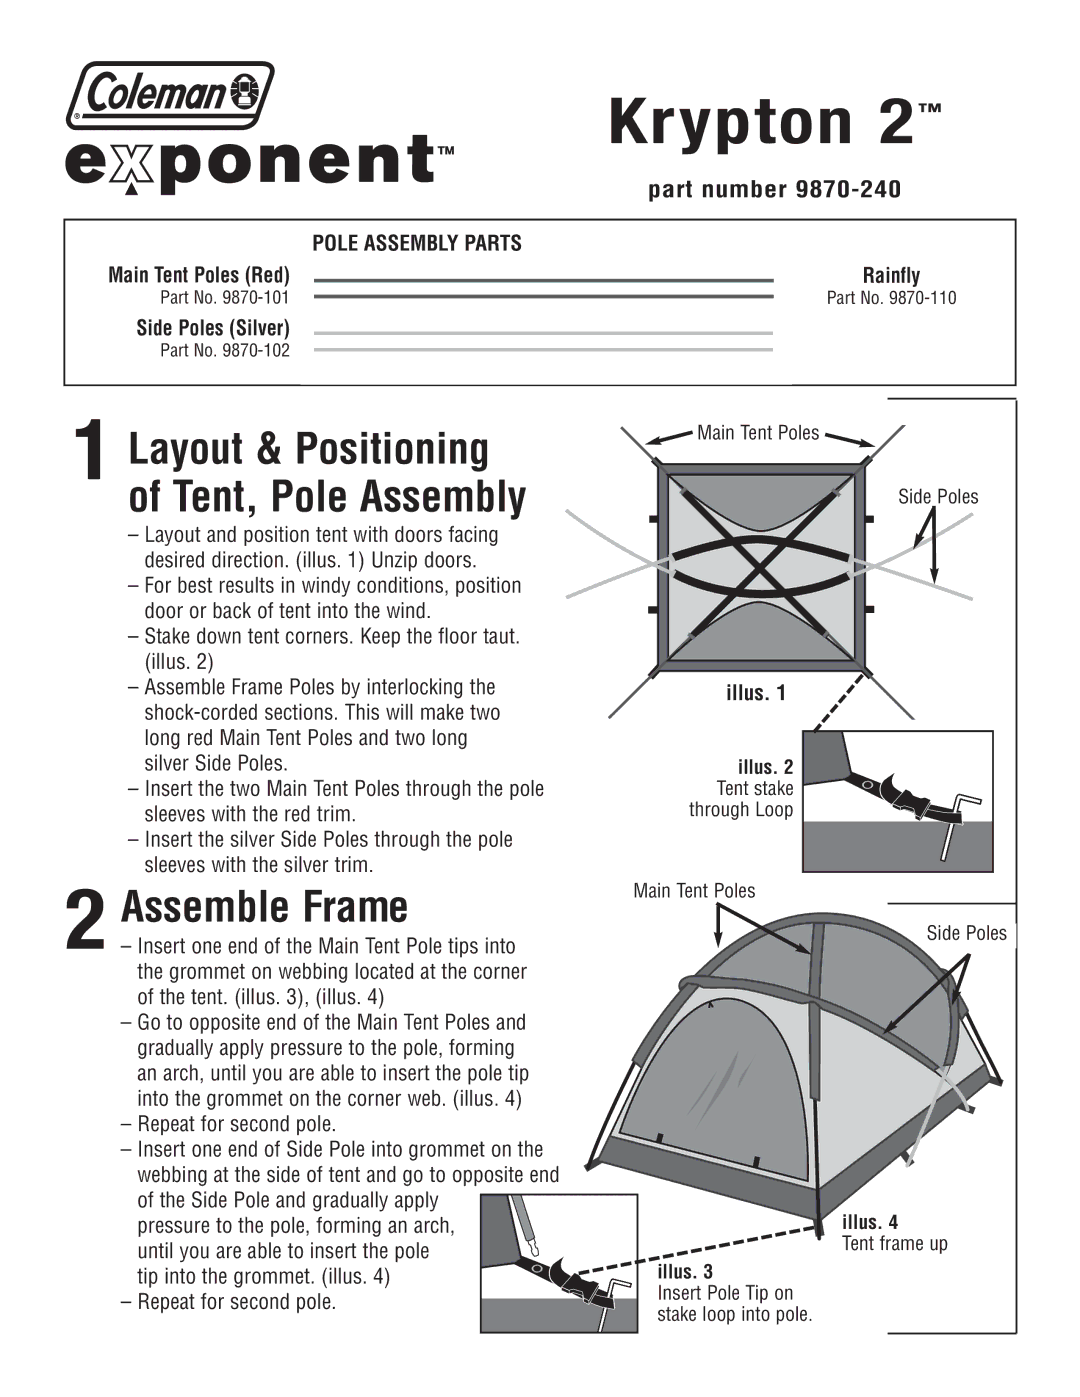
1 Layout & Positioning | Main Tent Poles | |
| ||
of Tent, Pole Assembly | Side Poles | |
| ||
– Layout and position tent with doors facing |
| |
desired direction. (illus. 1) Unzip doors. |
| |
– For best results in windy conditions, position |
| |
door or back of tent into the wind. |
| |
– Stake down tent corners. Keep the floor taut. |
| |
(illus. 2) |
| |
– Assemble Frame Poles by interlocking the | illus. 1 | |
| ||
long red Main Tent Poles and two long |
| |
silver Side Poles. | illus. 2 | |
– Insert the two Main Tent Poles through the pole | Tent stake | |
sleeves with the red trim. | through Loop | |
– Insert the silver Side Poles through the pole |
| |
sleeves with the silver trim. |
| |
Assemble Frame | Main Tent Poles | |
Side Poles | ||
2 – Insert one end of the Main Tent Pole tips into | ||
| ||
the grommet on webbing located at the corner |
| |
of the tent. (illus. 3), (illus. 4) |
| |
– Go to opposite end of the Main Tent Poles and |
| |
gradually apply pressure to the pole, forming |
| |
an arch, until you are able to insert the pole tip |
| |
into the grommet on the corner web. (illus. 4) |
| |
– Repeat for second pole. |
| |
– Insert one end of Side Pole into grommet on the |
| |
webbing at the side of tent and go to opposite end |
| |
of the Side Pole and gradually apply | illus. 4 | |
pressure to the pole, forming an arch, | ||
until you are able to insert the pole | Tent frame up | |
illus. 3 | ||
tip into the grommet. (illus. 4) | ||
– Repeat for second pole. | Insert Pole Tip on | |
stake loop into pole. | ||
|