.brush cleaning a with cleaned be also can cutter
1 figure
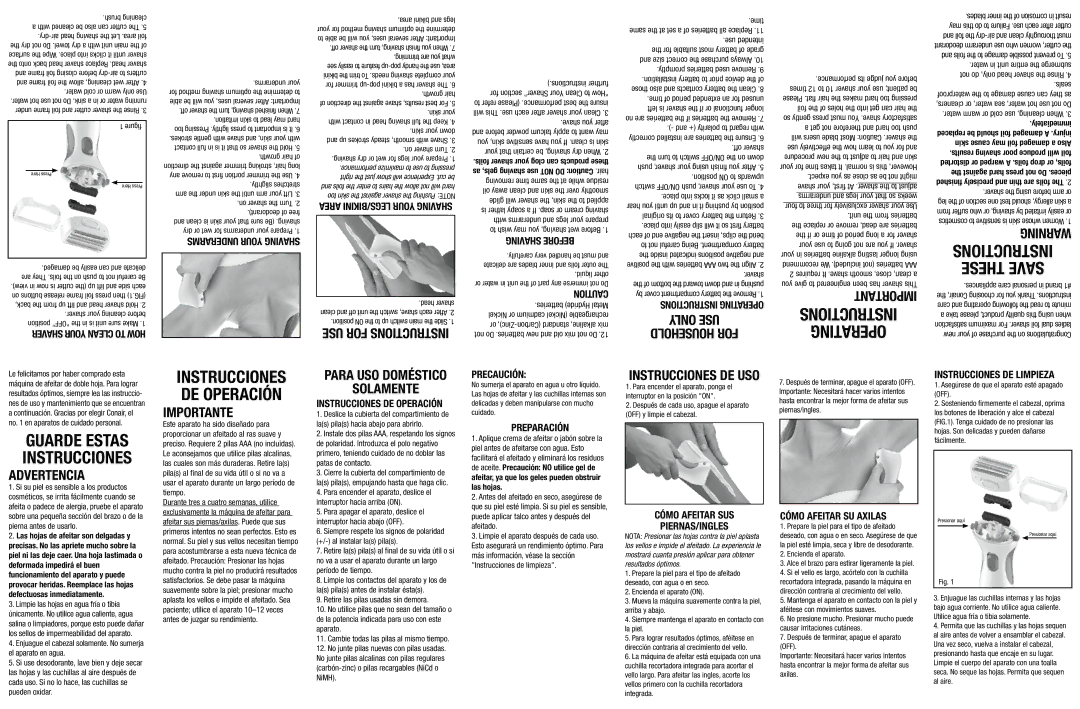
Here Press
Here Press
.damaged be easily can and delicate are They .foils the on push to not careful Be .view) in now is cutter (the up lift and side each on buttons release frame foil press then 1).(FIG back, the from up lift and head shaver Hold .2 .shaver your cleaning before position “OFF” the in is unit sure Make .1 owH
.underarms your for method shaving optimum the determine to able be will you uses, several After Important: .off shaver the turn shaving, finished When .7 .irritation skin to lead may hard too Pressing .lightly press to important is It .6 .strokes gentle with shave and skin, your with contact full in is it that so shaver the Hold .5 .growth hair of direction the against trimmer stroking hair, long any remove to first portion trimmer the Use .4 .slightly stretches arm the under skin the until arm your Lift .3 .on shaver the Turn .2 .deodorant) of free and clean is skin your that sure (Be .shaving dry or wet for underarms your Prepare .1 havingS
toleanC Your haverS
| .area bikini and legs |
|
|
|
| .time | ||
your for method shaving optimum the determine |
|
|
| same the at set a of batteries all Replace .11 | ||||
to able be will you uses, several After Important: |
|
|
|
| .use intended | |||
.off shaver the turn shaving, finish you When .7 |
|
|
| the for suitable most battery of grade | ||||
| .trimming are you what |
|
|
| ||||
|
|
|
| and size correct the purchase Always .10 | ||||
see easily to feature |
|
|
| |||||
|
|
| .promptly batteries used Remove .9 | |||||
bikini the trim To .needs shaving complete your |
|
|
| |||||
|
| ).instructions further | .installation battery to prior device the of | |||||
for trimmer |
|
| ||||||
|
| those also and contacts battery the Clean .8 | ||||||
| .growth hair |
| for section Shaver” Your Clean to “How | |||||
|
| .time of period extended an for unused | ||||||
of direction the against shave results, best For .5 | to refer (Please .performance best the insure | |||||||
left is shaver the if or functional longer | ||||||||
| .skin your | will This .use each after shaver your Clean .3 | ||||||
| no are batteries the if batteries the Remove .7 | |||||||
with contact in head shaving full the Keep .4 |
|
| .shave you after | |||||
|
| .)- and (+ polarity to regard with | ||||||
| .skin your down | and before powder talcum apply to want may | ||||||
| correctly installed are batteries the Ensure .6 | |||||||
and up strokes steady smooth, with Shave .3 |
| you skin, sensitive have you If .clean is skin | ||||||
|
| .off shaver | ||||||
| .on shaver Turn .2 |
| your that certain be shaving, dry When .2 |
| ||||
.shaving dry or wet for legs your Prepare .1 |
| the turn to switch ON/OFF the on down | ||||||
.foils shaver your clog can products these | ||||||||
.performance maximize to use to pressing | push shaver, your using finish you After .5 | |||||||
|
|
| ||||||
right the just show will Experience .cut be |
|
| .hairCaution:as gels, shavingDnotuse | .position ON to upwards | ||||
| removing time same the at while residue |
| ||||||
and foils the enter to hairs the allow not will hard |
| switch ON/OFF push shaver, your use To .4 | ||||||
| oil away clean and skin the over smoothly | |||||||
too skin the against shaverNOTE:the Pushing | .place into locks it as click small a | |||||||
glide will shaver the skin, the to applied | ||||||||
| havingS |
| hear you until up and in it pushing by position | |||||
|
| oury egsL | bi/ inikarea | |||||
|
|
|
| is lather soapy a If .soap or cream shaving | original its to cover battery the Return .3 | |||
|
|
|
| with underarms and legs your prepare | ||||
|
|
|
| .place into easily slip will it so first battery | ||||
|
|
|
| to wish may you shaving, wet Before .1 | ||||
|
|
|
| each of end negative the insert clips, the bend | ||||
ourynderarU | m s |
|
|
| B orefhavingS | |||
|
|
| to not careful Being .compartment battery | |||||
|
|
|
|
|
| |||
|
|
|
| .carefully very handled be must and | the inside indicated positions negative and | |||
|
|
|
| delicate are blades inner and foils outer The | positive the with batteries AAA two the Align .2 | |||
|
|
|
|
| .liquid other |
| .shaver | |
|
|
|
| or water in unit the of part any immerse not Do | the of bottom the toward down and in pushing | |||
|
|
|
|
| autionC | by cover compartment battery the Remove .1 | ||
| .head shaver |
|
| |||||
|
|
| .batteries Hydride) Metal |
| INSTRUCTIONS ERATINGOP | |||
clean and off unit the switch shave, each After .2 |
| Nickel or cadmium (Nickel rechargeable | ONLY USE | |||||
.position ON the to up switch main the Slide .1 |
| |||||||
| or | |||||||
| nstructionsI |
| foruse | HOUSEHOLD ORF | ||||
|
|
|
| not Do .batteries new and old mix not Do .12 |
|
| ||
|
|
| .blades inner the of corrosion in result | ||
|
|
| may this do to Failure .use each after cutter | ||
|
|
| and foil the | ||
|
|
| deodorant underarm use who women cutter, the | ||
|
|
| and foils the to damage possible prevent To .5 | ||
|
|
| .water in unit entire the submerge | ||
|
| .performance its judge you before | not do only, head shaver the Rinse .4 | ||
|
|
| .seals | ||
| times 12 to 10 shaver your use patient; be |
| |||
| waterproof the to damage cause can they as | ||||
Please .flat hair the makes hard too pressing | |||||
cleaners, or water, sea water, hot use not Do | |||||
|
| foil the of holes the into get can hair the | |||
|
| .water warm or cold use cleaning, When .3 | |||
| so gently press must You .shave satisfactory | ||||
|
| .immediately | |||
|
| a get not therefore and hard too push |
| ||
|
| replaced be should foil damaged A .injury | |||
| will users blade Most Caution: .shaver the | ||||
| skin cause may foil damaged a Also | ||||
| use effectively the how learn to you for and | ||||
| .results shaving poor produce will foil | ||||
| procedure new the to adjust to hair and skin | ||||
| distorted or warped A .foils drop or foils, | ||||
your for time takes It .normal is this However, | |||||
the against hard press not Do .pieces | |||||
|
| .expect you as close as be not might | |||
|
| finished precisely and thin are foils The.2 | |||
|
|
| |||
|
| shaver the to adjustshave your first, At . | .shaver the using before arm or | ||
|
| underarms and legs your that so weeks |
| ||
|
| leg the of section one test should allergy, skin a | |||
| four to three for exclusively shaver your Use | ||||
| from suffer who or shaving, by irritated easily or | ||||
|
| .unit the from batteries | |||
|
| cosmetics to sensitive is skin whose Women .1 | |||
| the replace or remove dead, are batteries | ||||
|
| WARNING | |||
| the if or time of period long a for shaver |
| |||
|
| your use to going not are you If .shaver | INSTRUCTIONS | ||
your in batteries alkaline lasting longer using | |||||
recommend We .included) (not batteries AAA | THESE SAVE | ||||
| 2 requires It .shave smooth close, clean, a | ||||
you give to engineered been has shaver This | .appliances care personal in brand #1 | ||||
|
| ortantImp |
| ||
|
|
| the Conair, choosing for you Thank .instructions | ||
|
| nstructionsI | care and operating following the read to minute | ||
|
| a take please product, quality this using when | |||
|
|
| |||
|
| eratingOp | satisfaction maximum For .shaver foil dual ladies | ||
|
| new your of purchase the on Congratulations | |||
Le felicitamos por haber comprado esta máquina de afeitar de doble hoja. Para lograr resultados óptimos, siempre lea las instruccio- nes de uso y mantenimiento que se encuentran a continuación. Gracias por elegir Conair, el no. 1 en aparatos de cuidado personal.
GUARDE ESTAS INSTRUCCIONES
ADVERTENCIA
1. Si su piel es sensible a los productos |
cosméticos, se irrita fácilmente cuando se |
Instrucciones de operación
Importante
Este aparato ha sido diseñado para proporcionar un afeitado al ras suave y preciso. Requiere 2 pilas AAA (no incluidas). Le aconsejamos que utilice pilas alcalinas, las cuales son más duraderas. Retire la(s) pila(s) al final de su vida útil o si no va a usar el aparato durante un largo período de tiempo.
PARA USO DOMÉSTICO
SOLAMENTE
INSTRUCCIONES DE OPERACIÓN
1. | Deslice la cubierta del compartimiento de |
la(s) pila(s) hacia abajo para abrirlo. | |
2. | Instale dos pilas AAA, respetando los signos |
de polaridad. Introduzca el polo negativo | |
primero, teniendo cuidado de no doblar las | |
patas de contacto. | |
3. | Cierre la cubierta del compartimiento de |
la(s) pila(s), empujando hasta que haga clic. | |
4. | Para encender el aparato, deslice el |
Precaución:
No sumerja el aparato en agua u otro líquido. Las hojas de afeitar y las cuchillas internas son delicadas y deben manipularse con mucho cuidado.
Preparación
1. Aplique crema de afeitar o jabón sobre la |
piel antes de afeitarse con agua. Esto |
facilitará el afeitado y eliminará los residuos |
de aceite. Precaución: No utilice gel de |
afeitar, ya que los geles pueden obstruir |
las hojas. |
2. Antes del afeitado en seco, asegúrese de |
Instrucciones de uso
1.Para encender el aparato, ponga el interruptor en la posición "ON".
2.Después de cada uso, apague el aparato (OFF) y limpie el cabezal.
7.Después de terminar, apague el aparato (OFF). Importante: Necesitará hacer varios intentos hasta encontrar la mejor forma de afeitar sus piernas/ingles.
Instrucciones de limpieza
1.Asegúrese de que el aparato esté apagado (OFF).
2.Sosteniendo firmemente el cabezal, oprima los botones de liberación y alce el cabezal (FIG.1). Tenga cuidado de no presionar las hojas. Son delicadas y pueden dañarse fácilmente.
afeita o padece de alergia, pruebe el aparato |
sobre una pequeña sección del brazo o de la |
pierna antes de usarlo. |
2. Las hojas de afeitar son delgadas y |
precisas. No las apriete mucho sobre la |
piel ni las deje caer. Una hoja lastimada o |
deformada impedirá el buen |
funcionamiento del aparato y puede |
provocar heridas. Reemplace las hojas |
defectuosas inmediatamente. |
3. Limpie las hojas en agua fría o tibia |
únicamente. No utilice agua caliente, agua |
salina o limpiadores, porque esto puede dañar |
los sellos de impermeabilidad del aparato. |
4. Enjuague el cabezal solamente. No sumerja |
el aparato en agua. |
5. Si use desodorante, lave bien y deje secar |
las hojas y las cuchillas al aire después de |
cada uso. Si no lo hace, las cuchillas se |
pueden oxidar. |
Durante tres a cuatro semanas, utilice exclusivamente la máquina de afeitar para afeitar sus piernas/axilas. Puede que sus primeros intentos no sean perfectos. Esto es normal. Su piel y sus vellos necesitan tiempo para acostumbrarse a esta nueva técnica de afeitado. Precaución: Presionar las hojas mucho contra la piel no producirá resultados satisfactorios. Se debe pasar la máquina suavemente sobre la piel; presionar mucho aplasta los vellos e impide el afeitado. Sea paciente; utilice el aparato
interruptor hacia arriba (ON). |
5. Para apagar el aparato, deslice el |
interruptor hacia abajo (OFF). |
6. Siempre respete los signos de polaridad |
7. Retire la(s) pila(s) al final de su vida útil o si |
no va a usar el aparato durante un largo |
período de tiempo. |
8. Limpie los contactos del aparato y los de |
la(s) pila(s) antes de instalar ésta(s). |
9. Retire las pilas usadas sin demora. |
10. No utilice pilas que no sean del tamaño o |
de la potencia indicada para uso con este |
aparato. |
11. Cambie todas las pilas al mismo tiempo. |
12. No junte pilas nuevas con pilas usadas. |
No junte pilas alcalinas con pilas regulares |
NiMH). |
que su piel esté limpia. Si su piel es sensible, |
puede aplicar talco antes y después del |
afeitado. |
3. Limpie el aparato después de cada uso. |
Esto asegurará un rendimiento óptimo. Para |
más información, véase la sección |
"Instrucciones de limpieza". |
Cómo afeitar sus
piernas/ingles
NOTA: Presionar las hojas contra la piel aplasta los vellos e impide el afeitado. La experiencia le mostrará cuanta presión aplicar para obtener resultados óptimos.
1.Prepare la piel para el tipo de afeitado deseado, con agua o en seco.
2.Encienda el aparato (ON).
3.Mueva la máquina suavemente contra la piel, arriba y abajo.
4.Siempre mantenga el aparato en contacto con la piel.
5.Para lograr resultados óptimos, aféitese en dirección contraria al crecimiento del vello.
6.La máquina de afeitar está equipada con una cuchilla recortadora integrada para acortar el vello largo. Para afeitar las ingles, acorte los vellos primero con la cuchilla recortadora integrada.
Cómo afeitar su axilas
1.Prepare la piel para el tipo de afeitado deseado, con agua o en seco. Asegúrese de que la piel esté limpia, seca y libre de desodorante.
2.Encienda el aparato.
3.Alce el brazo para estirar ligeramente la piel.
4.Si el vello es largo, acórtelo con la cuchilla recortadora integrada, pasando la máquina en dirección contraria al crecimiento del vello.
5.Mantenga el aparato en contacto con la piel y aféitese con movimientos suaves.
6.No presione mucho. Presionar mucho puede causar irritaciones cutáneas.
7.Después de terminar, apague el aparato (OFF).
Importante: Necesitará hacer varios intentos hasta encontrar la mejor forma de afeitar sus axilas.
Presionar aquí
Presionar aquí
Fig. 1
3.Enjuague las cuchillas internas y las hojas bajo agua corriente. No utilice agua caliente. Utilice agua fría o tibia solamente.
4.Permita que las cuchillas y las hojas sequen al aire antes de volver a ensamblar el cabezal. Una vez seco, vuelva a instalar el cabezal, presionando hasta que encaje en su lugar. Limpie el cuerpo del aparato con una toalla seca. No seque las hojas. Permita que sequen al aire.