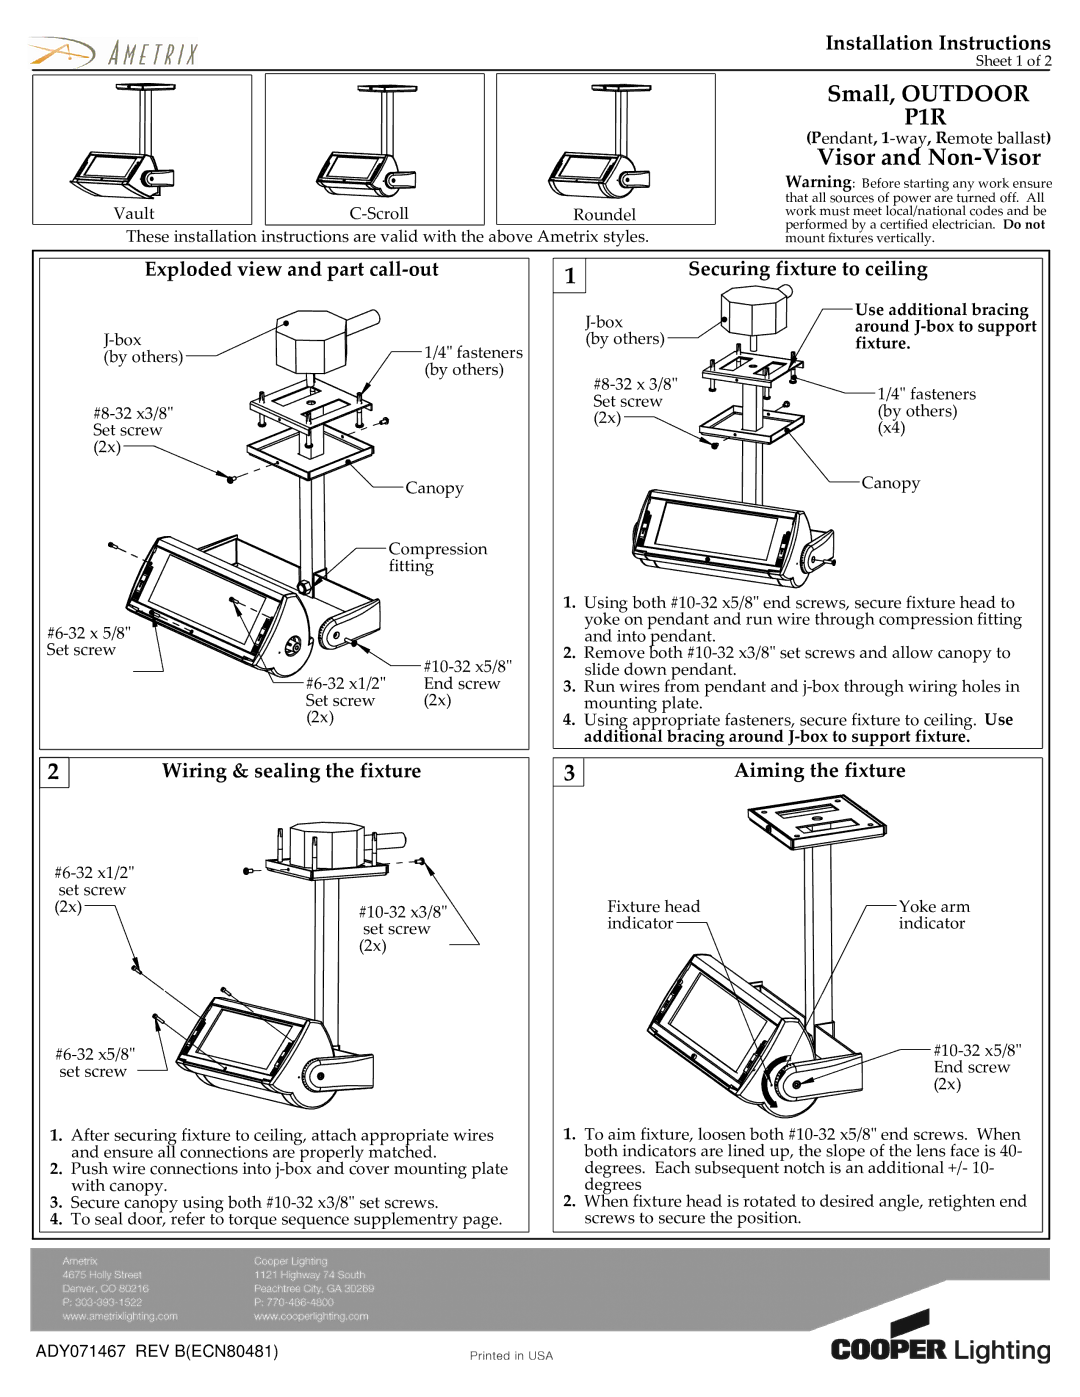
P1R specifications
Cooper Lighting's P1R series represents a significant advance in lighting technology, designed for a myriad of applications ranging from industrial to commercial settings. Known for its robust construction and versatile functionality, the P1R is engineered to meet contemporary lighting demands efficiently.One of the standout features of the P1R is its exceptional energy efficiency. Utilizing advanced LED technology, the P1R delivers high lumen output while consuming significantly less power compared to traditional lighting solutions. This not only reduces energy costs but also contributes to a lower carbon footprint, making it an environmentally friendly choice for sustainable lighting.
Durability is another hallmark of the P1R. Constructed with high-grade materials, the fixture is designed to withstand demanding conditions. It often features a rugged housing that is both weatherproof and impact-resistant, ensuring reliability in various environments. This makes the P1R an ideal solution for warehouses, manufacturing plants, and outdoor spaces.
The P1R series boasts advanced optical technologies that enhance light distribution and uniformity. Employing precision-engineered lenses and reflectors, the P1R minimizes glare while maximizing visual comfort. This feature is especially valuable in work settings where safety and visibility are paramount.
Flexibility in design is another significant characteristic of the P1R. Available in multiple configurations, including surface-mount and pendant options, it can be tailored to meet specific spatial requirements. Additionally, the fixture can accommodate a range of wattages and color temperatures, allowing users to customize their lighting schemes according to individual preferences or regulatory needs.
Connectivity is also an integral aspect of the P1R series. Many units feature advanced dimming capabilities and integrate seamlessly with building management systems. This not only enhances user control over lighting but also optimizes energy consumption, adapting to the evolving needs of spaces over time.
In summary, the Cooper Lighting P1R series stands out for its combination of energy efficiency, durability, advanced optical technologies, design flexibility, and connectivity options. As industries move towards smarter and more sustainable lighting solutions, the P1R is poised to be a leading choice for those seeking reliability and performance. Whether enhancing workplace productivity or illuminating outdoor areas, the P1R series offers a comprehensive lighting solution for modern applications.

