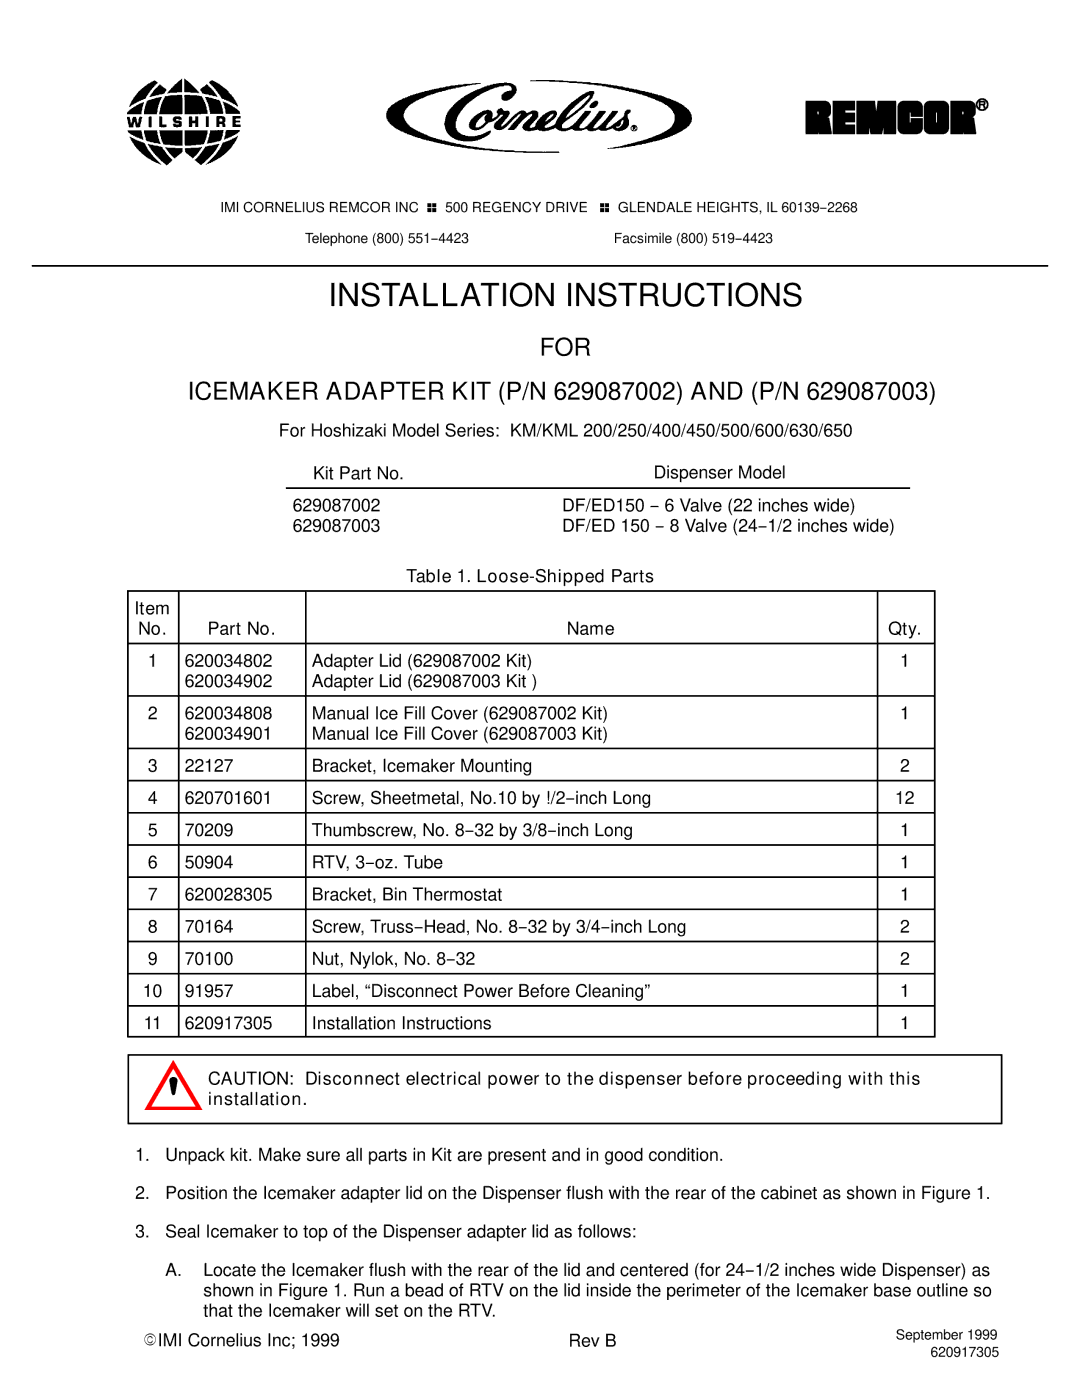
P/N 629087002, P/N 629087003 specifications
Cornelius P/N 629087003 and P/N 629087002 are advanced beverage dispensing systems recognized for their innovative design and high performance in commercial settings. These models demonstrate an exceptional blend of technology and user-friendly features, catering to the demands of bars, restaurants, and cafes seeking consistent quality in beverage offerings.One of the standout features of both the 629087003 and 629087002 is their robust construction, designed to withstand the rigors of daily use in fast-paced environments. Made from high-quality materials, these dispensers have been engineered to ensure durability and longevity, reducing the frequency of maintenance and replacement. Their sleek design also enhances the aesthetic appeal of any beverage service area.
These models incorporate advanced cooling technologies, which ensure that beverages are served at optimal temperatures. This is crucial not only for customer satisfaction but also for preserving the flavor profiles of drinks, particularly carbonated beverages and craft cocktails. With a focus on energy efficiency, these systems consume less power while maintaining performance, helping businesses to reduce operational costs.
Both P/N 629087003 and P/N 629087002 offer versatile dispensing options, capable of handling a wide range of beverages including sodas, juices, and even slush drinks. This versatility makes them an ideal choice for establishments looking to diversify their drink offerings without the need for multiple dispensers.
User-friendly interfaces are another key characteristic of these models. Operators can easily adjust settings and monitor beverage levels through intuitive controls and displays, which greatly facilitate day-to-day operations. This ease of use minimizes training time for new staff and enhances overall efficiency.
Furthermore, these dispensers emphasize hygiene, featuring designs that are easy to clean and maintain. Smooth surfaces and accessible components ensure that cleaning routines are straightforward, promoting a cleaner and safer environment for beverage preparation and service.
In summary, Cornelius P/N 629087003 and P/N 629087002 stand out in the beverage dispensing market due to their combination of durability, advanced cooling technology, versatility, user-friendly operation, and hygiene-focused design. With these features, they cater to the needs of modern establishments and contribute significantly to enhancing the customer experience.