REMOVAL, SHARPENING AND
HOW TO REMOVE THE KNIFE
•Stop the engine.
•Remove both spark plug wires and keep away from spark plugs.
•Disconnect battery at negative terminal.
•Remove both access covers from the chipper basic machine.
•Rotate the chipper disk until the three countersunk screws and nylock nuts attaching the knife to the flywheel are visible through the access doors.
•Clean out the heads of the allen screws with an awl or sharp tool.
•Insert a 3/16” allen wrench into the heads of the screws.
•Use a ½” socket and ratchet to remove the nylock nuts from the screws.
•Remove all three allen screws and nuts in this manner.
KNIFE SHARPENING
•You should never attempt to sharpen the chipper knife (or knives) freehand.
•It is extremely important that the 45 degree angle be maintained consistently for proper performance.
•The chipper knife should be taken to a machine shop for proper sharpening.
•Excessive heat generated during the sharpening process will damage knives and weaken the metal. Be sure the knife is not overheated.
KNIFE INFORMATION
•The chipper knife should be checked routinely for sharpness.
•Using a dull knife will decrease performance and cause excessive vibration that will cause damage to the chipper.
•How many times a knife can be sharpened is determined by how much material needs to be taken off to sharpen or to compensate for dents or gouges.
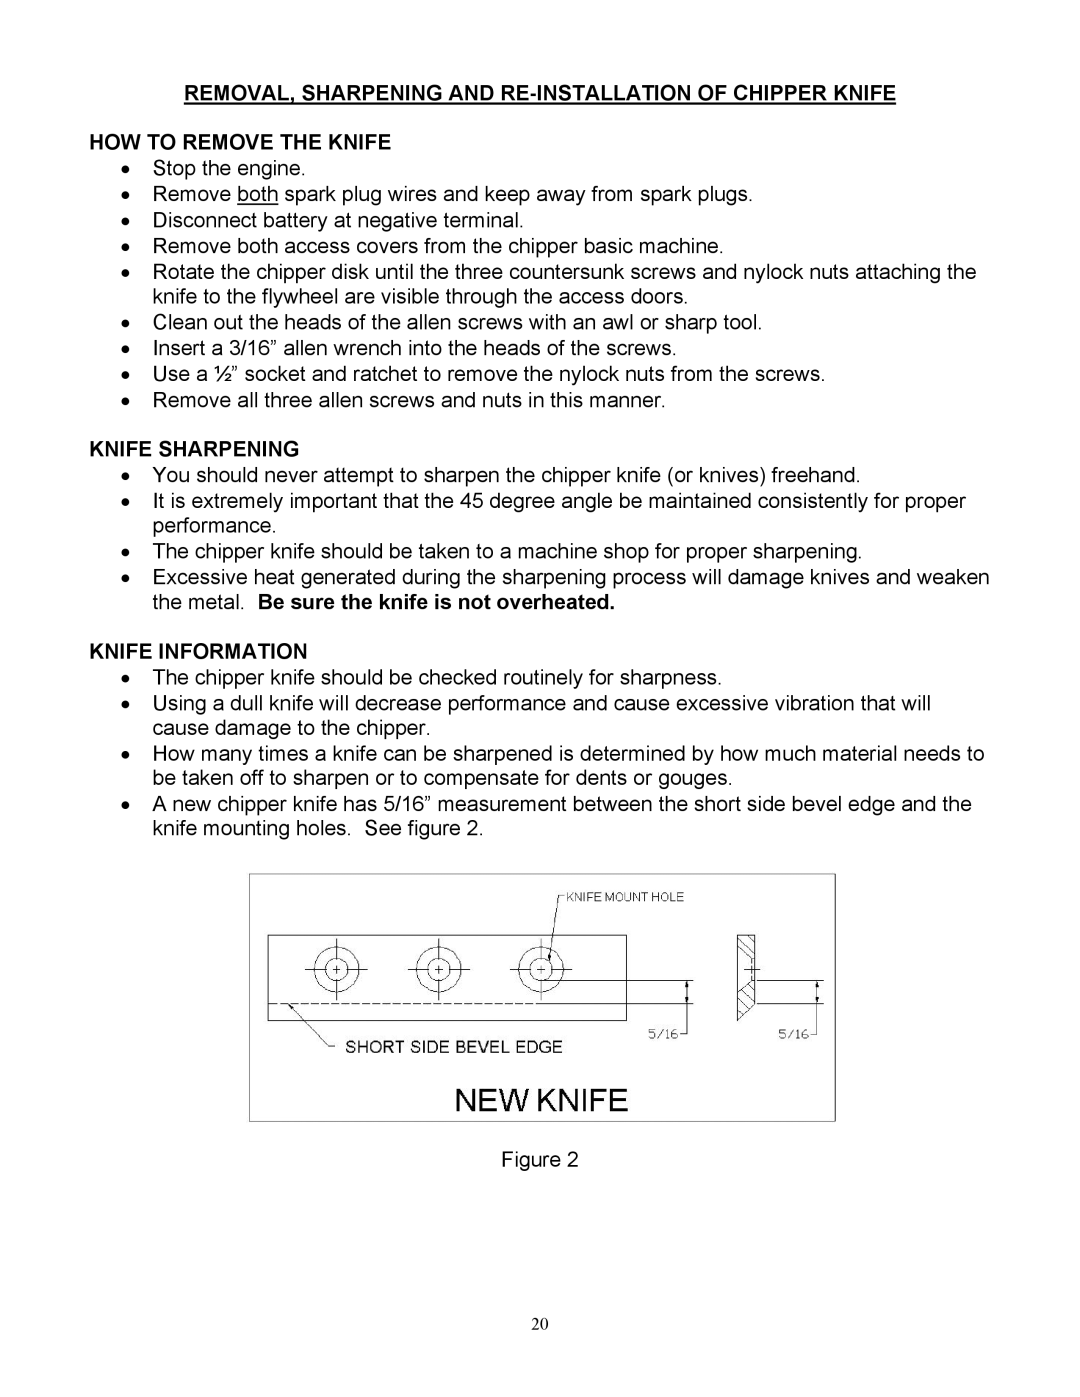
•A new chipper knife has 5/16” measurement between the short side bevel edge and the knife mounting holes. See figure 2.
Figure 2
20