Manuals
/
Craftsman
/
Lawn and Garden
/
Trimmer
Craftsman
240.74805
instruction manual
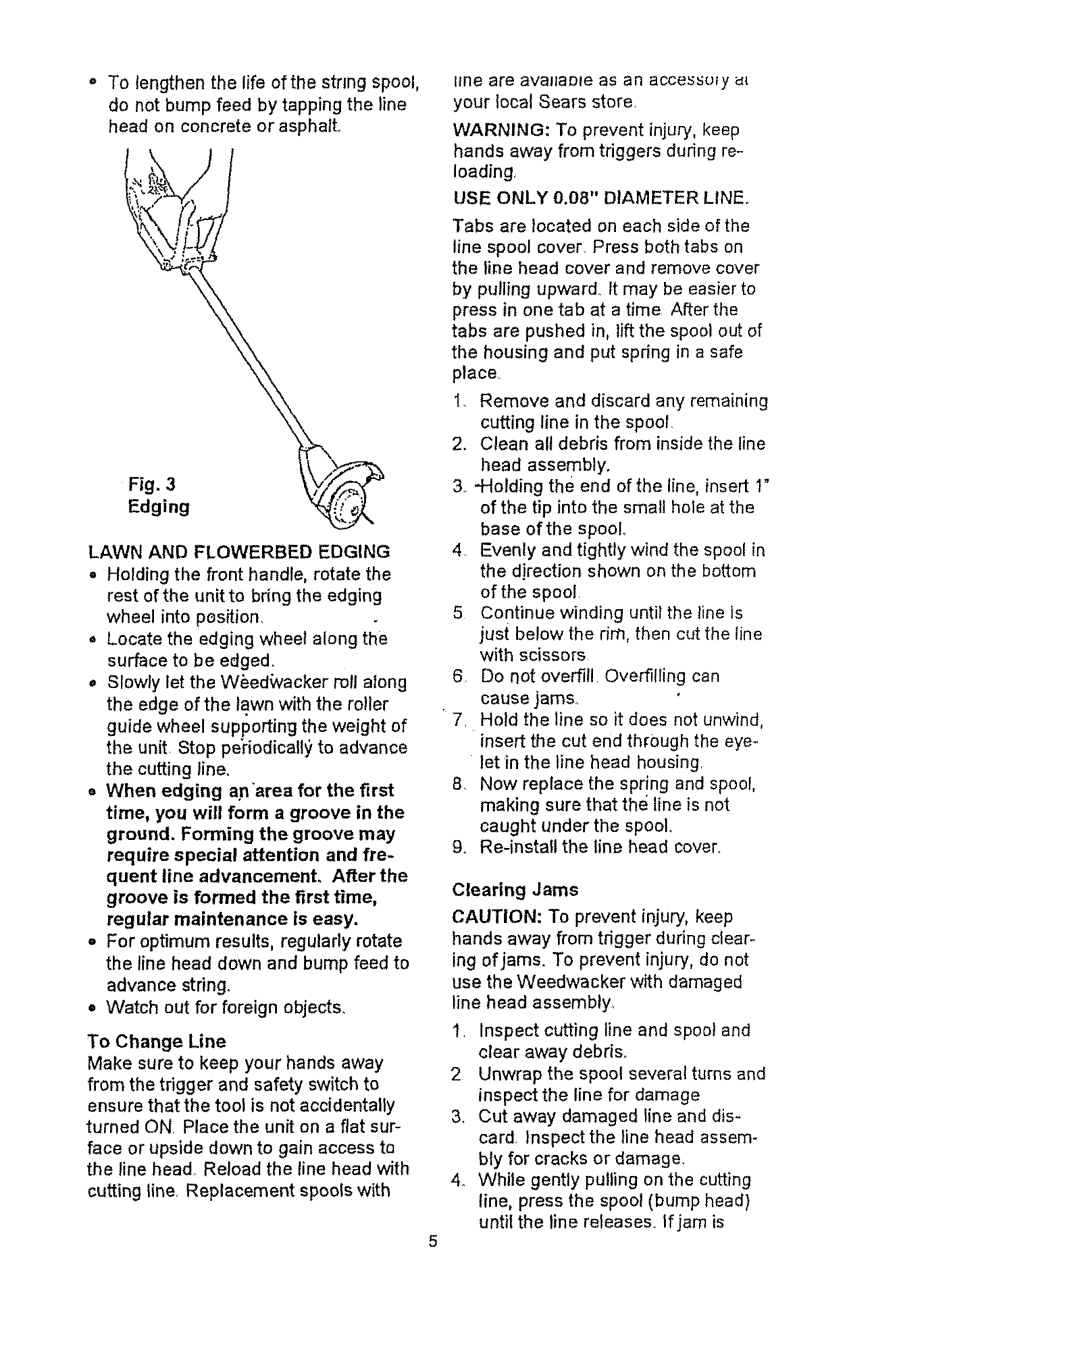
regular maintenance is easy
Models:
240.74805
1
5
12
12
Download
12 pages
59.65 Kb
1
2
3
4
5
6
7
8
Maintenance
To Charge Battery
Page 5
Image 5
Page 4
Page 6
Page 5
Image 5
Page 4
Page 6
Contents
Before using
Safety
allits Safety
Maintenance
To reduce risk of injury
Full One Year Warranty on Craftsman Weedwackel
READ ALL INSTRUCTIONS
o USERIGHTTOOL - Do not use the
To reduce risk when using charger
L+. ho m mV
SAVE THESEINSTRUCTIONS
1Plug the charger into a 120 Volt AC outlet
To Charge Battery
3 Charge for at least t6 hours
Charging Notes
regular maintenance is easy
1,.800
Para reducir el riesgo de lesiones
LEA TODAS LAS INSTRUCClONES
Todo un a o de garantia en Craftsman Weedwacker
o NOSE ESTIREDEMASIADO
arrancarla y operada
suficienteparareabastecerabatera
Notas sobre la carga
Para cambiar la tfnea
seravanzadaentoda su longitudde
1-600
9Reinstalela tapa del cabezalde lfnea
Top
Page
Image
Contents