[] Hnsertthewasheronthethreadedendof thetabletock handleThetablelockhandleisspringloadedand. isreleasedbypullingthehandleawayfromthesaw housingTightenthesawtableto. thesawhousingby ratchetingthetablelockhandleclockwiseorbyfinger tighteningthetablelockhandle.

[] Reattachtheangleadjustmentknobusingthespring, washer,andnut.

[] Reattachthetablealigningbolt,washer,andwingnut to thesawtable.

NOTE:Thewingnutgoesbelowthesawtable.

MOUNTmNG BAND SAW 3"0 WORKBENCH

Hfthe band saw is to be used in a permanent location, we recommend that you secure it to a workbench or other stable surface. When mounting the saw to a workbench,

holes should be drilled through the supporting surface of the workbench.

[] Each hole in the saw base should be bolted securely using bolts, lock washers, and hex nuts (not included).

[] Place band saw on the workbench. Using the saw

base as a pattern, locate and mark the holes where the band saw is to be mounted.

[] Drill four holes through the workbench.

[] Place band saw on the workbench aligning holes in the saw base with the holes drilled in the workbench.

[] Hnsert all four bolts (not included) and tighten securely with lock washers and hex nuts (not included).

NOTE: AI! bolts should be inserted from the top. Hnstall the lock washers and hex nuts from the underside of the bench.

Supporting surface where band saw is mounted should be examined carefully after mounting to insure that no movement during use can result. Hfany tipping or walk- ing is noted, secure workbench or support surface before beginning cutting operation.

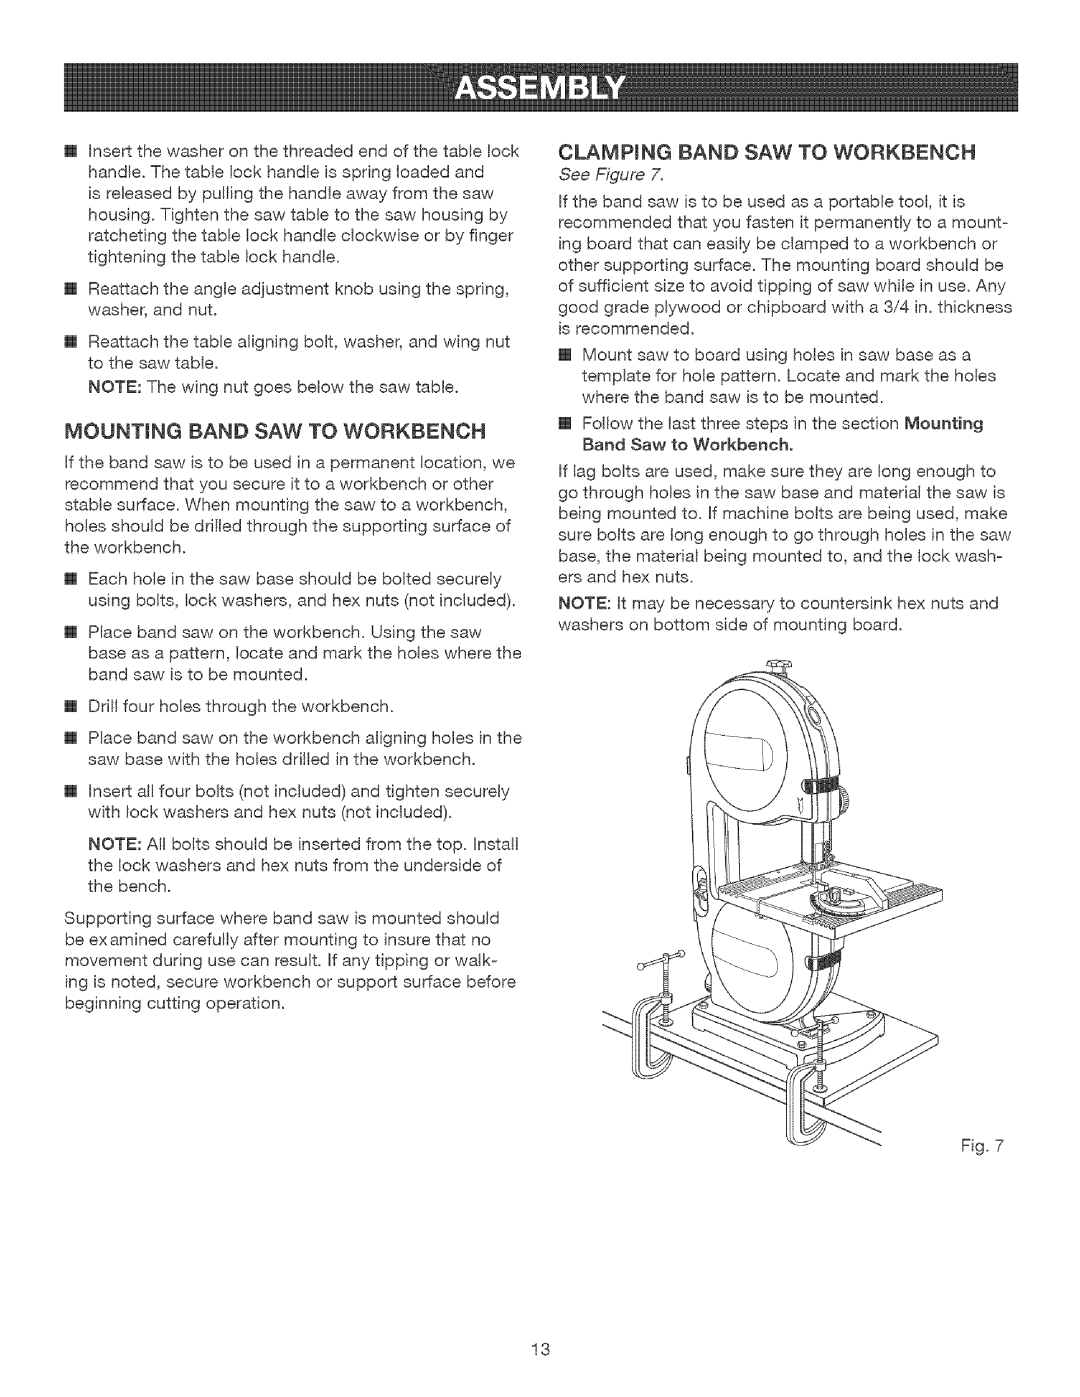
CLAMPmNG BAND SAW TO WORKBENCH

See Figure 7.

Hfthe band saw is to be used as a portable tool, it is recommended that you fasten it permanently to a mount- ing board that can easily be clamped to a workbench or other supporting surface. The mounting board should be of sufficient size to avoid tipping of saw while in use. Any

good grade plywood or chipboard with a 3/4 in. thickness is recommended.

[] Mount saw to board using holes in saw base as a template for hole pattern. Locate and mark the holes where the band saw is to be mounted.

[] Follow the last three steps in the section Mounting Band Saw to Workbench.

Hflag bolts are used, make sure they are long enough to go through holes in the saw base and material the saw is being mounted to. Hfmachine bolts are being used, make sure bolts are tong enough to go through holes in the saw

base, the material being mounted to, and the lock wash- ers and hex nuts.

NOTE: Htmay be necessary to countersink hex nuts and washers on bottom side of mounting board.

Fig. 7

13

Page 13
Image 13
Craftsman 315.21477 manual MOUNTmNG Band SAW 30 Workbench, CLAMPmNG Band SAW to Workbench

315.21477 specifications

The Craftsman 315.21477 is a versatile and highly sought-after tool known for its robust performance and user-friendly design. This tool is part of the Craftsman brand, which has built a reputation for quality and reliability over the years. The 315.21477 model is particularly favored among DIY enthusiasts and professionals alike for its innovative features and technologies.

One of the main features of the Craftsman 315.21477 is its powerful motor, which provides ample torque and speed for a variety of applications, from home repairs to intricate crafting projects. The tool is equipped with a variable speed control system, allowing users to adjust the speed settings according to the task at hand. This flexibility makes it ideal for tasks that require precision, such as sanding, drilling, and cutting.

The Craftsman 315.21477 is built with user comfort in mind. It features an ergonomic design that reduces hand fatigue, ensuring users can work for extended periods without discomfort. The rubberized grip provides a secure hold, giving users increased control and stability while using the tool. Additionally, the lightweight construction makes it easy to maneuver, making it perfect for both indoor and outdoor use.

In terms of versatility, the Craftsman 315.21477 boasts a range of attachments and accessories that allow it to perform multiple functions. From changing attachments to switching between various tasks, the tool can easily adapt to meet the needs of different projects. This multi-functionality reduces the need for multiple tools, saving both space and money.

Safety is a key consideration in the design of the Craftsman 315.21477. The tool comes equipped with safety features such as a paddle switch for easy shutdown and a built-in overload protection system, which helps prevent damage to the motor in case of excessive strain.

In summary, the Craftsman 315.21477 stands out in the market due to its powerful motor, variable speed control, ergonomic design, versatility, and enhanced safety features. It is a reliable choice for anyone looking to tackle a wide range of tasks with ease and efficiency. Whether you are a seasoned professional or a casual DIYer, the Craftsman 315.21477 offers the performance and reliability needed to get the job done right.