STEP 15 - ASSEMBLE PIVOT ROD
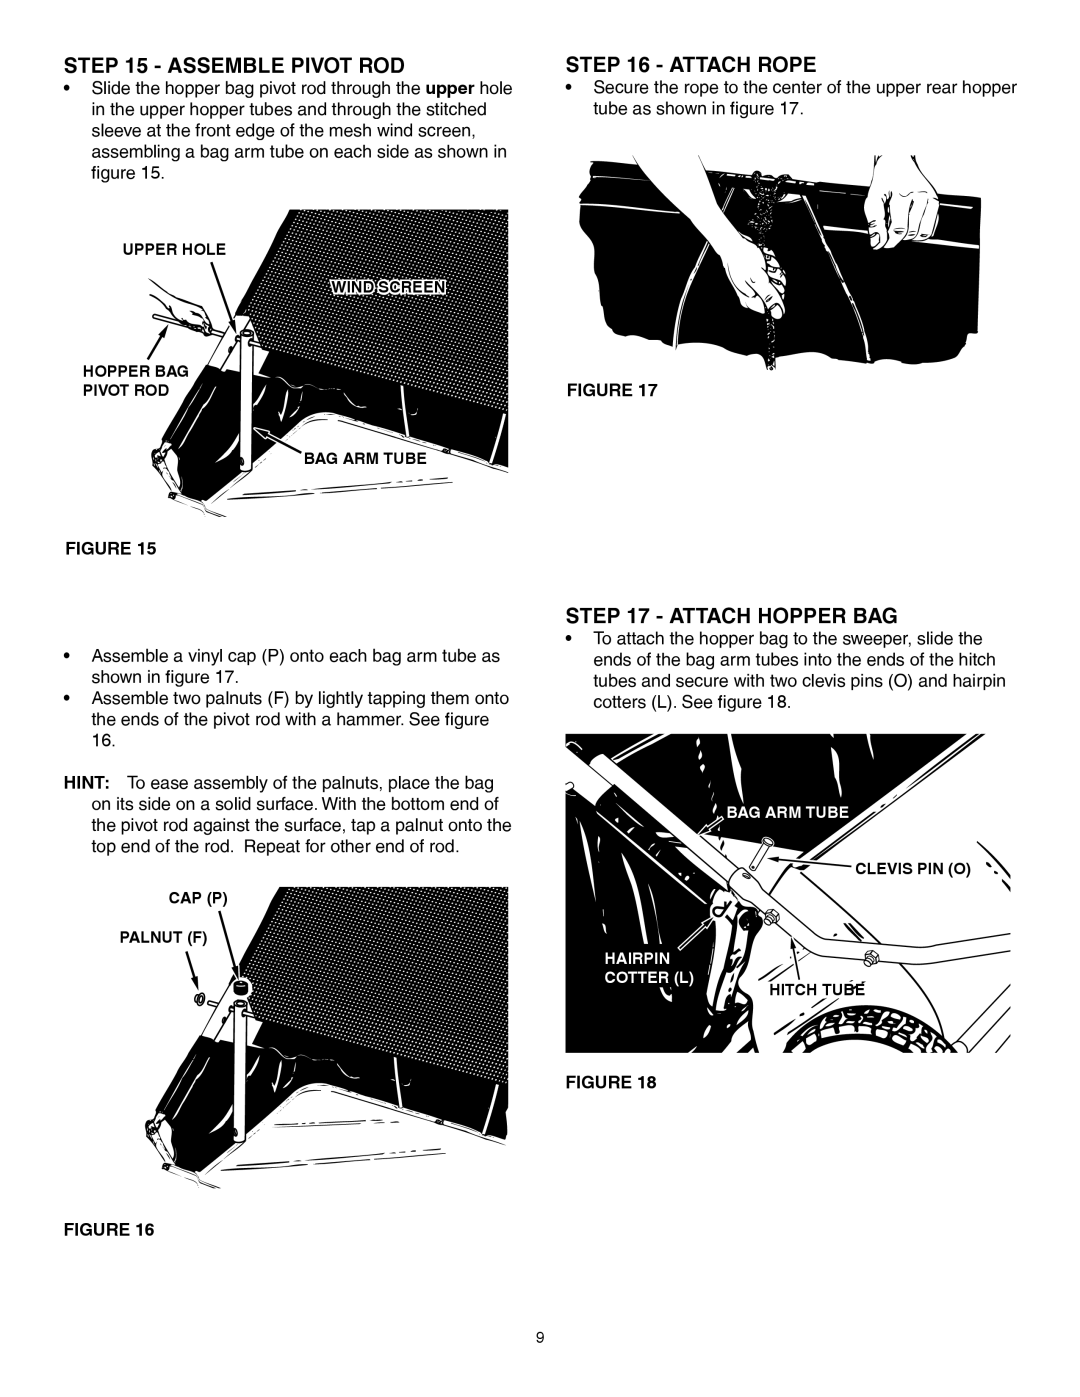
•Slide the hopper bag pivot rod through the upper hole in the upper hopper tubes and through the stitched sleeve at the front edge of the mesh wind screen, assembling a bag arm tube on each side as shown in fi gure 15.
UPPER HOLE
WIND SCREEN |
HOPPER BAG
PIVOT ROD
![]()
![]() BAG ARM TUBE
BAG ARM TUBE![]()
FIGURE 15
•Assemble a vinyl cap (P) onto each bag arm tube as shown in fi gure 17.
•Assemble two palnuts (F) by lightly tapping them onto the ends of the pivot rod with a hammer. See fi gure 16.
HINT: To ease assembly of the palnuts, place the bag on its side on a solid surface. With the bottom end of the pivot rod against the surface, tap a palnut onto the top end of the rod. Repeat for other end of rod.
CAP (P)
PALNUT (F)
STEP 16 - ATTACH ROPE
•Secure the rope to the center of the upper rear hopper tube as shown in fi gure 17.
FIGURE 17
STEP 17 - ATTACH HOPPER BAG
•To attach the hopper bag to the sweeper, slide the ends of the bag arm tubes into the ends of the hitch tubes and secure with two clevis pins (O) and hairpin cotters (L). See fi gure 18.
BAG ARM TUBE
![]()
![]() CLEVIS PIN (O)
CLEVIS PIN (O)
HAIRPIN
COTTER (L)
FIGURE 18
HITCHTUBETUBE
FIGURE 16
9