iNSTRUCTiONS FOR SINGLE SUSPENSION BRACKET TRACTORS
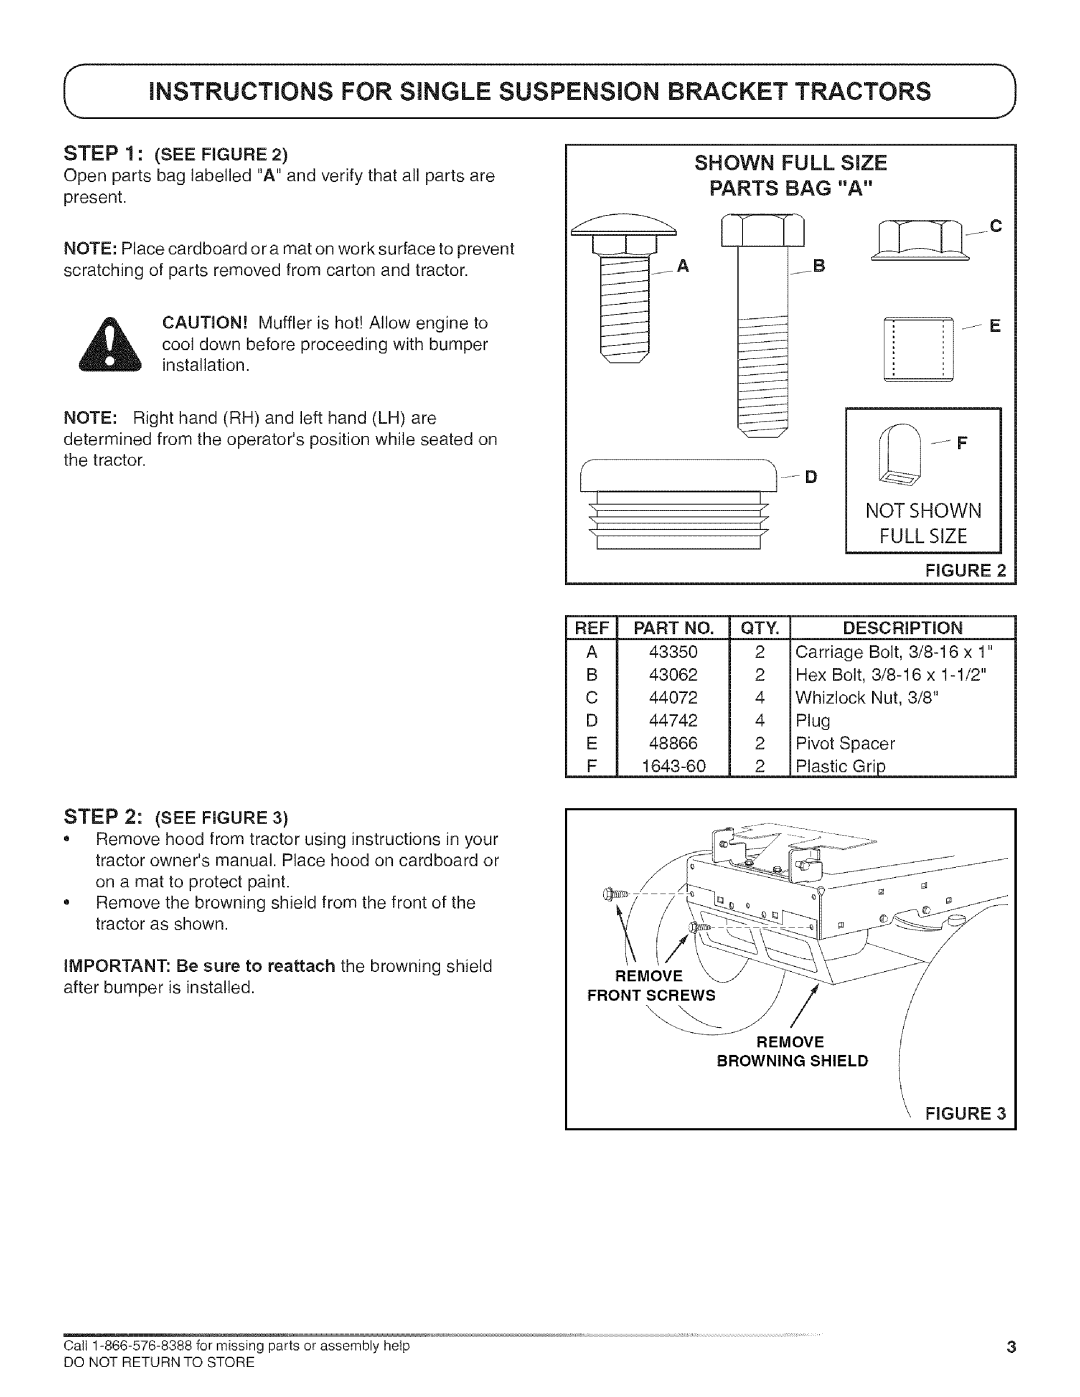
STEP 1 : (SEE FIGURE 2) | SHOWN | FULL | SiZE | |
Open parts bag labelled "A" and verify that all parts are | ||||
PARTS | BAG | "A" | ||
present. | ||||
|
|
|
NOTE: Place cardboard or a mat on work surface to prevent scratching of parts removed from carton and tractor.
CAUTION! Muffler is hot! Allow engine to
cool down before proceeding with bumper installation.
NOTE: Right hand (RH) and left hand (LH) are determined from the operator's position while seated on the tractor.
STEP 2: (SEE FIGURE 3)
Remove hood from tractor using instructions in your tractor owner's manual. Place hood on cardboard or on a mat to protect paint.
Remove the browning shield from the front of the tractor as shown.
IMPORTANT: Be sure to reattach the browning shield after bumper is installed.
r-
|
| ...... F |
| .... | D |
| I/ | NOT SHOWN |
| FULL SIZE | |
"1 | I/ | |
I |
| |
|
| FIGURE 2 |
REF PART NO. | QTY. | DESCRIPTION |
A43350 2 Carriage Bolt,
B43062 2 Hex Bolt,
C44072 4 Whizlock Nut, 3/8"
D | 44742 | 4 | Plug |
E | 48866 | 2 | Pivot Spacer |
F | 2 | Plastic Grip |
REMOVE
FRONTSCREWS
REMOVE
BROWNING SHIELD
FIGURE 3
3 | |
DO NOT RETURN TO STORE |
|
