Setting up Lift Mounting Hardware - Tractor Front
Tractor Lift can be used out of the box on all Craftsman tractors with bumpers or brush guards. Tractor Lift mounting hardware is provided. If your tractor does not have a bumper or brush guard, follow the steps below:
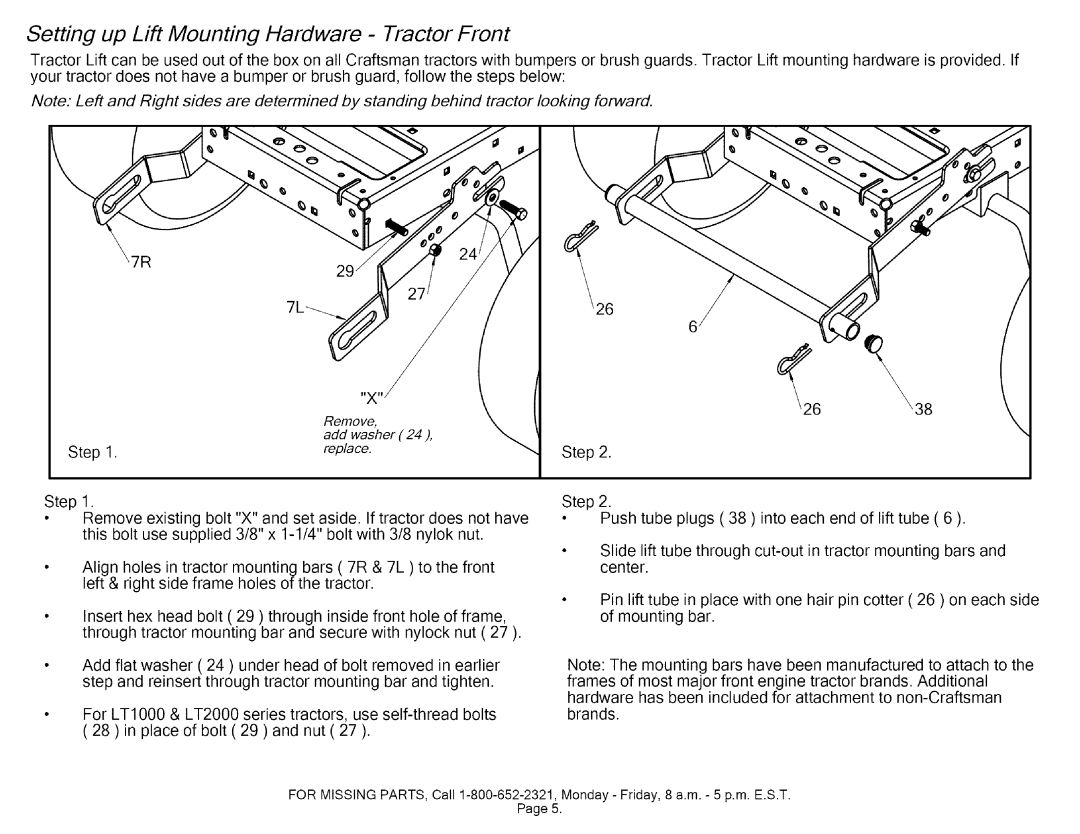
Note: Left and Right sides are determined by standing behind tractor looking forward.
7R
26
6 %38
Remove,
add washer (24),
Step 1. | replace. |
Step ,
Remove existing bolt "X" and set aside. If tractor does not have this bolt use supplied 3/8" x
Align holes in tractor mounting bars ( 7R & 7L ) to the front left & right side frame holes of the tractor.
Insert hex head bolt ( 29 ) through inside front hole of frame, through tractor mounting bar and secure with nylock nut ( 27 ).
Add flat washer ( 24 ) under head of bolt removed in earlier step and reinsert through tractor mounting bar and tighten.
For LT1000 & LT2000 series tractors, use
Step 2.
Step 2.
•Push tube plugs ( 38 ) into each end of lift tube ( 6 ).
Slide lift tube through
Pin lift tube in place with one hair pin cotter ( 26 ) on each side of mounting bar.
Note: The mounting bars have been manufactured to attach to the
frames of most major front engine tractor brands. Additional hardware has been included for attachment to
brands.
FOR MISSING PARTS, Call
Page 5.