PCI512, Sound Blaster specifications
The Creative Sound Blaster PCI512 is a notable sound card that caters to the needs of both casual users and audiophiles alike. Launched by Creative Labs, this sound card seeks to provide quality audio experiences for those who desire excellent sound output from their computer systems.One of the main features of the Sound Blaster PCI512 is its high-quality audio playback capabilities. The card is equipped with a 16-bit digital-to-analog converter (DAC), which ensures clear and accurate sound reproduction. This feature makes it an excellent choice for music enthusiasts who want to enjoy their favorite tracks with remarkable clarity. The PCI512 also supports sample rates of up to 48 kHz, allowing for enhanced audio fidelity.
In addition to playback, the Sound Blaster PCI512 excels in audio processing. The card employs Creative's innovative audio technologies, including Environmental Audio Extensions (EAX), which provide realistic 3D audio effects. This feature is particularly beneficial for gamers, as it creates an immersive sound environment, enhancing the gaming experience. The card supports multiple EAX levels, enabling users to experience deeper and more dynamic soundscapes.
Another important characteristic of the PCI512 is its multi-channel audio output. It supports a 4-channel audio output configuration, allowing users to connect various speakers for a surround sound experience. This capability is great for home theater enthusiasts looking to expand their audio setups without compromising on sound quality.
The Sound Blaster PCI512 is also designed with user convenience in mind. The card includes an easy-to-use software suite that provides comprehensive control over audio settings. Users can adjust various parameters such as equalization, volume levels, and audio effects, making it a customizable solution for a wide range of audio needs.
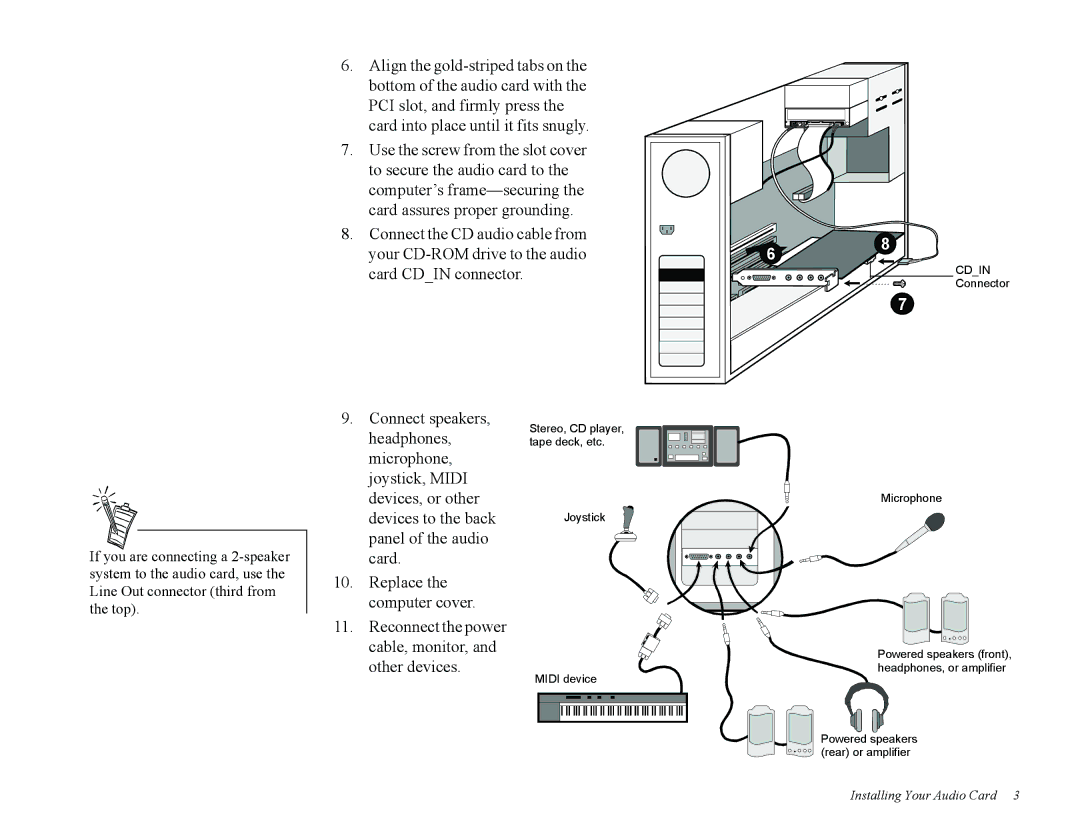
Moreover, the installation process is straightforward, thanks to its PCI interface, which is compatible with most motherboards. The PCI512 is also equipped with a digitized audio input, allowing for high-quality recording from external sources, further expanding its versatility.
In summary, the Creative Sound Blaster PCI512 stands out for its exceptional audio playback, advanced audio processing capabilities, and user-friendly features. With its robust performance in both gaming and media playback, it remains a relevant choice for anyone looking to elevate their sound experience on a PC.