EVOLUTION 2 INTEGRATED AMPLIFIER OPERATING INSTRUCTIONS
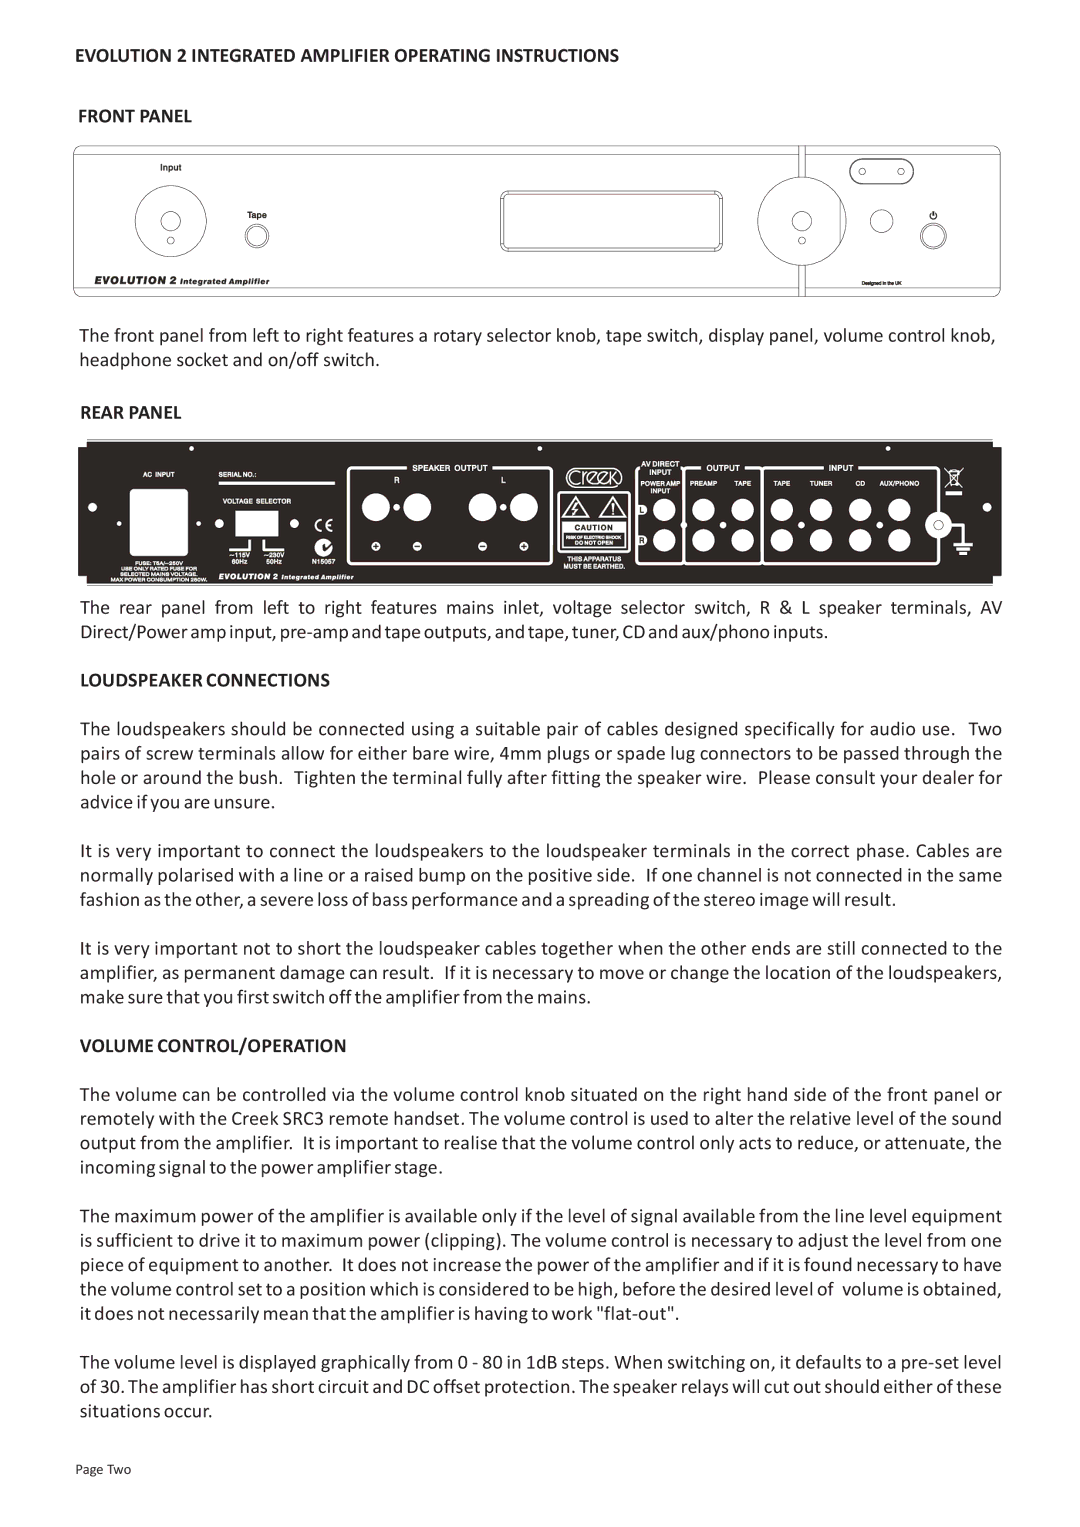
FRONT PANEL
The front panel from left to right features a rotary selector knob, tape switch, display panel, volume control knob, headphone socket and on/off switch.
REAR PANEL
The rear panel from left to right features mains inlet, voltage selector switch, R & L speaker terminals, AV Direct/Power amp input,
LOUDSPEAKER CONNECTIONS
The loudspeakers should be connected using a suitable pair of cables designed specifically for audio use. Two pairs of screw terminals allow for either bare wire, 4mm plugs or spade lug connectors to be passed through the hole or around the bush. Tighten the terminal fully after fitting the speaker wire. Please consult your dealer for advice if you are unsure.
It is very important to connect the loudspeakers to the loudspeaker terminals in the correct phase. Cables are normally polarised with a line or a raised bump on the positive side. If one channel is not connected in the same fashion as the other, a severe loss of bass performance and a spreading of the stereo image will result.
It is very important not to short the loudspeaker cables together when the other ends are still connected to the amplifier, as permanent damage can result. If it is necessary to move or change the location of the loudspeakers, make sure that you first switch off the amplifier from the mains.
VOLUME CONTROL/OPERATION
The volume can be controlled via the volume control knob situated on the right hand side of the front panel or remotely with the Creek SRC3 remote handset. The volume control is used to alter the relative level of the sound output from the amplifier. It is important to realise that the volume control only acts to reduce, or attenuate, the incoming signal to the power amplifier stage.
The maximum power of the amplifier is available only if the level of signal available from the line level equipment is sufficient to drive it to maximum power (clipping). The volume control is necessary to adjust the level from one piece of equipment to another. It does not increase the power of the amplifier and if it is found necessary to have the volume control set to a position which is considered to be high, before the desired level of volume is obtained, it does not necessarily mean that the amplifier is having to work
The volume level is displayed graphically from 0 - 80 in 1dB steps. When switching on, it defaults to a
Page Two