Manuals
/
CyberPower
/
Household Appliance
/
Thermostat
CyberPower
PR50000LCDRTXL5U Hardware Installation, Safety Precautions, Rackmount Installation
Models:
PR50000LCDRTXL5U
PR6000LCDRTXL5U
1
5
12
12
Download
12 pages
5.74 Kb
1
2
3
4
5
6
7
8
Specifications
Install
Maintenance
Safety Precautions
Safety
Service Information
Main Features
Page 5
Image 5
Page 4
Page 6
Page 5
Image 5
Page 4
Page 6
Contents
K01-0000124-02
User’s Manual
PR5000LCDRTXL5U/ PR6000LCDRTXL5U
UNPACKING
IMPORTANT SAFETY INSTRUCTIONS
SYSTEM BLOCK DIAGRAM
INSTALLING YOUR UPS SYSTEM
HARDWARE INSTALLATION GUIDE
AUTOMATIC VOLTAGE REGULATORAVR
FRONT/REAR PANEL DESCRIPTION
BASIC OPERATION
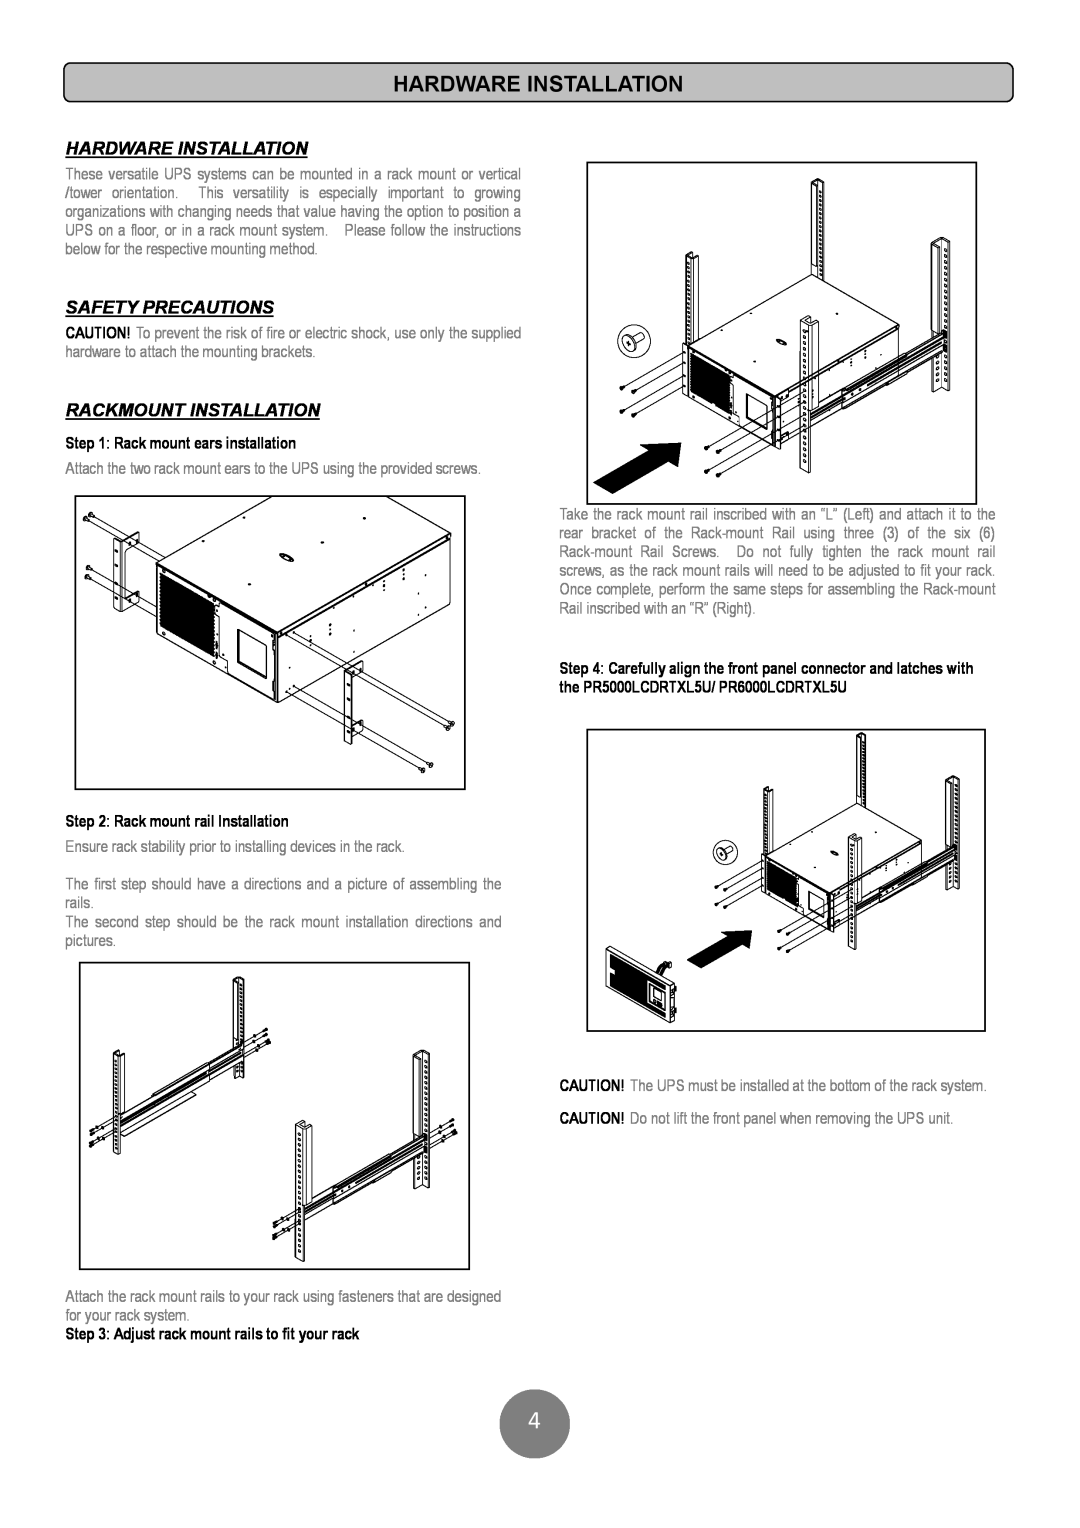
HARDWARE INSTALLATION
HARDWARE INSTALLATION
SAFETY PRECAUTIONS
RACKMOUNT INSTALLATION
SAFETY PRECAUTIONS
VERTICAZL/TOWER INSTALLATION
ELECTRICAL INSTALLATION
MAIN FEATURES
DEFINITION FRO ILLUMINATED LCD INDICATORS
MULTIFUNCTION LCD READOUT
BASIC OPERATION
TOGGLE SCREENS
Battery Replacement
MAINTENANCE
Safety Precautions
Replacement Batteries
TECHNICAL SPECIFICATIONS
Product Registration
PRODUCT REGISTRATION & WARRANTY
Limited Warranty and Connected Equipment Guarantee
NEED ADDITIONAL HELP?
SERVICE INFORMATION
FREQUENTLY ASKED QUESTIONS FAQs
Top
Page
Image
Contents