2. Hardware Overview
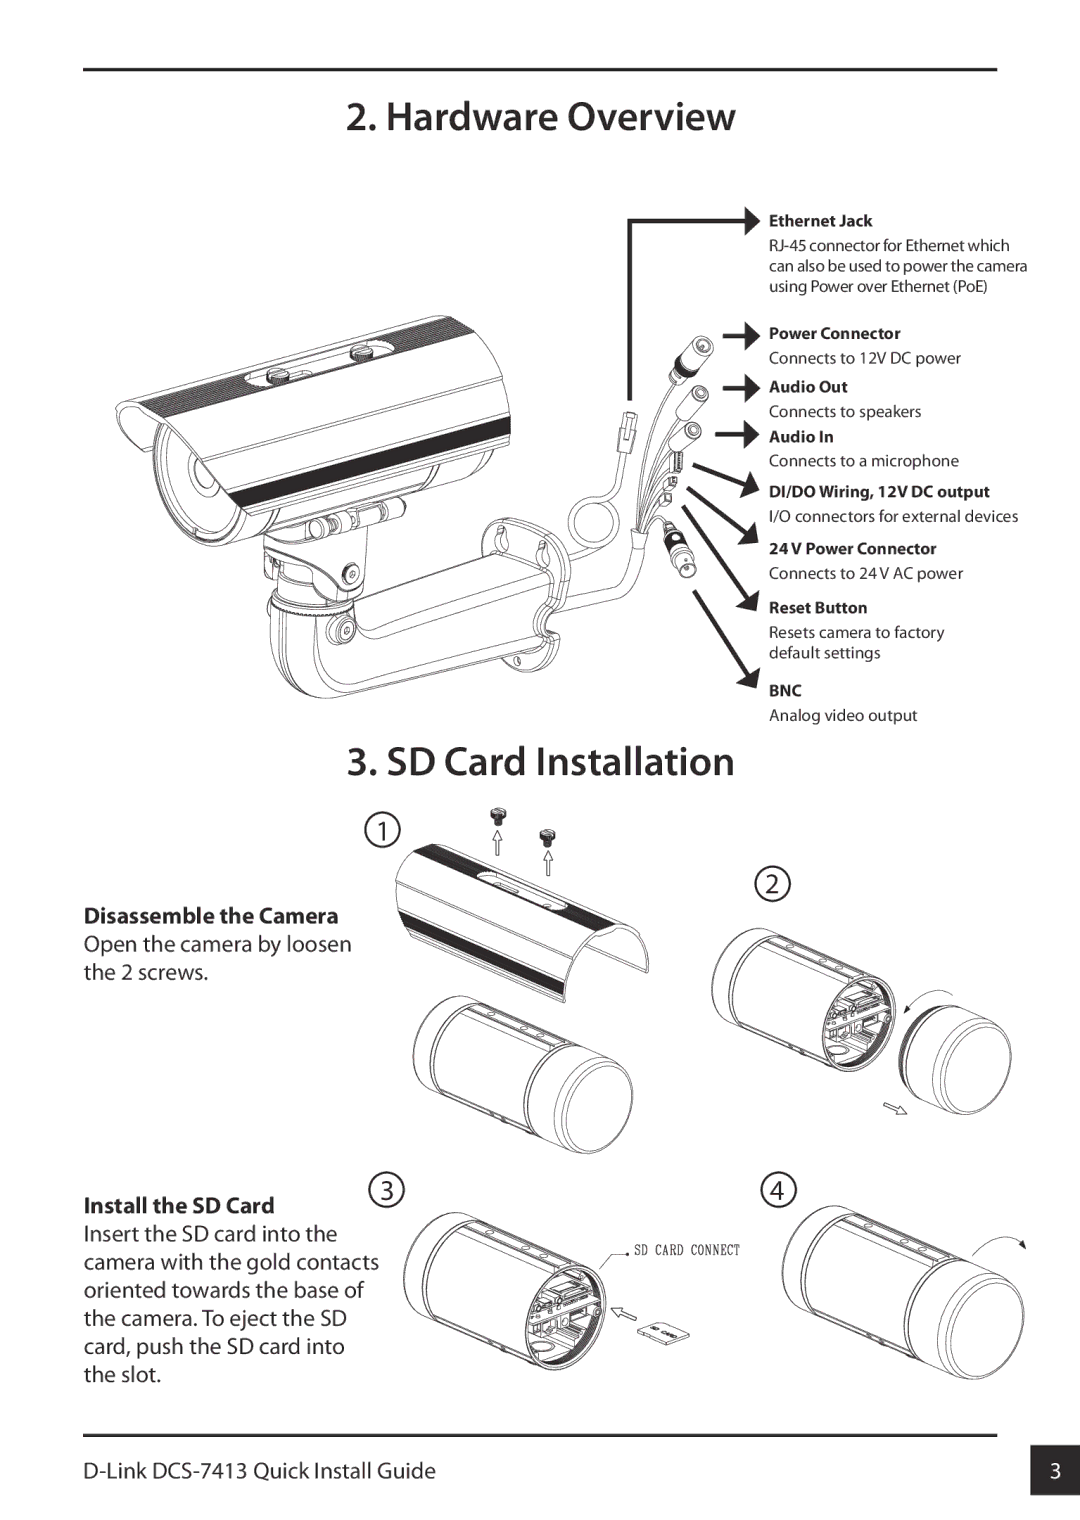
Ethernet Jack
Power Connector
Connects to 12V DC power
Audio Out
Connects to speakers
Audio In
Connects to a microphone
![]() DI/DO Wiring, 12V DC output
DI/DO Wiring, 12V DC output
I/O connectors for external devices
24 V Power Connector
Connects to 24 V AC power
![]() Reset Button
Reset Button
Resets camera to factory default settings
![]() BNC
BNC
Analog video output
3. SD Card Installation
1
Disassemble the Camera Open the camera by loosen the 2 screws.
Install the SD Card Insert the SD card into the camera with the gold contacts oriented towards the base of the camera. To eject the SD card, push the SD card into the slot.
2
34
3 | |
|
|