Quick Install Guide
Package Contents
LEDs (from top to bottom)
Power LED - A solid green light indicates a proper connection to the power supply. The light will blink green during the WPS process. The light will blink orange during boot up.
Wireless N 300 Gigabit Cloud Router
Power Adapter
Ethernet Cable
Internet LED - A solid orange light indicates connection on the Internet port. If the LED is orange, the connection is good but the router cannot connect to the Internet.
If any of the above items are missing, please contact your reseller.
Note: Please go to http://www.dlink.com/support/ to download the user manual.
Start Here
To configure your router, go to the Manual Setup Section below and follow the steps.
Important for Manual Setup: For the quick setup wizard to work properly, you must have a working Internet connection. Ensure that you are able to use your computer to get on the Internet before disconnecting your computer from your modem.
Tips for PPPoE and USB connections:
If you have DSL and are connecting via PPPoE, make sure that you disable or uninstall any PPPoE software such as WinPoet, Broadjump, or Enternet 300 from your computer or you will not be able to connect to the Internet.
You can only use the Ethernet port on your modem. If you were using USB to connect before, then you must turn off your modem, disconnect the USB cable and connect an Ethernet cable to the Internet port on the router, then turn the modem back on. In some cases, you may need to call your ISP to
change connection types (USB to Ethernet).
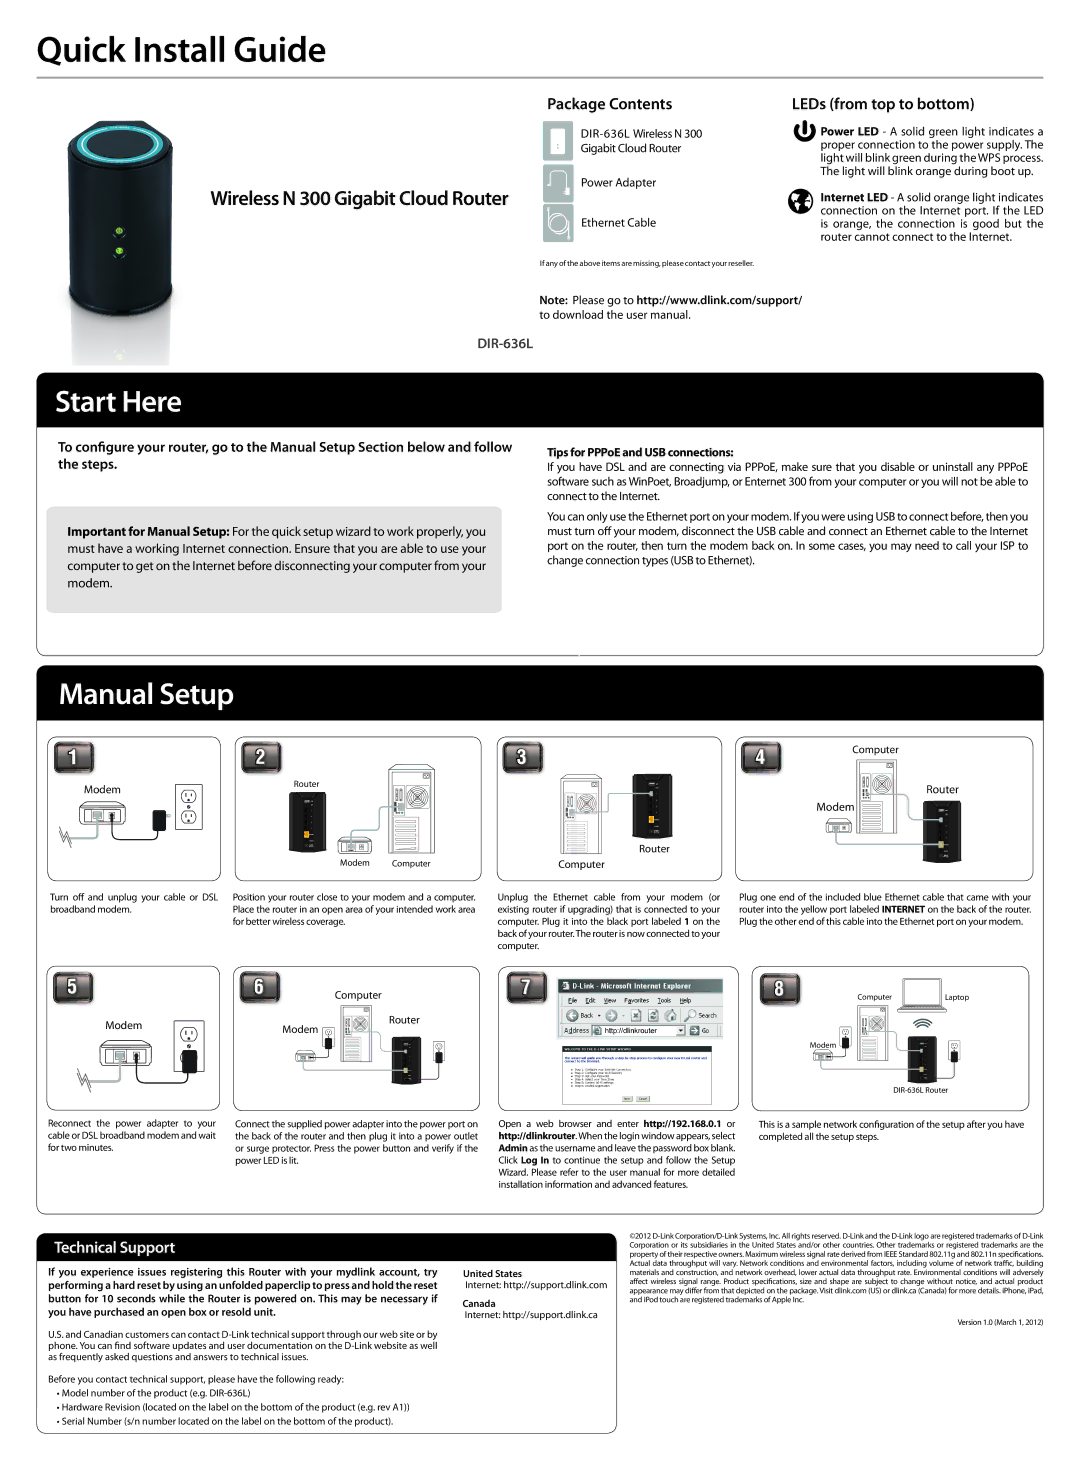
Manual Setup |
|
|
|
1 | 2 |
|
|
Modem | Router |
| |
|
|
| |
|
| USB |
|
|
| WPS |
|
|
| 1 |
|
|
| 2 |
|
INTERNET |
| 3 |
|
|
| 4 |
|
| INTERNET |
| |
| POWER |
| |
| 5V | 2.5A |
|
|
| Modem | Computer |
3
Computer |
|
| 4 | Computer |
|
|
|
|
| |
| 1 |
| Router | |
| USB |
|
|
|
| WPS |
|
|
|
| 2 |
| Modem |
|
| 4 |
| USB | |
| 3 |
|
|
|
|
|
|
| WPS |
INTERNET |
|
| 1 | |
POWER |
|
| 2 | |
5V | 2.5A |
|
| 3 |
Router |
|
| 4 | |
| INTERNET | |||
|
|
| POWER | |
|
|
| 5V | 2.5A |
Turn off and unplug your cable or DSL broadband modem.
Position your router close to your modem and a computer. Place the router in an open area of your intended work area for better wireless coverage.
Unplug the Ethernet cable from your modem (or existing router if upgrading) that is connected to your computer. Plug it into the black port labeled 1 on the back of your router. The router is now connected to your computer.
Plug one end of the included blue Ethernet cable that came with your router into the yellow port labeled INTERNET on the back of the router. Plug the other end of this cable into the Ethernet port on your modem.
5 | 6 | Computer | 7 | 8 | Computer | Laptop |
Modem | Modem |
|
Router
Modem |
INTERNET
5V | 5V | 2.5A |
2.5A |
|
DIR-636L Router
Reconnect the power adapter to your cable or DSL broadband modem and wait for two minutes.
Connect the supplied power adapter into the power port on the back of the router and then plug it into a power outlet or surge protector. Press the power button and verify if the power LED is lit.
Open a web browser and enter http://192.168.0.1 or http://dlinkrouter. When the login window appears, select Admin as the username and leave the password box blank. Click Log In to continue the setup and follow the Setup Wizard. Please refer to the user manual for more detailed installation information and advanced features.
This is a sample network configuration of the setup after you have completed all the setup steps.
Technical Support
If you experience issues registering this Router with your mydlink account, try performing a hard reset by using an unfolded paperclip to press and hold the reset button for 10 seconds while the Router is powered on. This may be necessary if you have purchased an open box or resold unit.
United States
Internet: http://support.dlink.com
Canada
Internet: http://support.dlink.ca
©2012
Version 1.0 (March 1, 2012)
U.S. and Canadian customers can contact
Before you contact technical support, please have the following ready:
•Model number of the product (e.g.
•Hardware Revision (located on the label on the bottom of the product (e.g. rev A1))
•Serial Number (s/n number located on the label on the bottom of the product).