DAC6010E specifications
The Danby DAC6010E is a portable air conditioner designed to provide relief from hot weather while being user-friendly and efficient. This model is particularly suitable for smaller spaces such as bedrooms, offices, or dorm rooms, making it an ideal choice for individuals seeking cooling solutions without the hassle of permanent installation.One of the main features of the DAC6010E is its compact design, which allows for easy movement between rooms. Weighing around 56 pounds, it is equipped with caster wheels for convenient transport. The unit operates with a cooling capacity of 6000 BTU, making it suitable for spaces up to 250 square feet, depending on environmental factors such as ceiling height and sun exposure.
In terms of technology, the DAC6010E utilizes a refrigerant that is environmentally friendly, contributing to energy efficiency without compromising performance. The unit is designed to provide cooling, dehumidifying, and fan-only modes, offering versatility for various conditions. This makes it an excellent option for maintaining comfort during humid summer months or when conditions are particularly muggy.
The air conditioner comes with a digital display and remote control, allowing users to adjust settings from a distance. It includes an adjustable thermostat and a 24-hour programmable timer, enabling users to set specific times for cooling, promoting energy savings and convenience. The unit also features multiple fan speeds, providing options for different levels of airflow according to personal preferences.
A standout characteristic of the DAC6010E is its quiet operation. This model has a noise level of around 52 dB, comparable to a quiet library. Thus, it can effectively cool a room without causing disturbances, making it ideal for sleeping or working.
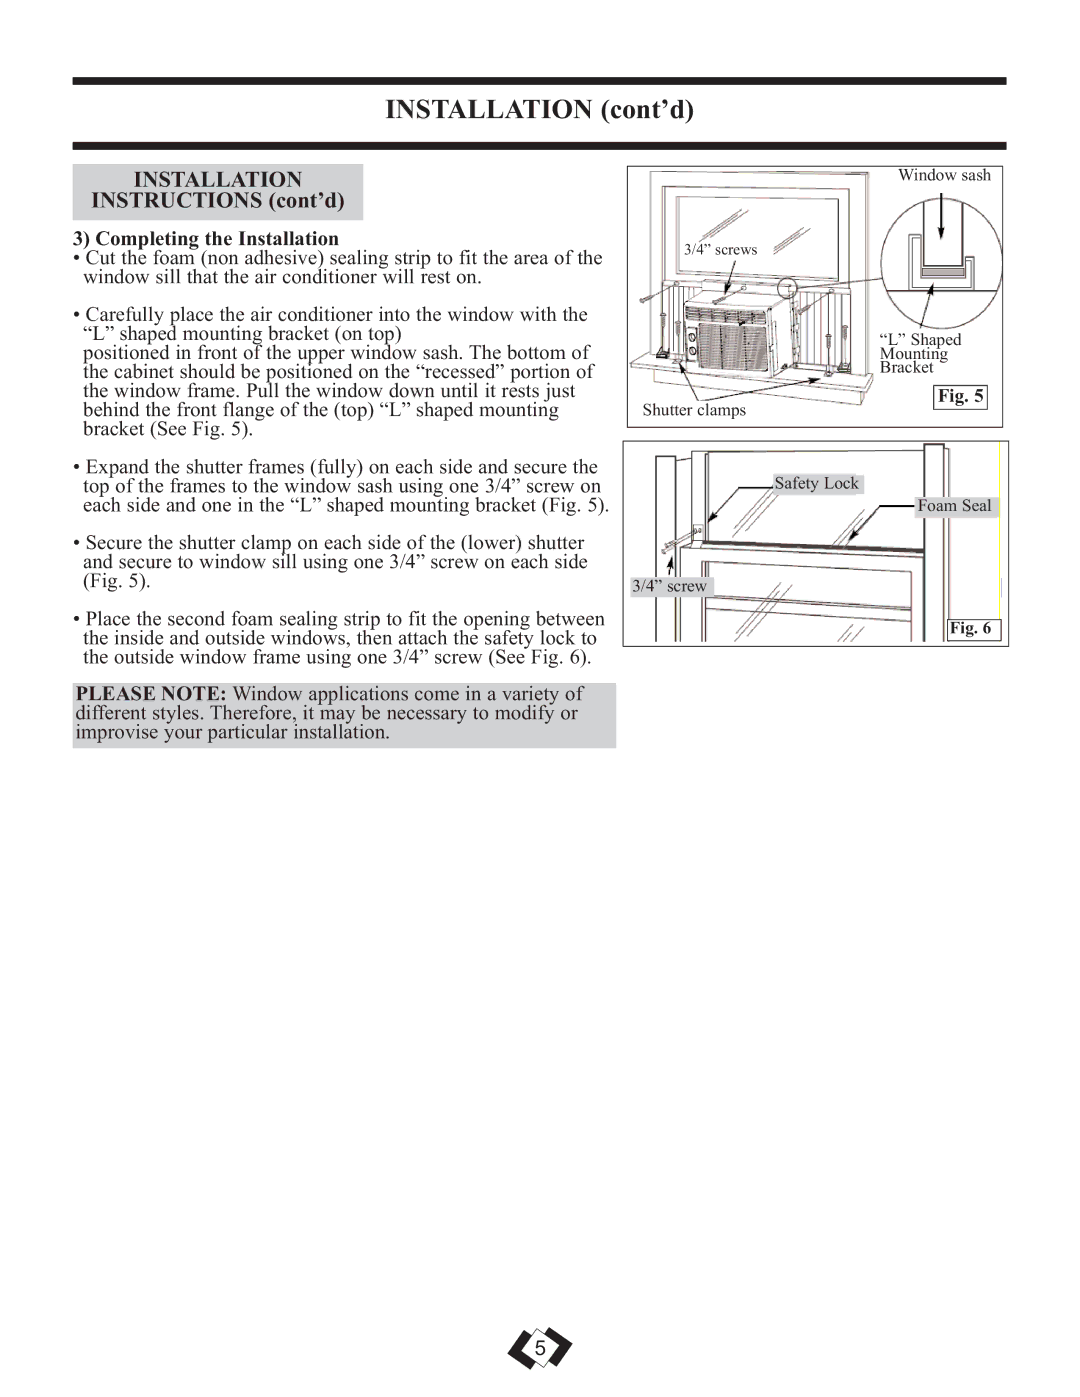
The installation process is straightforward, requiring minimal tools and effort. The package includes an easy-to-follow window installation kit, allowing users to secure the exhaust hose effectively. Maintenance is also user-friendly, with a removable and washable air filter that ensures clean air circulation and optimal performance.
Overall, the Danby DAC6010E is a practical and efficient solution for anyone needing portable cooling. Its combination of features, user-focused design, and effective technologies makes it a commendable choice in the market of portable air conditioners.