OPERATING INSTRUCTIONS
To avoid vibration, the unit must be set level. This is accomplished by adjusting the (2) front leveling legs located under the refrigerator. To start the refrigerator, turn the temperature control to the position corresponding to the desired cooling. We recommend starting the temperature at 4 (middle setting) and adjusting if necessary.
OFF = No Cooling | 4 = Medium Cooling |
1= Minimum Cooling | MAX = Maximum Cooling |
The temperature will vary depending on the quantity of the food stored and on the frequency with which the door is opened.
DEFROSTING INSTRUCTIONS:
This refrigerator is inclusive of a cycle defrost system. The refrigerator has a cold plate located in behind the back wall of the refrigerator cabinet. Ice
REMINDER: Keep the drain outlet opening clear of any food particles or other impediments. This will ensure the water can funnel to the drain pain without obstruction. Failure to keep this drain clean may result in water overflowing the trough, causing water to accumulate at the bottom of the refrigerator, eventually leaking onto your floor. Please wipe this trough and drain outlet with a soft cloth as required.
DOOR REVERSAL INSTRUCTIONS:
CAUTION: To avoid personal injury to yourself and/or property, we recommend someone assist you during the door reversal process.
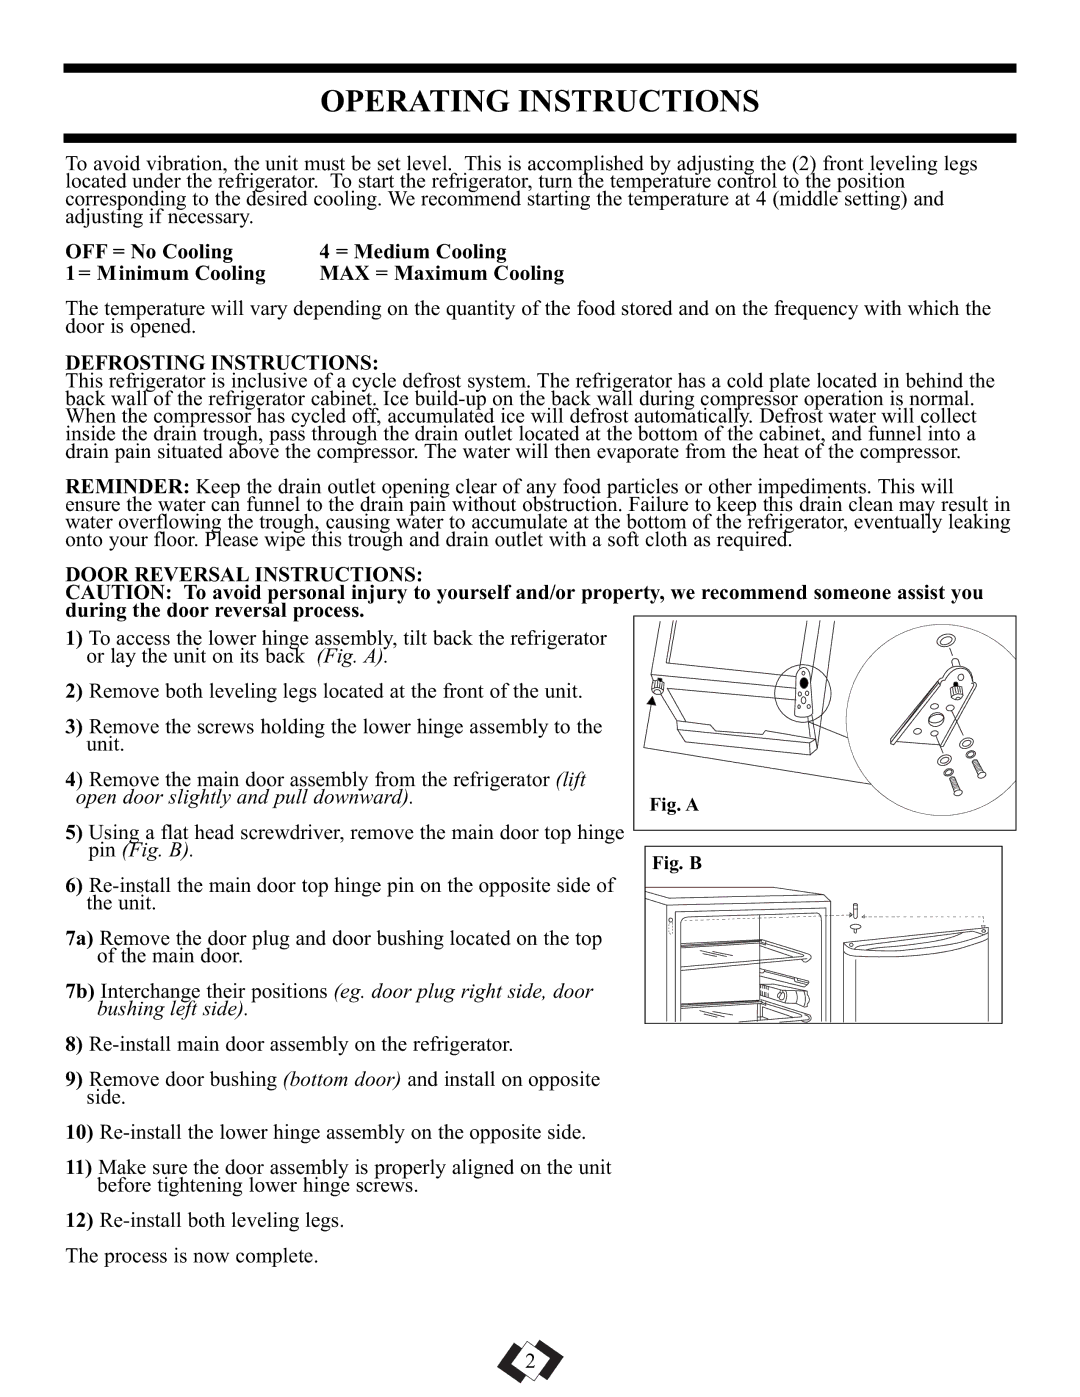
1)To access the lower hinge assembly, tilt back the refrigerator or lay the unit on its back (Fig. A).
2) Remove both leveling legs located at the front of the unit.
3)Remove the screws holding the lower hinge assembly to the unit.
4) Remove the main door assembly from the refrigerator (lift |
|
| ||
open door slightly and pull downward). | Fig. A |
| ||
5) | Using a flat head screwdriver, remove the main door top hinge |
|
|
|
|
|
| ||
| pin (Fig. B). |
|
| |
6) | Fig. B |
| ||
|
|
| ||
|
| |||
| the unit. |
|
| |
7a) Remove the door plug and door bushing located on the top |
|
| ||
| of the main door. |
|
| |
7b) Interchange their positions (eg. door plug right side, door |
|
| ||
| bushing left side). |
|
| |
8) |
|
| ||
9) | Remove door bushing (bottom door) and install on opposite |
|
| |
| side. |
|
| |
10)
11) Make sure the door assembly is properly aligned on the unit before tightening lower hinge screws.
12)
2