| OPERATING INSTRUCTIONS (cont’d) | |
|
| |
|
| |
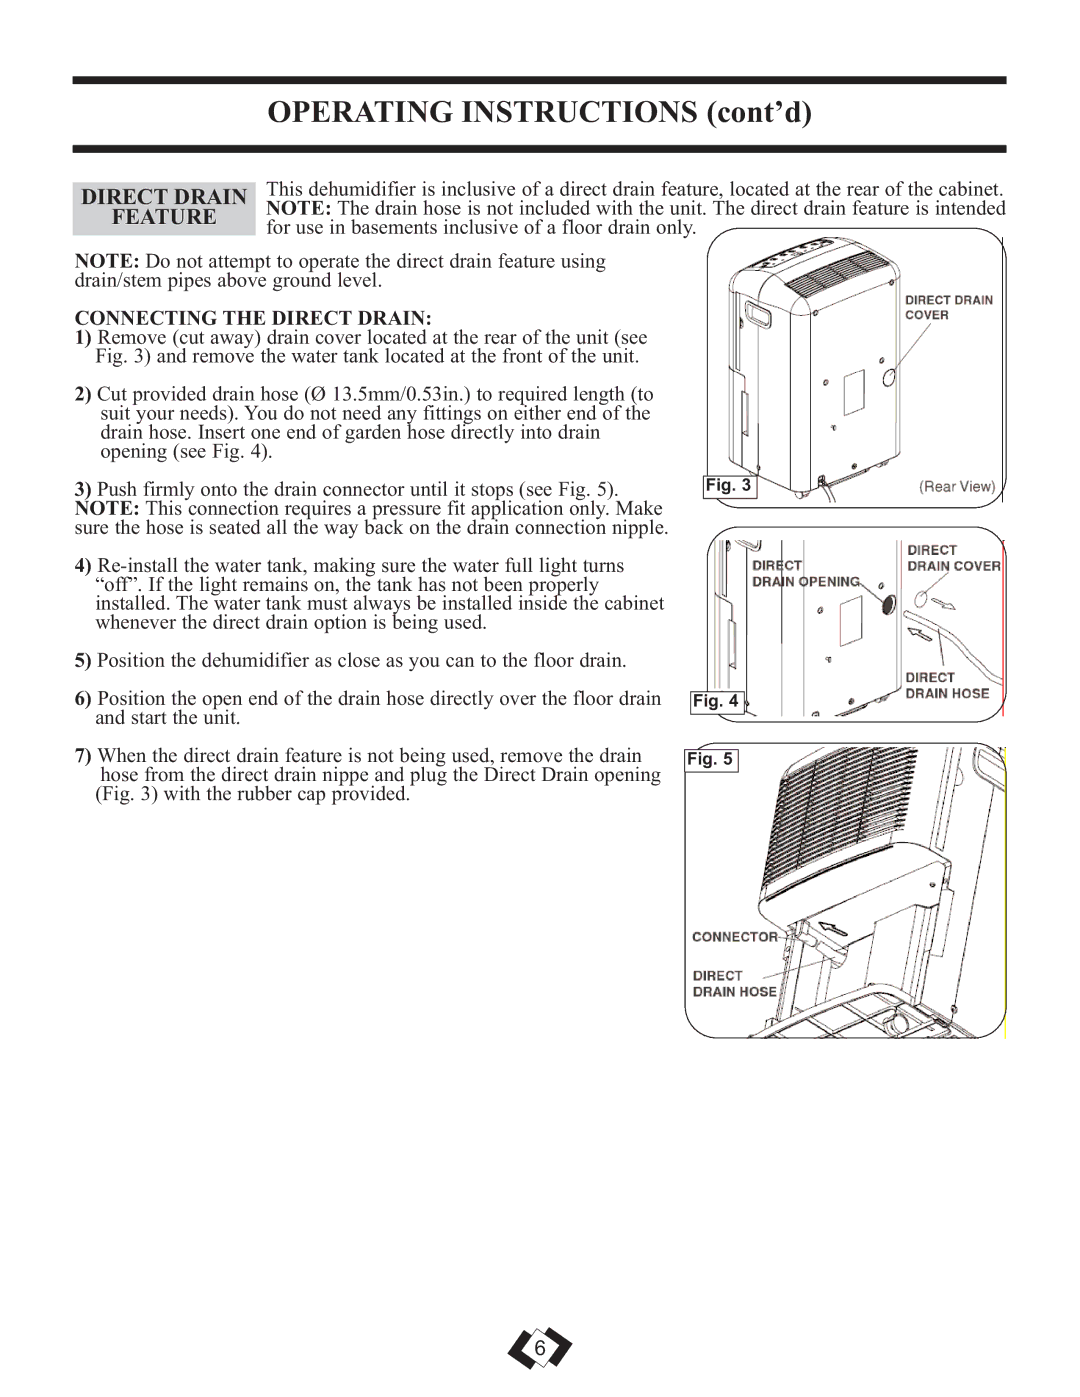
| This dehumidifier is inclusive of a direct drain feature, located at the rear of the cabinet. | |
DIRECT DRAIN | ||
FEATURE | NOTE: The drain hose is not included with the unit. The direct drain feature is intended | |
for use in basements inclusive of a floor drain only. | ||
|
NOTE: Do not attempt to operate the direct drain feature using drain/stem pipes above ground level.
CONNECTING THE DIRECT DRAIN:
1)Remove (cut away) drain cover located at the rear of the unit (see Fig. 3) and remove the water tank located at the front of the unit.
2)Cut provided drain hose (Ø 13.5mm/0.53in.) to required length (to suit your needs). You do not need any fittings on either end of the drain hose. Insert one end of garden hose directly into drain opening (see Fig. 4).
3)Push firmly onto the drain connector until it stops (see Fig. 5). NOTE: This connection requires a pressure fit application only. Make sure the hose is seated all the way back on the drain connection nipple.
4)
5)Position the dehumidifier as close as you can to the floor drain.
6)Position the open end of the drain hose directly over the floor drain and start the unit.
7)When the direct drain feature is not being used, remove the drain hose from the direct drain nippe and plug the Direct Drain opening (Fig. 3) with the rubber cap provided.
Fig. 3
Fig. 4
Fig. 5
6
