
 Operating Instructions
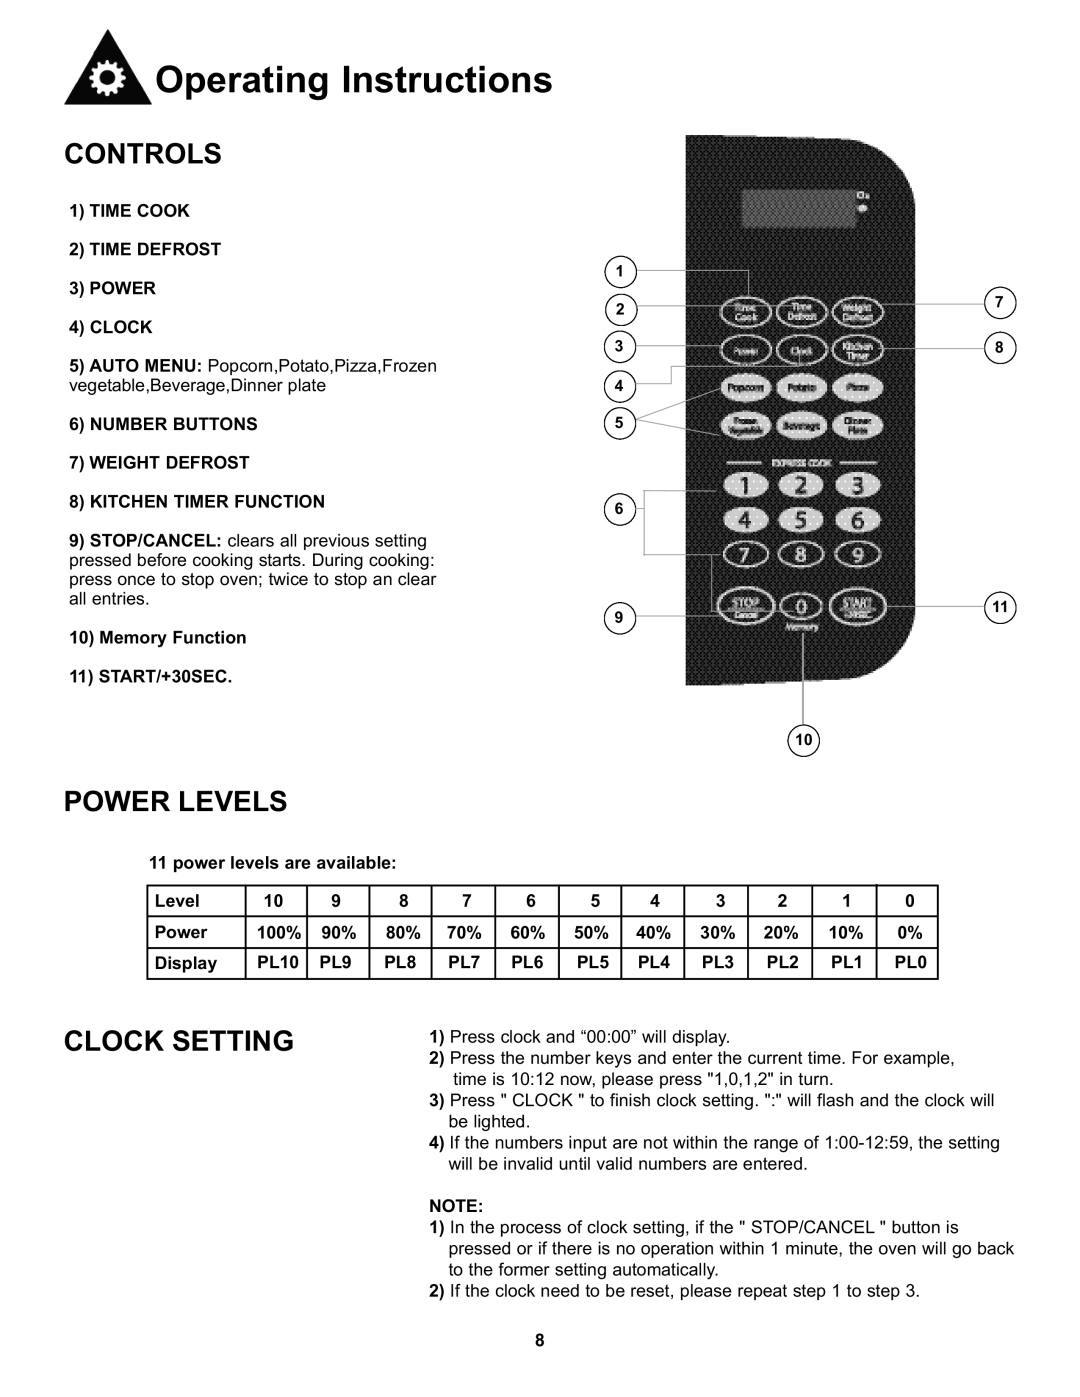
DMW7700WDB specifications
The Danby DMW7700WDB and DMW7700BLDB microwave ovens offer a perfect blend of style, performance, and convenience, making them ideal additions to any modern kitchen. These compact units, with their sleek designs, come in white and black respectively, allowing users to choose the model that best complements their kitchen décor.One of the standout features of both the DMW7700WDB and DMW7700BLDB is the 700 watts of cooking power. This efficient power level ensures that food is evenly cooked, reheated, or defrosted without hot spots or overcooking. The microwave also includes a variety of cooking options, highlighted by its 11 power levels, enabling users to customize their cooking experience based on their specific needs.
The 0.7 cubic feet capacity of these microwaves makes them perfect for small kitchens, dorm rooms, and office break rooms. Despite their compact size, they can accommodate a standard dinner plate, and the turntable function guarantees that food is evenly heated while rotating.
Danby has equipped both models with user-friendly control panels that feature a digital display and easy-to-read buttons. The one-touch cooking functions simplify meal preparation, allowing users to microwave popcorn, pizza, or reheat leftovers with just a single press. Additionally, the quick-defrost feature saves time and ensures that frozen foods can be thawed safely and efficiently.
Noteworthy technologies incorporated into the DMW7700WDB and DMW7700BLDB include the innovative cooking sensor, which automatically adjusts cooking time and power based on the food being prepared. This technology ensures optimal results with minimal guesswork, providing a great user experience.
Energy efficiency is also a major consideration in the design of these microwaves. They feature a power-saving mode that reduces energy consumption when the unit is not in use, making them an environmentally friendly option.
Safety is paramount in kitchen appliances, and Danby has integrated several safety features into these microwaves. The child lock function prevents unintended use, making it perfect for families with young children.
In summary, the Danby DMW7700WDB and DMW7700BLDB microwave ovens deliver exceptional versatility and efficiency. With their stylish designs, user-friendly controls, and advanced cooking technologies, these microwaves are an excellent choice for anyone seeking a reliable and attractive cooking solution.