
AW6500, AW5500 specifications
Definitive Technology has forged a reputation for producing high-quality audio equipment, and their outdoor speakers, the AW6500 and AW5500, exemplify this tradition of excellence. Designed for those who want to enjoy crystal-clear sound in their outdoor environments, these speakers provide a perfect blend of durability, performance, and aesthetic appeal.The AW6500 is a robust, all-weather speaker featuring a 6.5-inch bass driver coupled with a 1-inch aluminum dome tweeter. Known for its rich bass response and dynamic mid-range, the AW6500 is capable of delivering high-fidelity sound even amidst the distractions of the great outdoors. The speaker is equipped with Definitive Technology's proprietary technologies, such as BDSS (Balanced Double Surround System) technology, which enhances sound dispersion and provides a more immersive listening experience. With a frequency response ranging from 38 Hz to 30 kHz, the AW6500 captures the nuances of every musical detail while promising deep, punchy bass.
In contrast, the AW5500 offers a slightly smaller form factor, featuring a 5.25-inch bass driver and a 1-inch tweeter, making it an ideal choice for those seeking a more compact yet powerful outdoor audio solution. Like its larger counterpart, the AW5500 utilizes BDSS technology to ensure a wide soundstage and remarkable performance. The frequency response spans from 40 Hz to 30 kHz, allowing listeners to enjoy clear highs and balanced lows, proving that size does not always dictate performance.
Both models are engineered from marine-grade materials, ensuring that they withstand harsh weather conditions, including rain, snow, and UV exposure. Their rugged enclosures and powder-coated grilles contribute to their durability, making them suitable for installation in gardens, patios, or pool areas. The speaker designs are both stylish and discreet, allowing them to blend seamlessly into any outdoor setting.
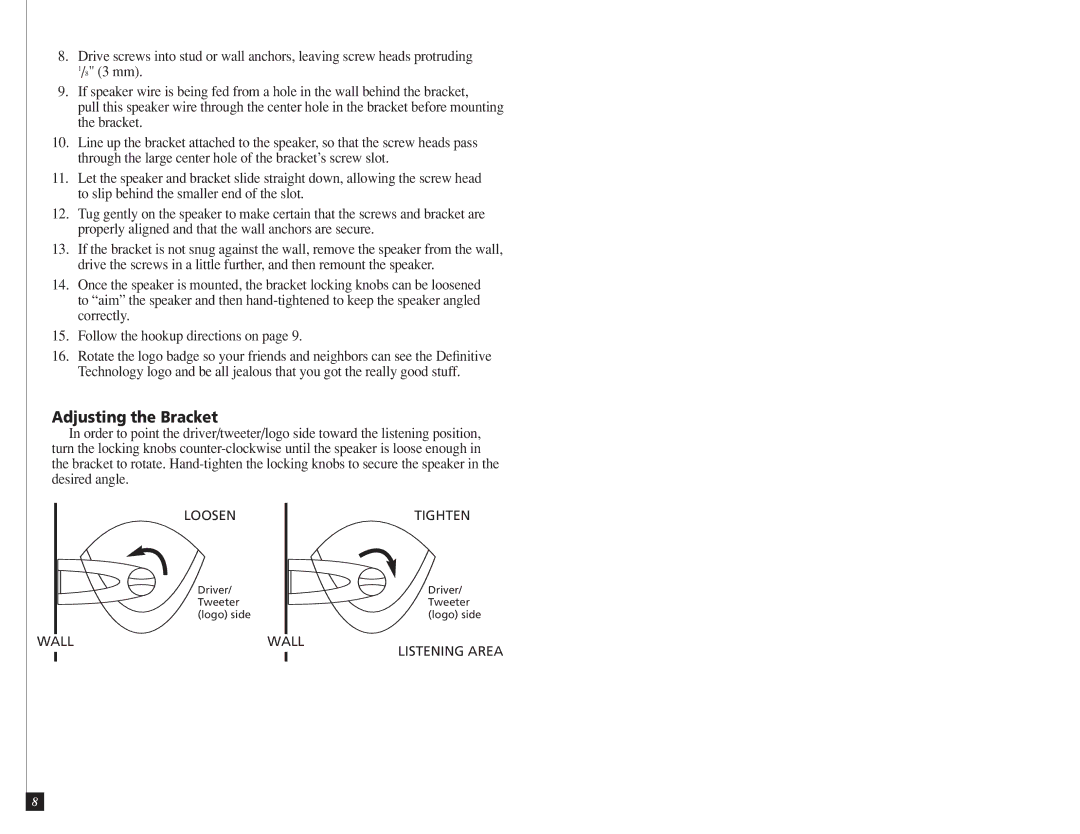
Installation is simplified with the included mounting brackets, allowing users to optimize their setups without hassle. The versatility of both the AW6500 and AW5500 makes them an excellent choice for a variety of outdoor scenarios, whether for entertaining guests or simply enjoying music on a quiet evening.
In summary, the Definitive Technology AW6500 and AW5500 speakers merge innovative engineering with aesthetic design, providing outdoor audio solutions that prioritize sound quality and durability. With features that cater to audiophiles and casual listeners alike, these speakers deliver an exceptional audio experience outside the conventional listening spaces.