7.Mark the location of pilot holes noted on the Mounting Template with a pencil; remove the template.
8.
9.It is best if at least one screw hits a wall stud. If there is no stud behind the pilot hole location, install wall anchors (not included) to secure the bracket screws. Follow the wall anchor manufacturer’s directions. Each wall anchor should be rated to hold at least one- half of the product net weight [see specifications on front cover].
10.For masonry walls, use a masonry drill bit to
11.Pull the speaker wires through the hole in the bracket.
12.Screw the bracket to the wall.
13.The bracket has two sets of keyhole slots, one set for vertical and the other set for horizontal orientation. When the wall mounting bracket is securely screwed to the wall, line up the speaker’s protruding Mounting Screws with the appropriate keyhole slots on the wall mounting bracket. Let the speaker slide straight down (in horizontal alignment) or push the speaker sideways (vertical alignment), allowing the screw heads to slip behind the smaller end of the keyhole slots. Gently push the edge of the speaker opposite the screw heads toward the wall until the speaker snaps onto the lower lip of the bracket.
MYTHOS NINE OWNER’S MANUAL
Using the Leveling Foot
If you are going to use the Mythos Nine in horizontal mode on a shelf or table, first attach the wall bracket to the speaker as described above. Attach the one “L” bracket to the wall bracket using one M4 x 10mm screw provided. Thread the foot screw into “L” bracket and adjust to required height.
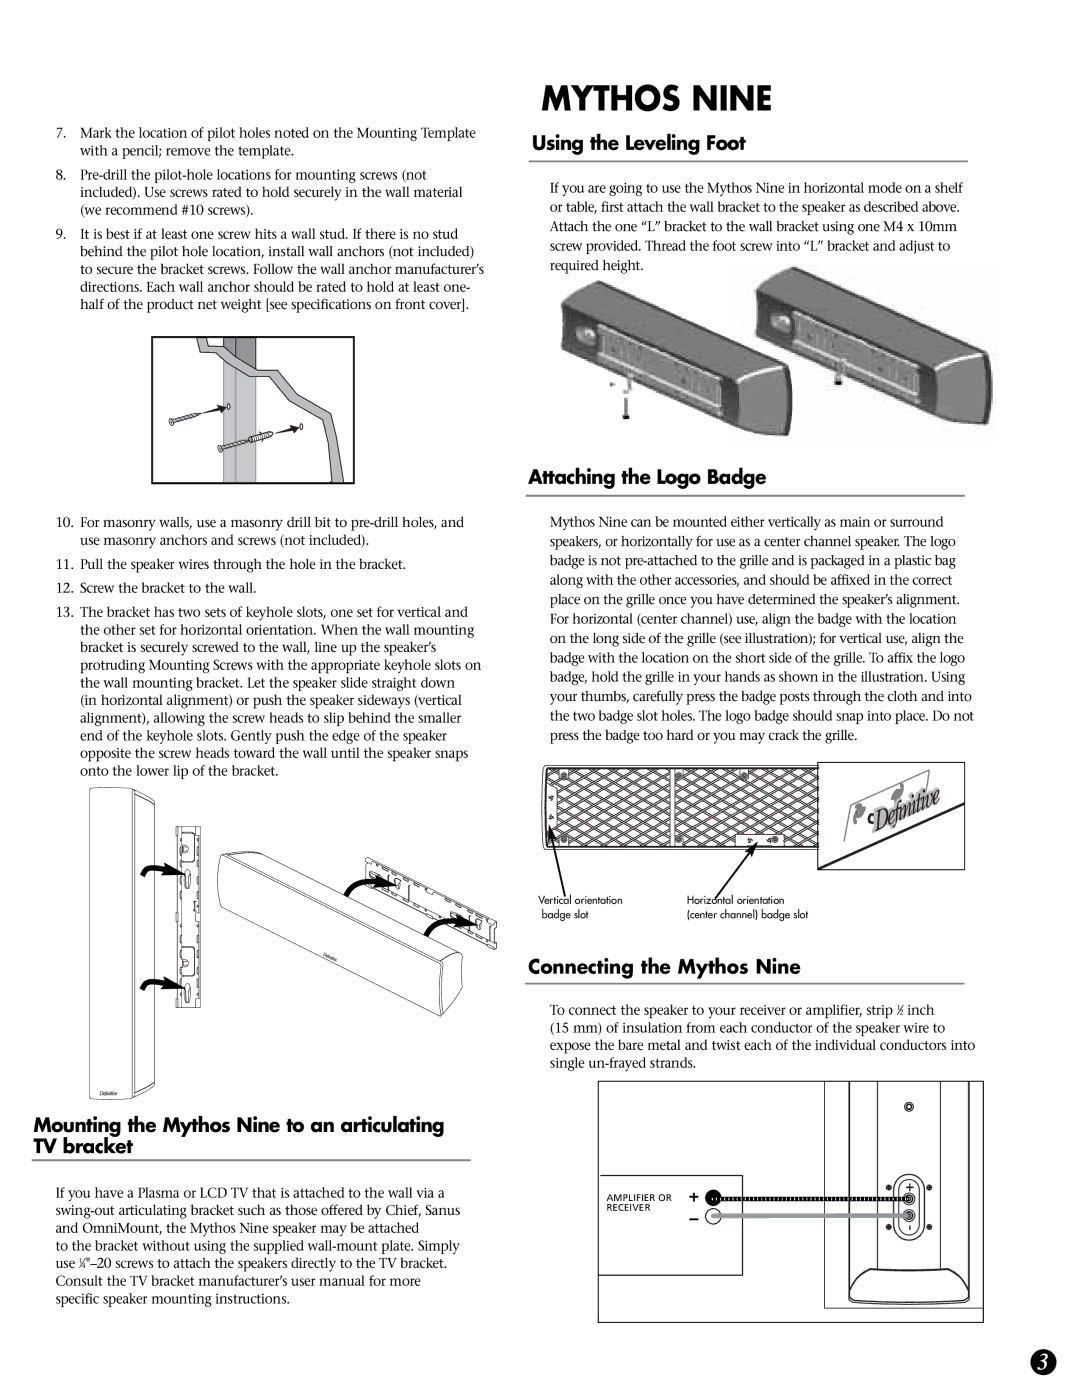
Attaching the Logo Badge
Mythos Nine can be mounted either vertically as main or surround speakers, or horizontally for use as a center channel speaker. The logo badge is not
Mounting the Mythos Nine to an articulating TV bracket
If you have a Plasma or LCD TV that is attached to the wall via a
to the bracket without using the supplied
Vertical orientation | Horizontal orientation |
badge slot | (center channel) badge slot |
Connecting the Mythos Nine
To connect the speaker to your receiver or amplifier, strip 1⁄2 inch
(15 mm) of insulation from each conductor of the speaker wire to expose the bare metal and twist each of the individual conductors into single
AMPLIFIER OR
RECEIVER
3