Installation
Installation is the buyer’s responsibility. The manufacturer accepts no liability for this service. Any action that the manufacturer has to take as a result of an erroneous installation will not be covered by the warranty.
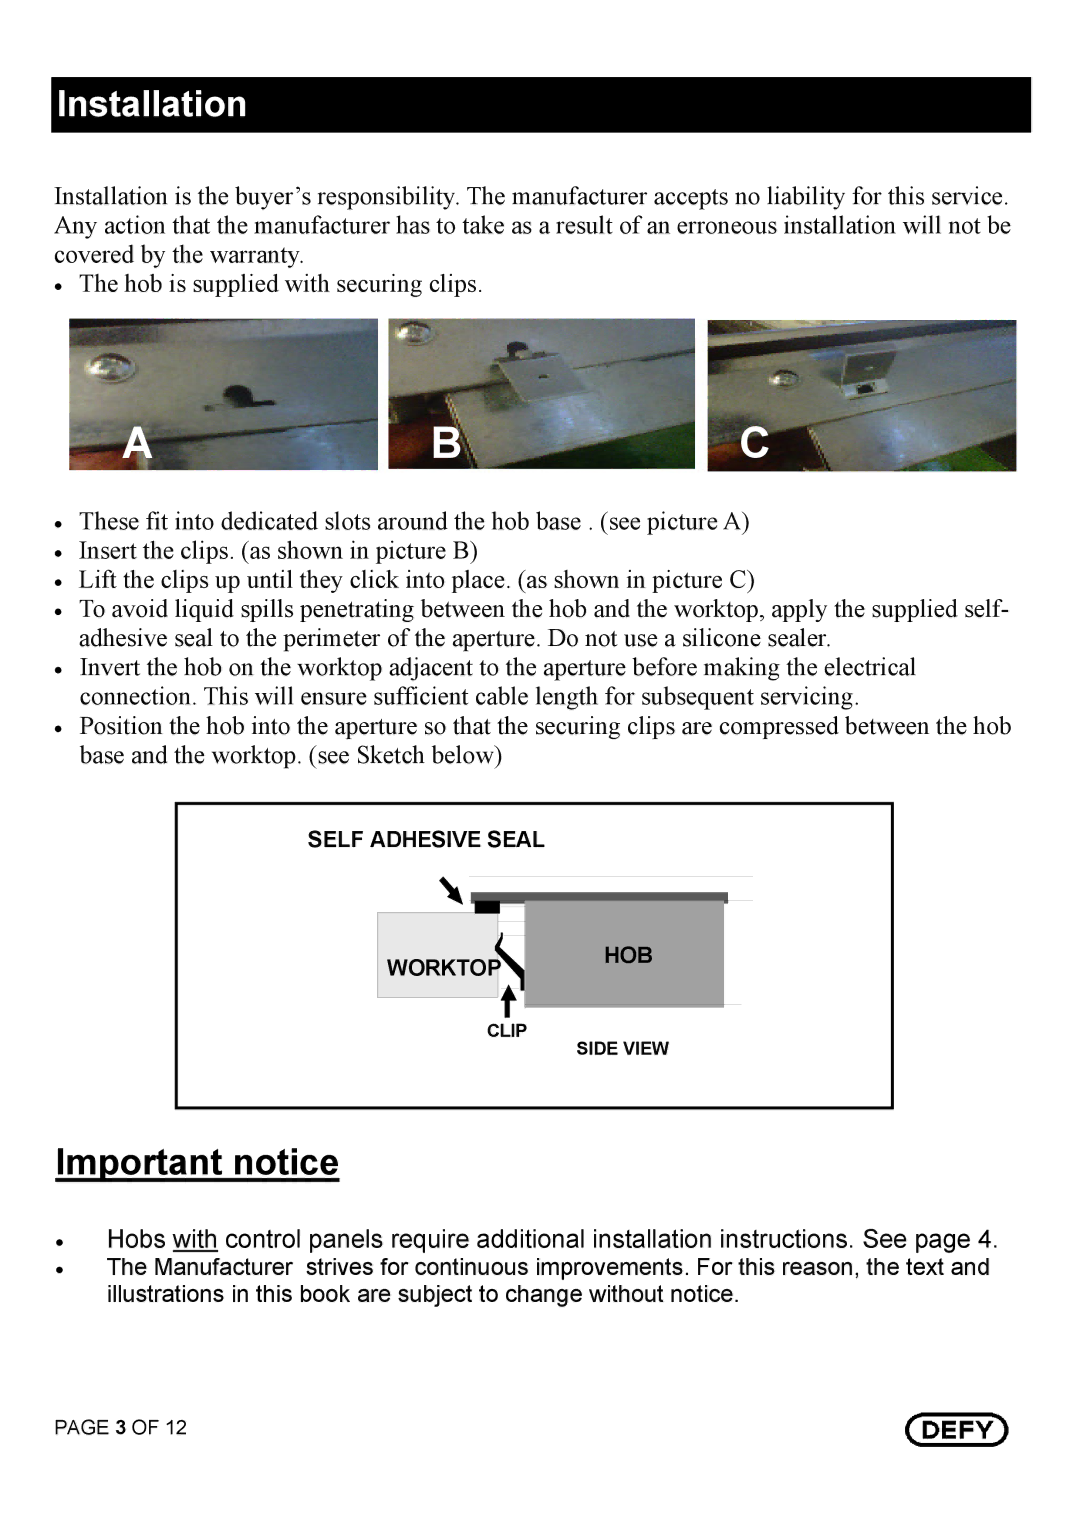
•The hob is supplied with securing clips.
A B C
•These fit into dedicated slots around the hob base . (see picture A)
•Insert the clips. (as shown in picture B)
•Lift the clips up until they click into place. (as shown in picture C)
•To avoid liquid spills penetrating between the hob and the worktop, apply the supplied self- adhesive seal to the perimeter of the aperture. Do not use a silicone sealer.
•Invert the hob on the worktop adjacent to the aperture before making the electrical connection. This will ensure sufficient cable length for subsequent servicing.
•Position the hob into the aperture so that the securing clips are compressed between the hob base and the worktop. (see Sketch below)
SELF ADHESIVE SEAL
|
|
|
|
|
|
|
|
|
| HOB |
|
WORKTOP |
|
|
| ||
|
|
|
| ||
|
|
|
|
|
|
|
|
|
|
|
|
|
|
|
|
|
|
CLIP
SIDE VIEW
Important notice
•
•
Hobs with control panels require additional installation instructions. See page 4. The Manufacturer strives for continuous improvements. For this reason, the text and illustrations in this book are subject to change without notice.
PAGE 3 OF 12