HOW TO USE YOUR HEATER
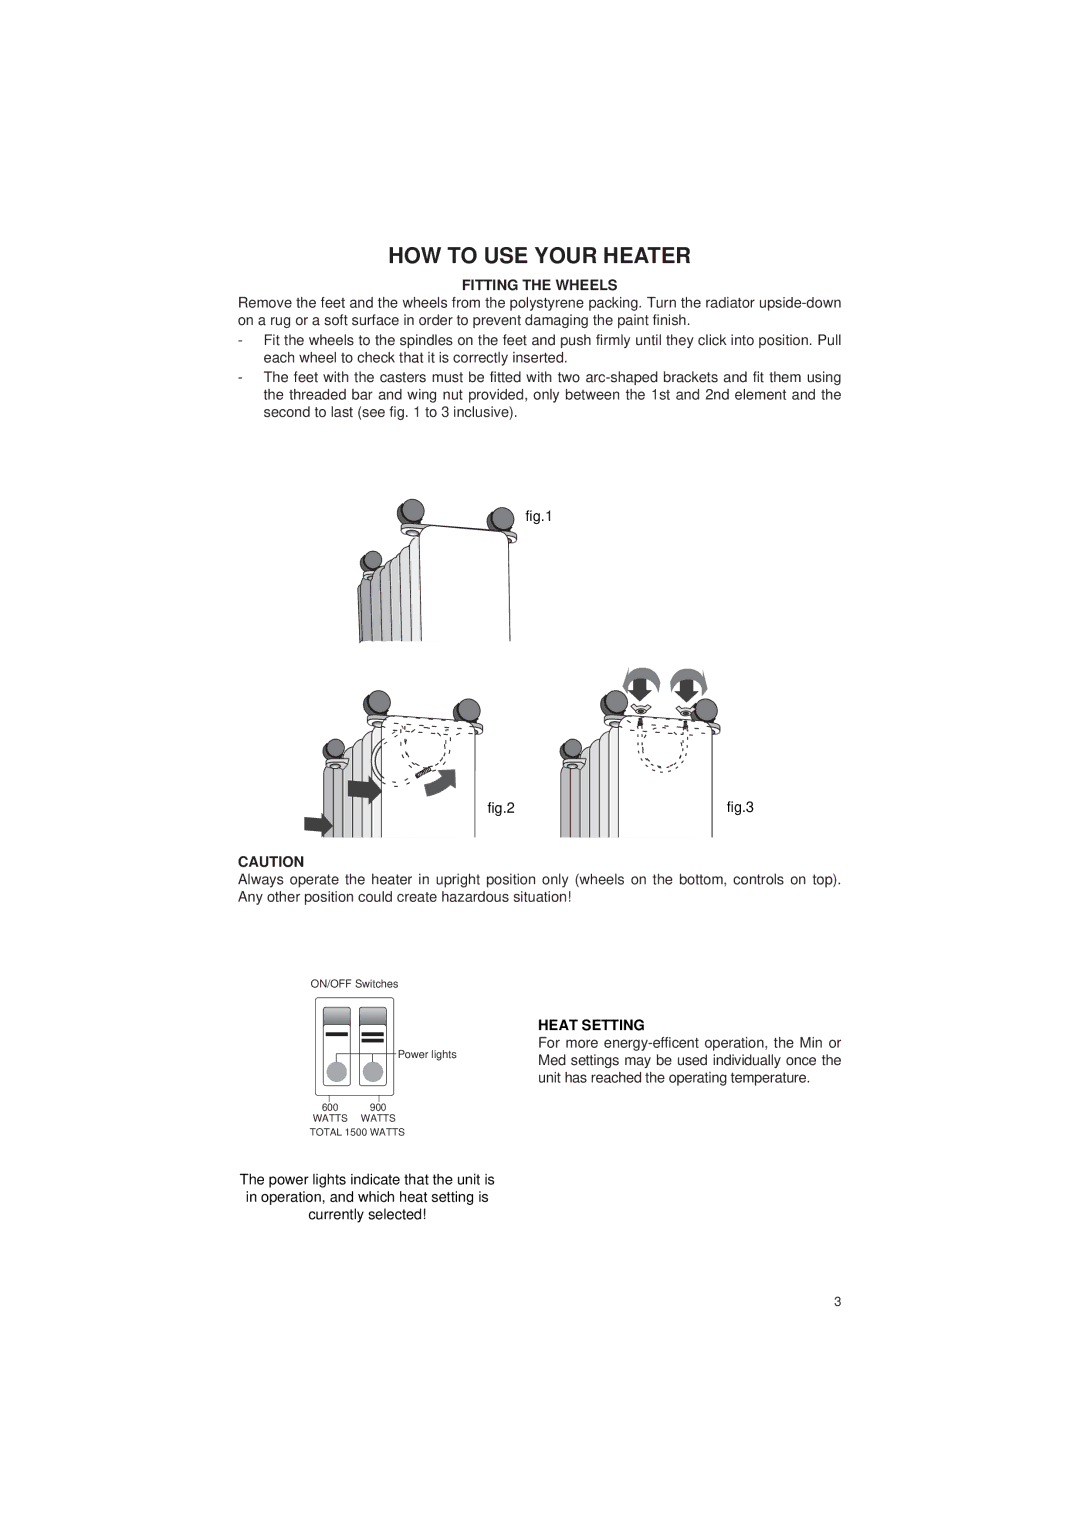
FITTING THE WHEELS
Remove the feet and the wheels from the polystyrene packing. Turn the radiator
-Fit the wheels to the spindles on the feet and push firmly until they click into position. Pull each wheel to check that it is correctly inserted.
-The feet with the casters must be fitted with two
fig.1
fig.2 | fig.3 |
CAUTION
Always operate the heater in upright position only (wheels on the bottom, controls on top). Any other position could create hazardous situation!
ON/OFF Switches
Power lights
600900
WATTS WATTS
TOTAL 1500 WATTS
HEAT SETTING
For more
The power lights indicate that the unit is in operation, and which heat setting is currently selected!
3