
DD1000TC Series specifications
The DeLonghi DD1000TC Series is a remarkable addition to the world of home comfort appliances, specifically designed for those who seek both performance and style. This innovative dehumidifier offers a range of features that effectively combat humidity, providing a healthier indoor environment, especially in areas prone to dampness.One of the standout features of the DD1000TC Series is its advanced Condensation technology. This system efficiently removes excess moisture from the air, helping to prevent mold, mildew, and other airborne allergens. By maintaining optimal humidity levels, this dehumidifier not only enhances comfort but also protects the integrity of your home and furnishings.
The series boasts a substantial dehumidification capacity, making it suitable for medium to large rooms. With its ability to extract up to 30 pints of moisture per day, it ensures that areas such as basements, laundry rooms, and bathrooms remain dry and comfortable. The unit is designed with a continuous drainage option, allowing for hassle-free operation. Users can connect a hose to a nearby drain, eliminating the need for frequent emptying of the water tank.
Portability is another key characteristic of the DD1000TC Series. Equipped with casters and a lightweight design, this dehumidifier can be easily moved from room to room, adapting to your needs and ensuring that moisture is controlled wherever you go. The ergonomic handle further enhances maneuverability, allowing users to transport it with ease.
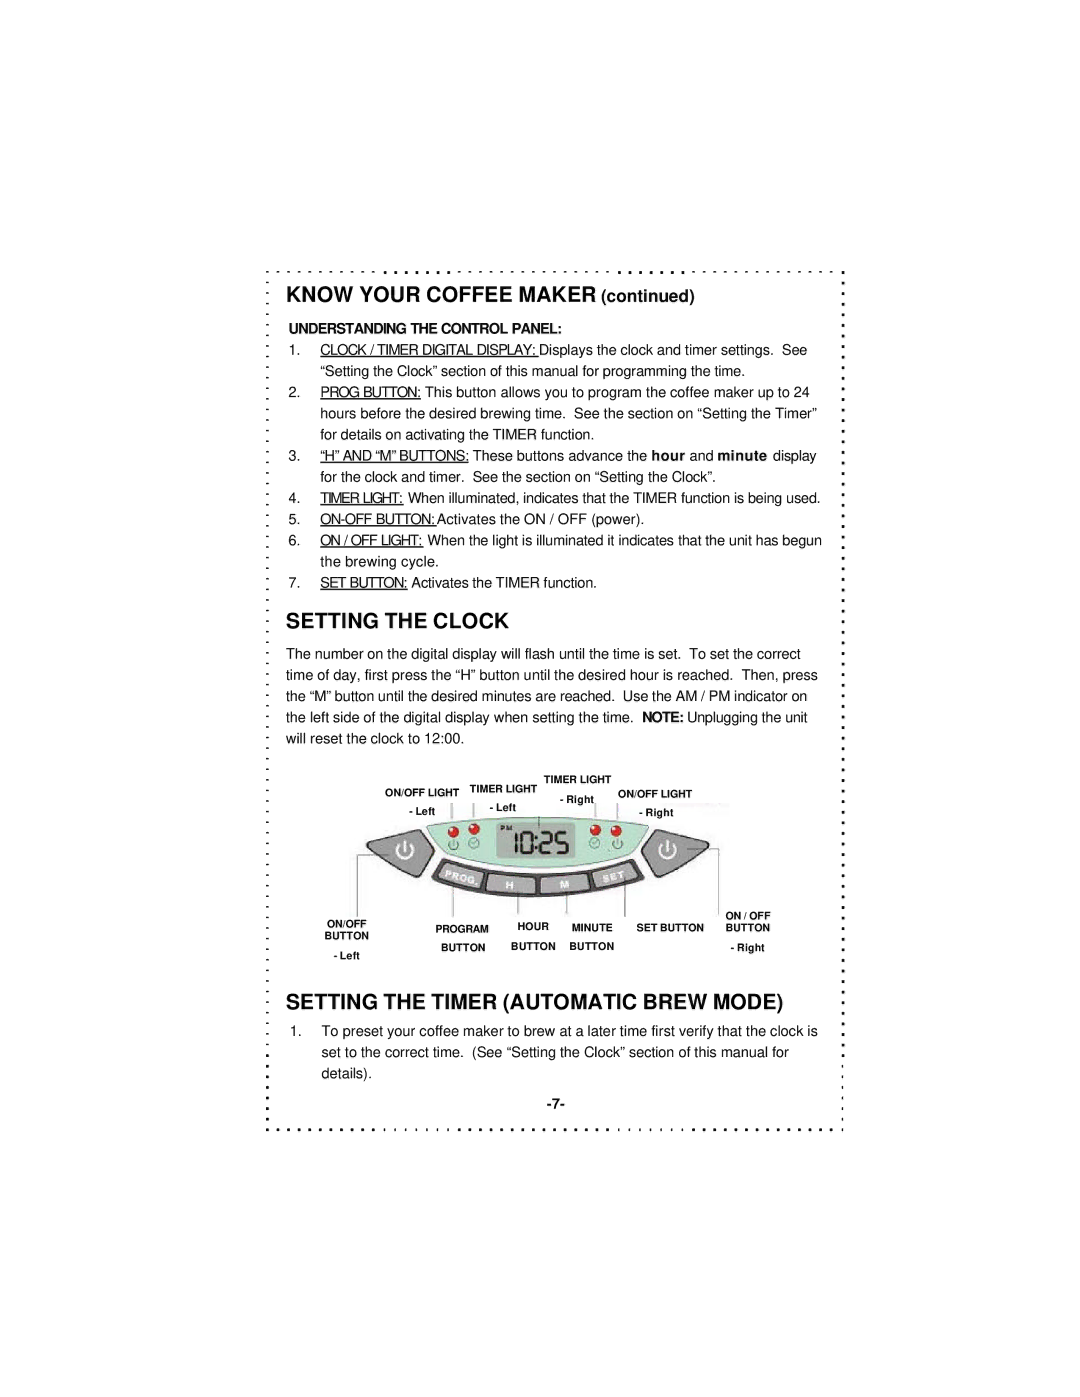
Additionally, the DD1000TC includes an intuitive control panel that features an LED display, which provides real-time humidity readings and allows for easy adjustment of settings. The user-friendly interface makes it simple to set the desired humidity level, operate the fan speed, and program the unit on or off according to your schedule.
Energy efficiency is another strong point of the DeLonghi DD1000TC Series. Featuring an Energy Star rating, this dehumidifier is designed to consume less power while delivering outstanding performance. This not only contributes to lower energy bills but also makes it an environmentally friendly choice.
In conclusion, the DeLonghi DD1000TC Series integrates advanced technologies with practical features to create a high-performance dehumidifier. Its Condensation technology, significant moisture removal capabilities, portability, and energy efficiency make it a top choice for anyone looking to improve indoor air quality and maintain comfort in their living spaces. Whether tackling humidity issues in your home or simply seeking a more comfortable environment, the DD1000TC Series is a reliable and stylish solution.