ASSEMBLING PEDESTAL (MODELS 23-730 & 23-735)
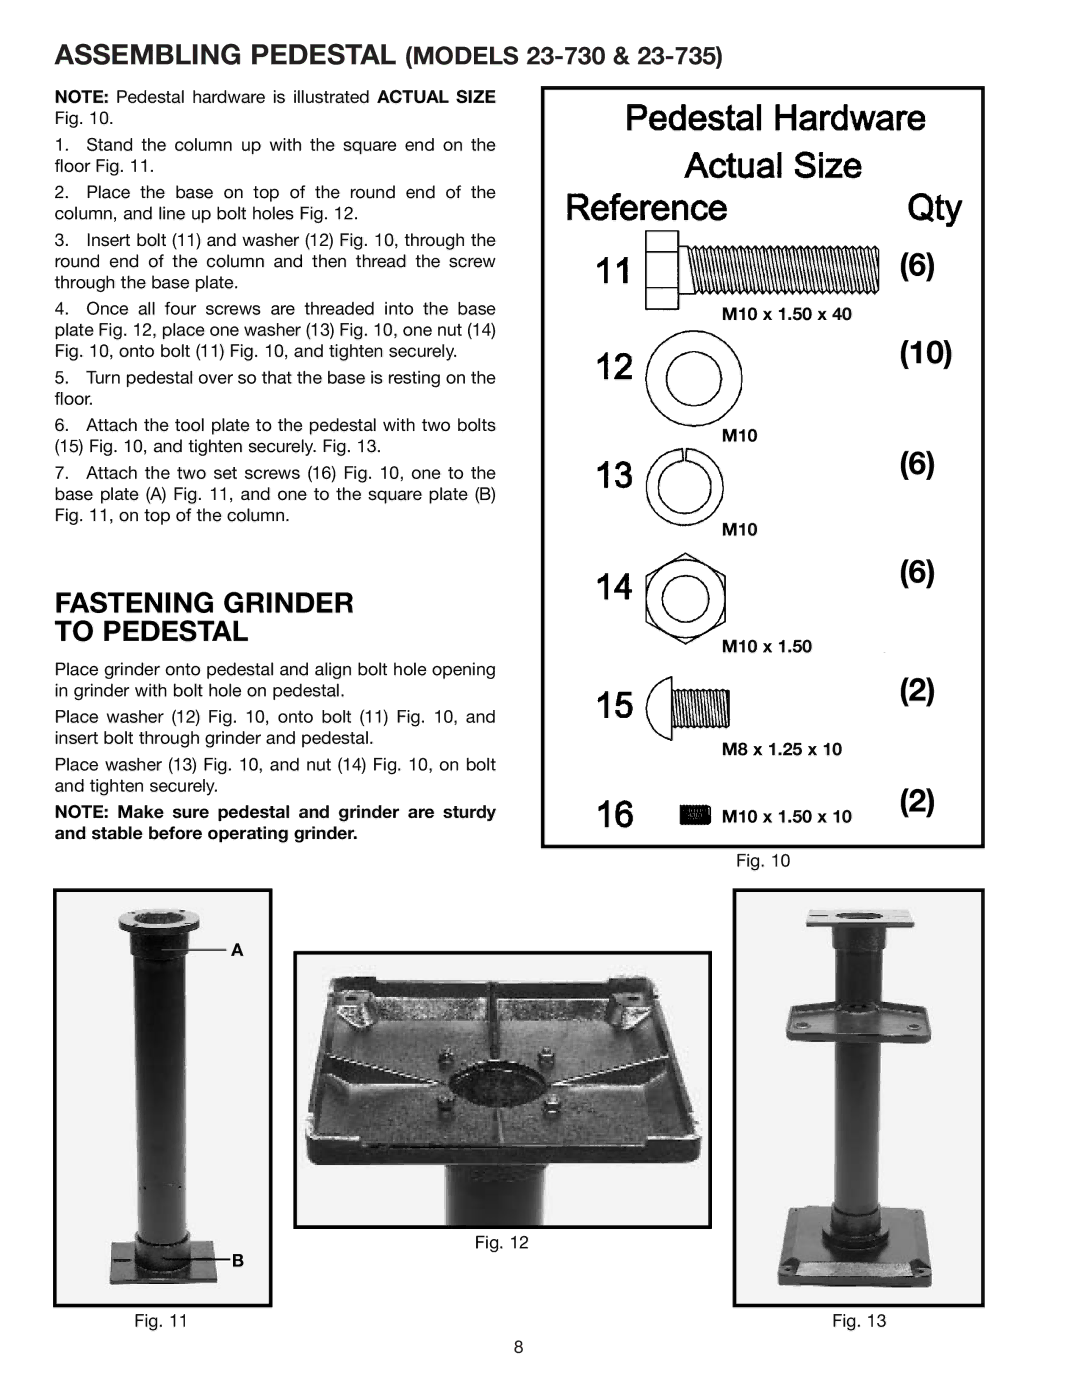
NOTE: Pedestal hardware is illustrated ACTUAL SIZE Fig. 10.
1.Stand the column up with the square end on the floor Fig. 11.
2.Place the base on top of the round end of the column, and line up bolt holes Fig. 12.
3.Insert bolt (11) and washer (12) Fig. 10, through the round end of the column and then thread the screw through the base plate.
4.Once all four screws are threaded into the base plate Fig. 12, place one washer (13) Fig. 10, one nut (14) Fig. 10, onto bolt (11) Fig. 10, and tighten securely.
5.Turn pedestal over so that the base is resting on the floor.
6.Attach the tool plate to the pedestal with two bolts
(15) Fig. 10, and tighten securely. Fig. 13.
7.Attach the two set screws (16) Fig. 10, one to the base plate (A) Fig. 11, and one to the square plate (B) Fig. 11, on top of the column.
FASTENING GRINDER
TO PEDESTAL
Place grinder onto pedestal and align bolt hole opening in grinder with bolt hole on pedestal.
Place washer (12) Fig. 10, onto bolt (11) Fig. 10, and insert bolt through grinder and pedestal.
Place washer (13) Fig. 10, and nut (14) Fig. 10, on bolt and tighten securely.
NOTE: Make sure pedestal and grinder are sturdy and stable before operating grinder.
M10 x 1.50 x 40
M10
M10
M10 x 1.50
M8 x 1.25 x 10
M10 x 1.50 x 10
Fig. 10
(6)
(10)
(6)
(6)
(2)
(2)
A
B
Fig. 11
Fig. 12
Fig. 13
8
