![]() AVOID CONTACT WITH THE BLADE TEETH TO PREVENT PERSONAL INJURY.
AVOID CONTACT WITH THE BLADE TEETH TO PREVENT PERSONAL INJURY.
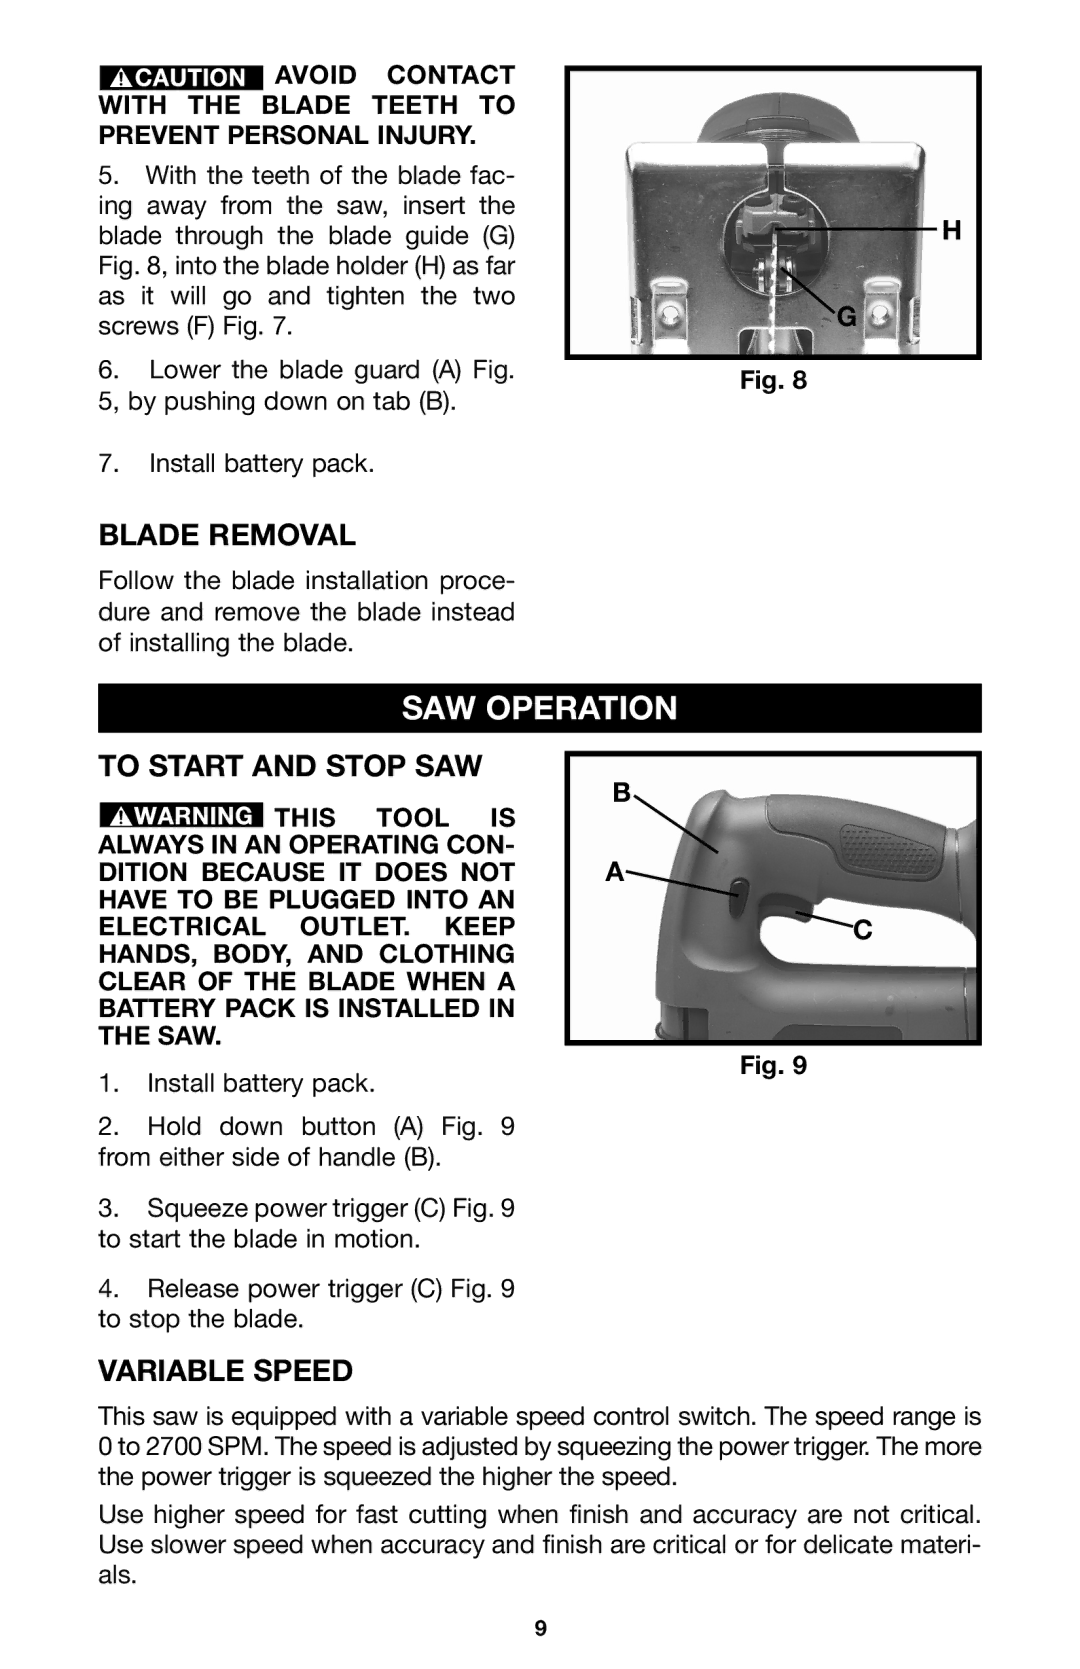
5.With the teeth of the blade fac- ing away from the saw, insert the blade through the blade guide (G) Fig. 8, into the blade holder (H) as far as it will go and tighten the two screws (F) Fig. 7.
6.Lower the blade guard (A) Fig. 5, by pushing down on tab (B).
7.Install battery pack.
H
G
Fig. 8
BLADE REMOVAL
Follow the blade installation proce- dure and remove the blade instead of installing the blade.
SAW OPERATION
TO START AND STOP SAW
![]() THIS TOOL IS ALWAYS IN AN OPERATING CON- DITION BECAUSE IT DOES NOT HAVE TO BE PLUGGED INTO AN ELECTRICAL OUTLET. KEEP HANDS, BODY, AND CLOTHING CLEAR OF THE BLADE WHEN A BATTERY PACK IS INSTALLED IN THE SAW.
THIS TOOL IS ALWAYS IN AN OPERATING CON- DITION BECAUSE IT DOES NOT HAVE TO BE PLUGGED INTO AN ELECTRICAL OUTLET. KEEP HANDS, BODY, AND CLOTHING CLEAR OF THE BLADE WHEN A BATTERY PACK IS INSTALLED IN THE SAW.
1.Install battery pack.
B
A![]()
C
Fig. 9
2.Hold down button (A) Fig. 9 from either side of handle (B).
3.Squeeze power trigger (C) Fig. 9 to start the blade in motion.
4.Release power trigger (C) Fig. 9 to stop the blade.
VARIABLE SPEED
This saw is equipped with a variable speed control switch. The speed range is 0 to 2700 SPM. The speed is adjusted by squeezing the power trigger. The more the power trigger is squeezed the higher the speed.
Use higher speed for fast cutting when finish and accuracy are not critical. Use slower speed when accuracy and finish are critical or for delicate materi- als.
9
