FIREPLACE
INSTALLATION
Continued
FRAMING
Construct framing using dimensions shown if Figures 6, 7 and 8. (Use the figure applicable to your application.) Figure 6 shows the framing dimensions prior to having the appliance in place. Once the unit has been fitted, bring studs in against nailing flanges located on the side of the appliance making sure a 1" clearance is maintained as shown in Figure 7.
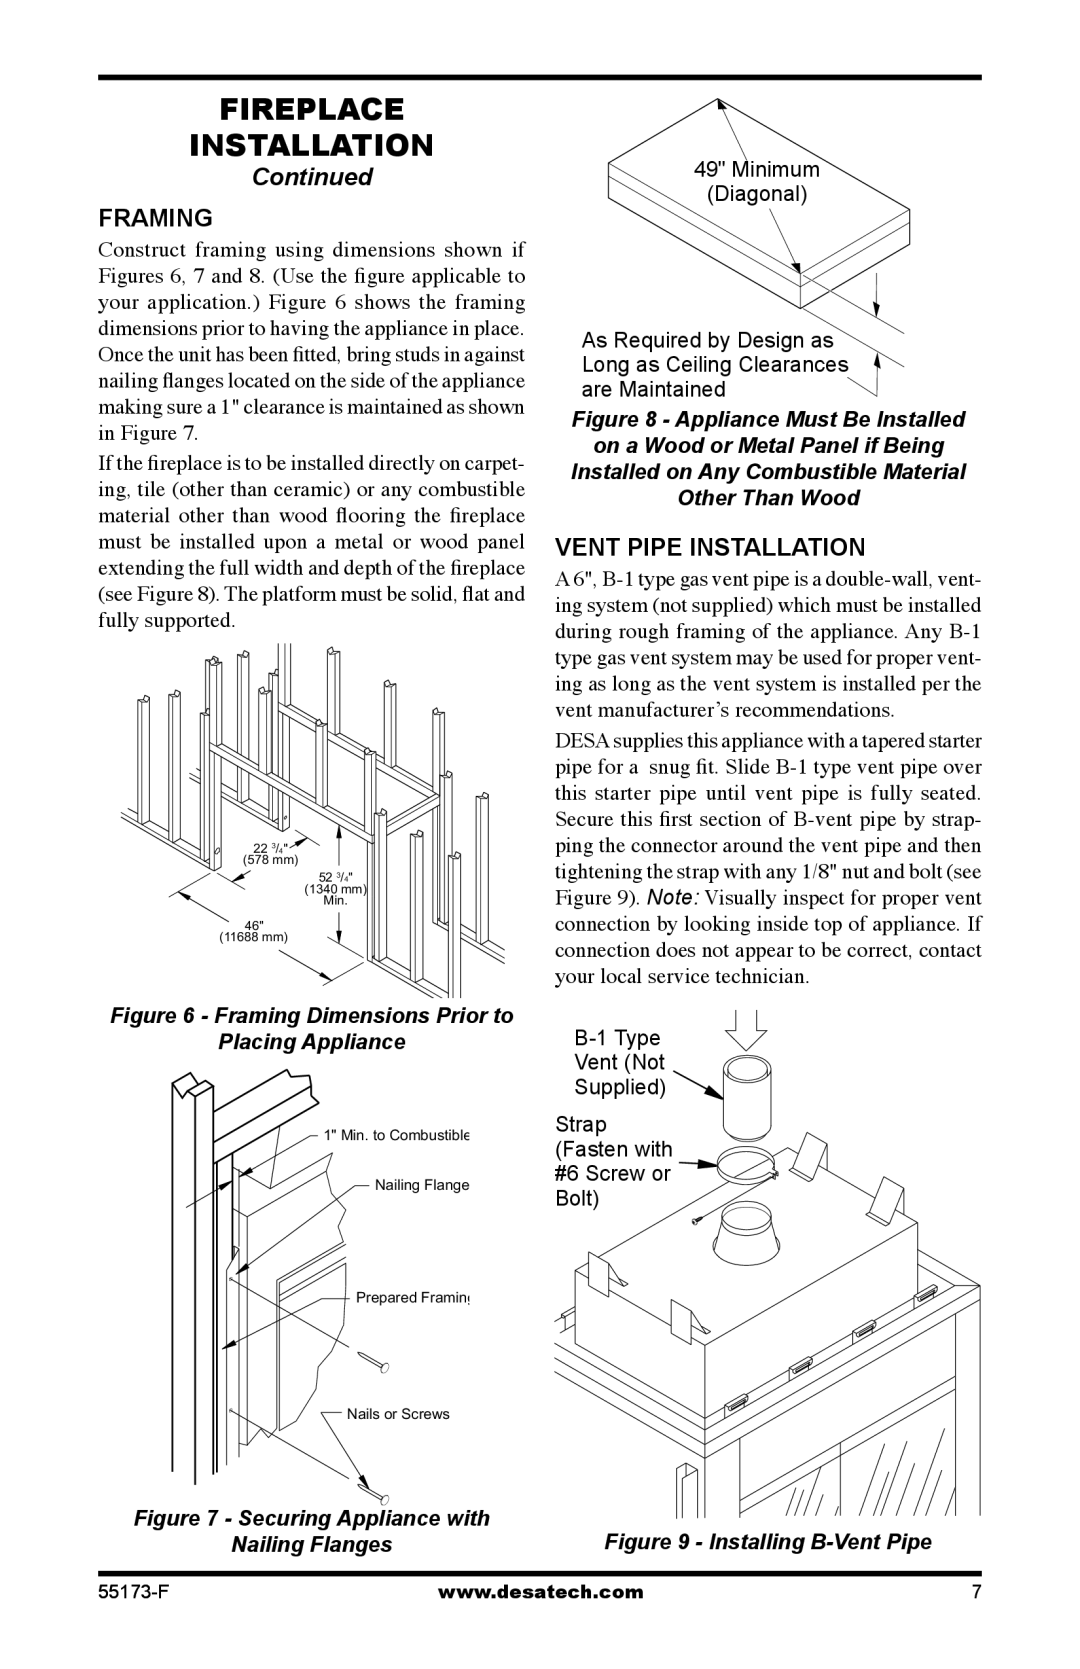
If the fireplace is to be installed directly on carpet- ing, tile (other than ceramic) or any combustible material other than wood flooring the fireplace must be installed upon a metal or wood panel extending the full width and depth of the fireplace (see Figure 8). The platform must be solid, flat and fully supported.
22 3/4" ![]()
(578 mm)
52 3/4"
(1340 mm)
Min.
46"
(11688 mm)
Figure 6 - Framing Dimensions Prior to
Placing Appliance
1" Min. to Combustible
Nailing Flange
49" Minimum
(Diagonal)
As Required by Design as Long as Ceiling Clearances are Maintained
Figure 8 - Appliance Must Be Installed
on a Wood or Metal Panel if Being
Installed on Any Combustible Material
Other Than Wood
VENT PIPE INSTALLATION
A 6",
DESA supplies this appliance with a tapered starter pipe for a snug fit. Slide
B-1 Type Vent (Not Supplied) 
Strap (Fasten with  #6 Screw or
 Bolt)
Bolt)
Prepared Framing |
|
Nails or Screws |
|
Figure 7 - Securing Appliance with | Figure 9 - Installing |
Nailing Flanges |
www.desatech.com | 7 |