
LP155AT specifications
Desa LP155AT is a versatile and efficient liquid propane heater that has become increasingly popular for both residential and commercial applications. Known for its reliability and performance, this heater offers a range of features that cater to the needs of users looking for a dependable heating solution.One of the standout characteristics of the Desa LP155AT is its impressive heating capacity. With an output of 155,000 BTU, this heater can effectively warm large spaces, making it ideal for warehouses, garages, workshops, and other expansive areas. The ability to provide substantial heat not only enhances comfort but also increases productivity in environments where temperature control is crucial.
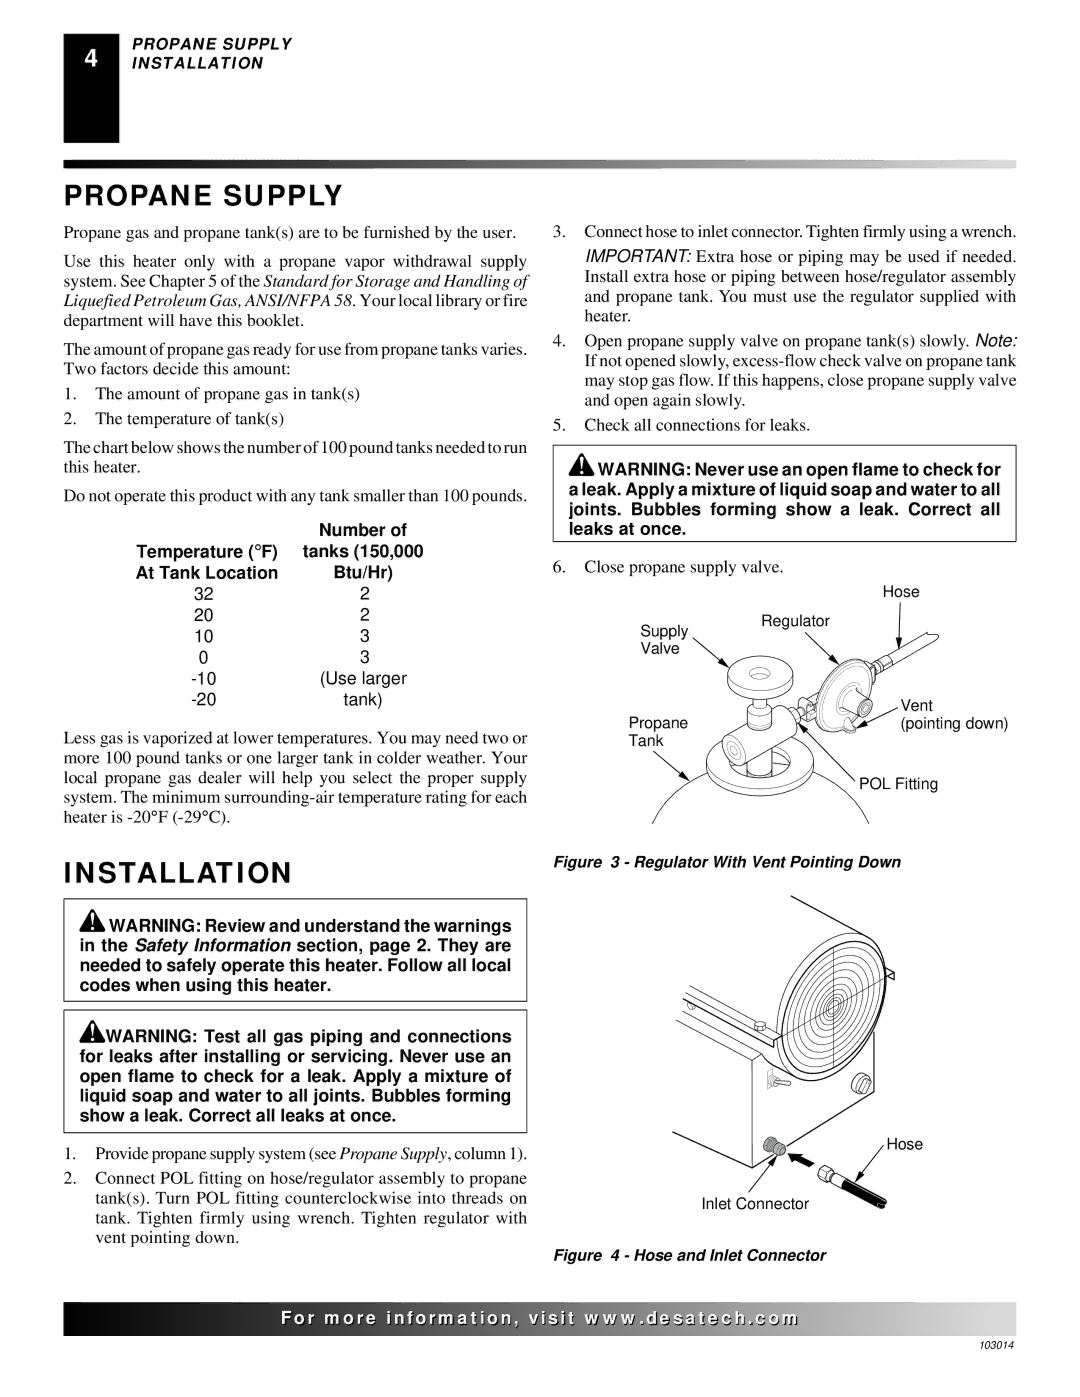
The design of the Desa LP155AT emphasizes portability and ease of use. Featuring built-in wheels, it is easy to move from one location to another, allowing for flexible heating options as the needs change throughout the day. Moreover, the heater is equipped with a durable steel construction that ensures longevity and resilience, capable of withstanding various environmental conditions.
Safety is a paramount consideration in the design of the Desa LP155AT. It includes an automatic shut-off feature that activates in the event of flame failure, ensuring that users can operate the heater with confidence. Additionally, the unit operates using liquid propane, a clean-burning fuel that minimizes emissions and environmental impact compared to other fuel sources.
The heater is designed for efficient fuel usage, optimizing performance while keeping operational costs manageable. The adjustable thermostat allows users to set desired temperatures for maximum comfort, and the forced air design ensures that heat is distributed evenly throughout the space.
In conclusion, the Desa LP155AT is a powerful, portable, and safe heating solution that meets the demands of various applications. With its robust construction, significant heating capacity, and user-friendly features, it is an excellent choice for anyone looking to enhance their heating capabilities. Whether for personal use or in a commercial setting, the Desa LP155AT proves to be a reliable partner in maintaining a warm and comfortable environment.