INSTALLATION | WARNING |
Review and understand the warnings in the Safety Informa- tion Section. They are needed to safely operate this heater. Follow all local codes when using this heater.
![]() WARNING
WARNING
Test all gas piping and connections for leaks after installation or servicing. Never use an open flame to check for a leak. Apply a mixture of liquid soap and water to all joints. Bubbles forming show a leak. Correct all leaks at once.
1.Provide propane supply system (see Propane Supply, page 5).
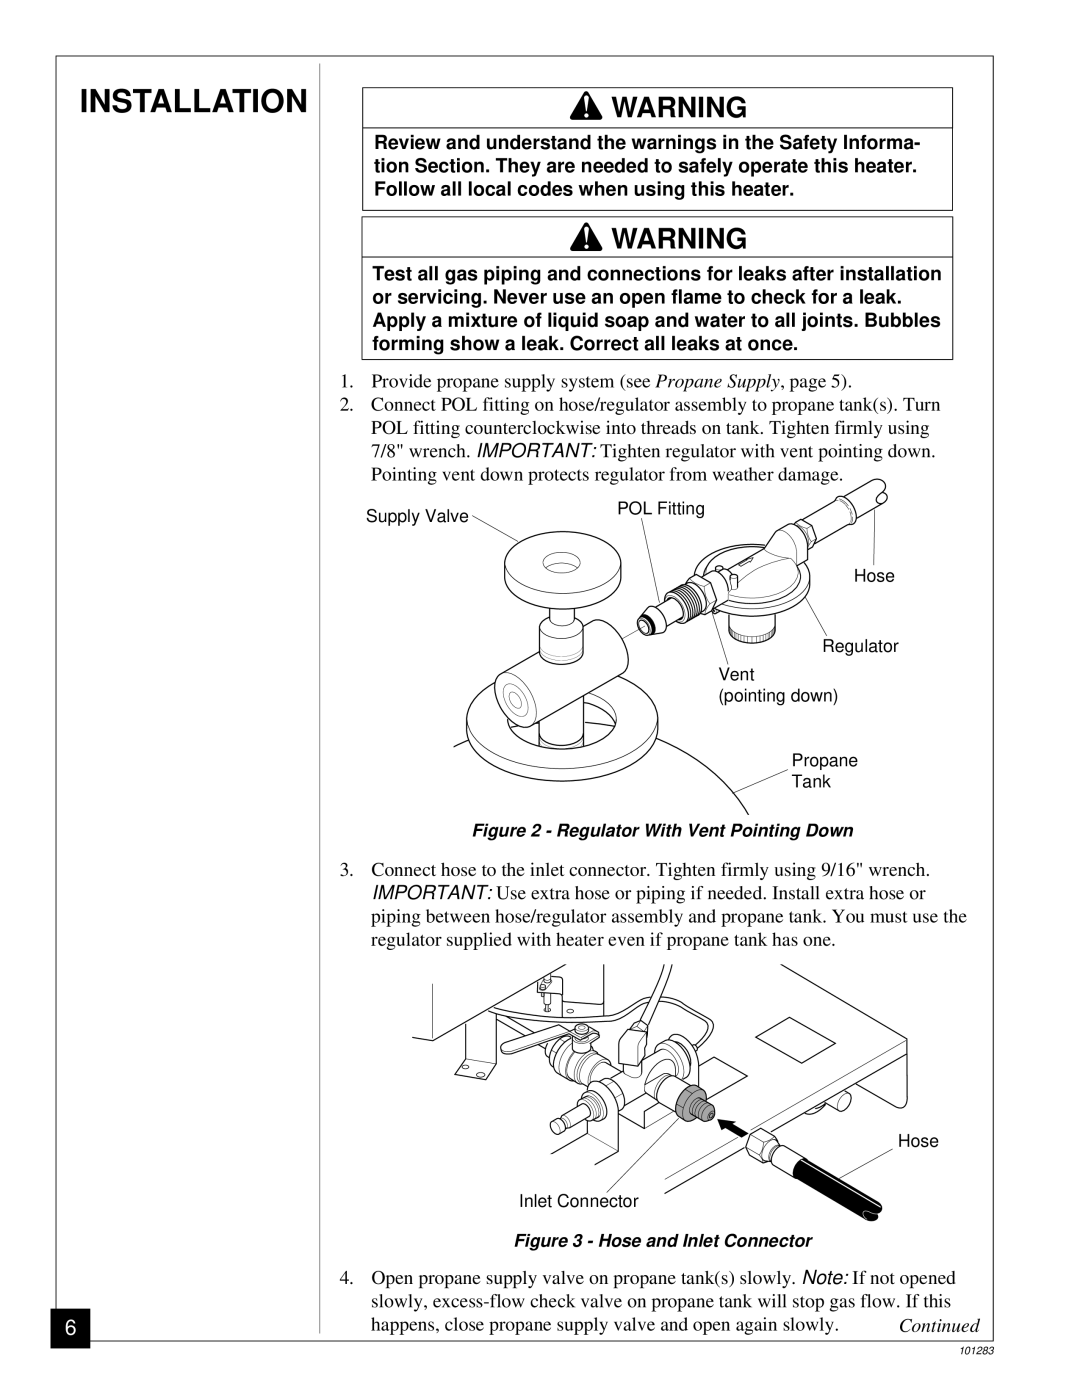
2.Connect POL fitting on hose/regulator assembly to propane tank(s). Turn POL fitting counterclockwise into threads on tank. Tighten firmly using 7/8" wrench. IMPORTANT: Tighten regulator with vent pointing down. Pointing vent down protects regulator from weather damage.
Supply Valve | POL Fitting |
|
Hose
Regulator
Vent
(pointing down)
Propane
![]() Tank
Tank
Figure 2 - Regulator With Vent Pointing Down
3.Connect hose to the inlet connector. Tighten firmly using 9/16" wrench. IMPORTANT: Use extra hose or piping if needed. Install extra hose or piping between hose/regulator assembly and propane tank. You must use the regulator supplied with heater even if propane tank has one.
|
|
|
|
| Hose |
|
|
|
|
|
|
|
| Inlet Connector |
| ||
| Hose and Inlet |
| |||
| Figure 3 - Hose and Inlet Connector |
| |||
| 4. Open propane supply valve on propane tank(s) slowly. Note: If not opened | ||||
| slowly, | ||||
6 | happens, close propane supply valve and open again slowly. | Continued | |||
101283