
BFH24T, BFH24TB, BFH24TS, BFH24T specifications
The Dimplex BFH24 series, which includes models BFH24TB, BFH24TS, BFH24T, and BFH24T, represents an innovative approach to heating and is designed to cater to diverse needs in both domestic and commercial spaces. Known for their elegance and efficiency, these electric fires combine modern aesthetics with advanced heating technologies, creating a comfortable environment while minimizing energy costs.One of the standout features of the Dimplex BFH24 series is the Optiflame® technology, which offers a unique visual effect that simulates a realistic flame. This patented technology utilizes a combination of LED lights and mirrors to create a flickering flame effect, ensuring that the fire looks authentic without the hassles associated with traditional fireplaces. The flame effect can be used independently of the heat source, making it perfect for year-round enjoyment.
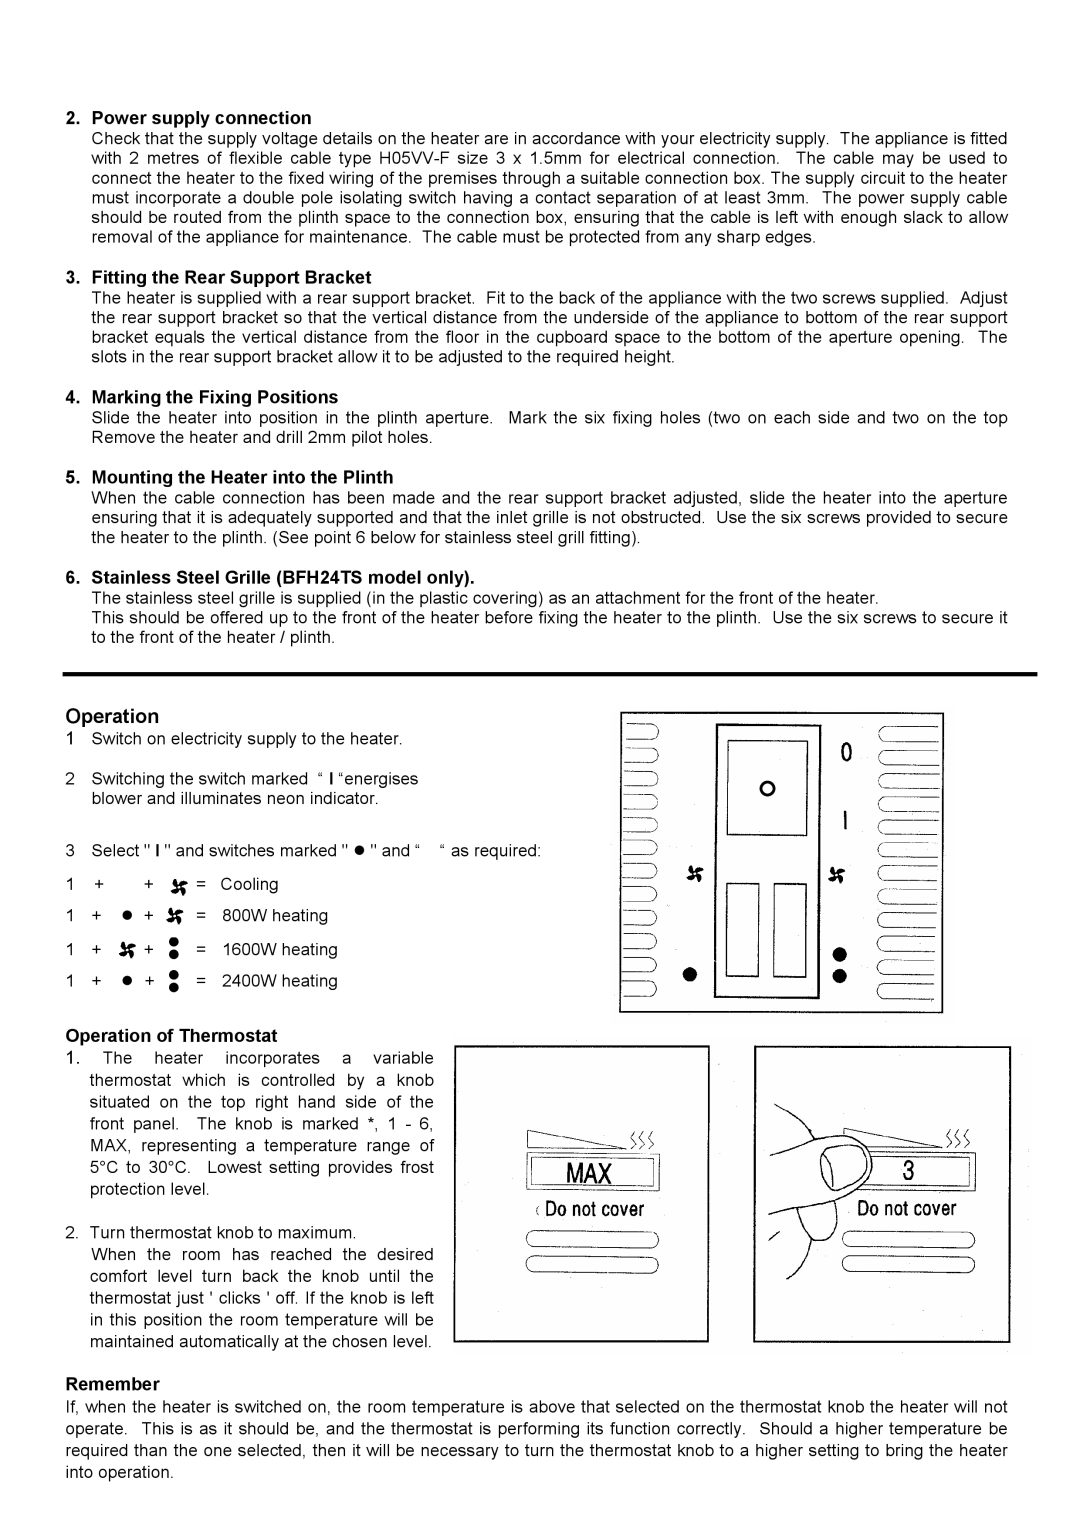
In terms of heating performance, the BFH24TB, BFH24TS, BFH24T, and BFH24T models are equipped with powerful fan heaters that deliver quick and efficient warmth. The adjustable heat settings allow users to customize the heating level according to their specific needs, promoting comfort while also conserving energy. This means that you can easily set the desired temperature for any occasion, whether it be a cozy evening at home or a gathering with friends.
Furthermore, these models come with a sleek and modern design that can seamlessly blend into various interior styles. The options for black, silver, or a combination of finishes ensure that there is a BFH24 model to suit almost any decor. Additionally, the compact size makes it easy to install in a variety of spaces, from living rooms to bedrooms or offices.
The remote control feature found in these models enhances user convenience, allowing for effortless operation without the need to get up. With a simple press of a button, users can adjust the flame and heating settings, ensuring an optimal and personalized experience.
Safety is also a priority with the Dimplex BFH24 models. Equipped with a thermostat and overheat protection, these heaters are designed to automatically shut off if they reach unsafe temperatures, providing peace of mind for users. In summary, the Dimplex BFH24TB, BFH24TS, BFH24T, and BFH24T are excellent choices for those who want effective heating, contemporary design, and advanced technology, all wrapped up in one stylish package.