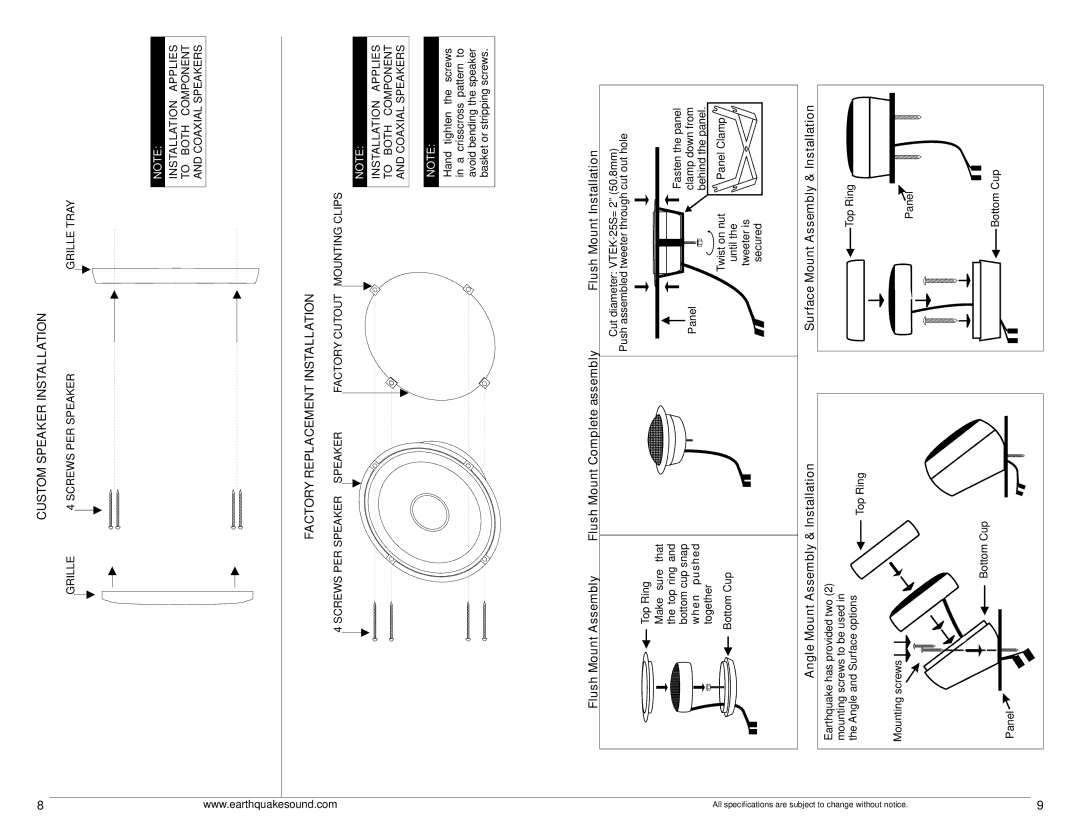
F5.25, FS6.5, F4.0, F6x9, F5x7 specifications
Earthquake Sound is renowned for its innovative and high-performance audio solutions, and their lineup of speakers, including the FC5.2, F5x7, F6x9, F4.0, and FS6.5, exemplify their commitment to quality and technology. Each model is designed to deliver an exceptional auditory experience, tailored to various needs and preferences.The FC5.2 component speaker system focuses on providing clear, precise sound with a remarkable frequency response. This model incorporates a 5.25-inch woofer and a 1-inch silk dome tweeter, resulting in smooth highs and punchy mids. The inclusion of a high-quality crossover network ensures that frequencies are effectively distributed, allowing for a more immersive listening experience. The tunable tweeter allows audiophiles to adjust the output for personal preference, making the FC5.2 an excellent choice for those seeking customizability.
Moving onto the F5x7, this speaker is designed with versatility in mind, featuring a 5 x 7-inch design that can easily fit into various vehicle installations. The F5x7 is engineered with a polypropylene cone for durability and enhanced bass response while still delivering crisp treble frequencies. Its lightweight structure aids installation, and the built-in mounting system provides a secure fit, making it a popular choice for aftermarket upgrades.
The F6x9 speaker takes things a step further with its 6 x 9-inch size, delivering robust sound quality typically associated with larger speakers. This model includes a multi-layer composite cone that enhances mid-bass performance, ensuring a full-bodied sound. Coupled with a powerful neodymium magnet, the F6x9 promises not just volume but clarity across a range of genres.
For those looking for a compact solution, the F4.0 4-inch speaker becomes an ideal choice. With its small form factor, it doesn't compromise on performance. The F4.0 features a strong magnet structure and a well-built cone, ensuring it can handle higher power levels while providing impressive sound fidelity, making it perfect for tight spaces such as dashboards or small enclosures.
Finally, the FS6.5 model combines the advantages of both size and sound quality, featuring a 6.5-inch woofer designed for optimal bass response. The FS6.5 is equipped with a rubber surround for enhanced longevity and stability, producing deep, rich bass while maintaining clarity in the vocals.
In conclusion, the Earthquake Sound lineup—including the FC5.2, F5x7, F6x9, F4.0, and FS6.5—demonstrates a commitment to high-quality sound, versatility, and durability. Whether for home audio systems or automotive applications, these speakers are engineered to satisfy both casual listeners and audiophiles alike.

