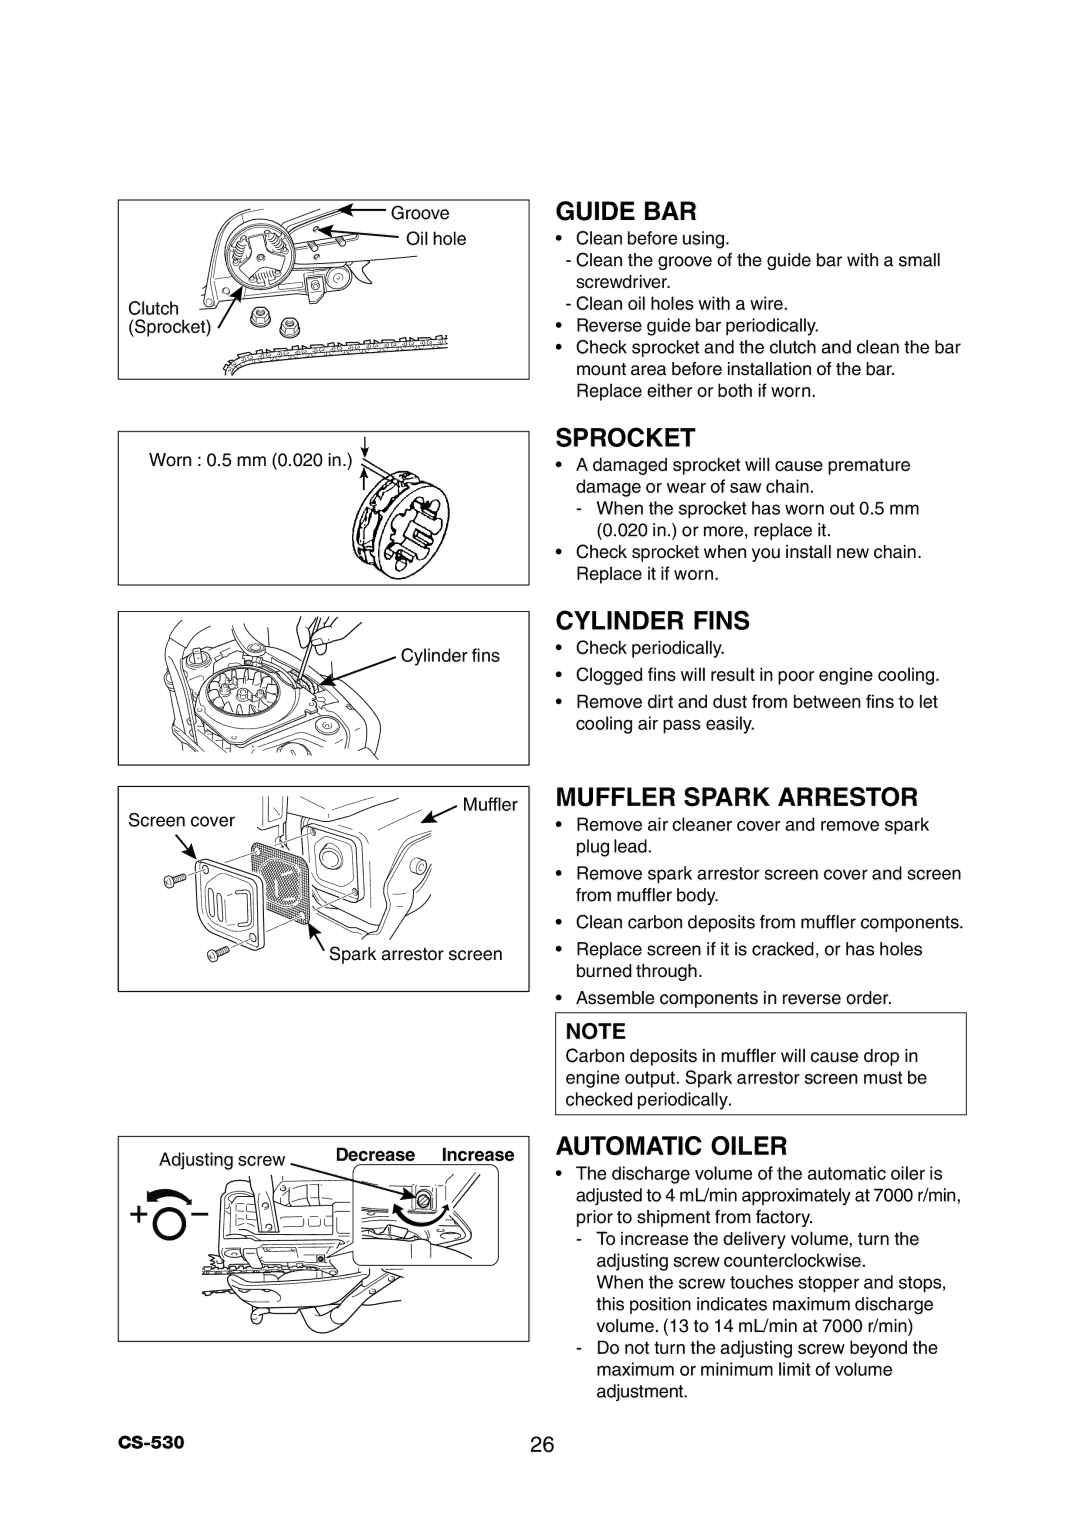
![]() Groove
Groove
![]()
![]() Oil hole
Oil hole
Clutch ![]() (Sprocket)
(Sprocket)
Worn : 0.5 mm (0.020 in.)
GUIDE BAR
•Clean before using.
-Clean the groove of the guide bar with a small screwdriver.
-Clean oil holes with a wire.
•Reverse guide bar periodically.
•Check sprocket and the clutch and clean the bar mount area before installation of the bar. Replace either or both if worn.
SPROCKET
•A damaged sprocket will cause premature damage or wear of saw chain.
-When the sprocket has worn out 0.5 mm (0.020 in.) or more, replace it.
•Check sprocket when you install new chain. Replace it if worn.
Cylinder fins
CYLINDER FINS
•Check periodically.
•Clogged fins will result in poor engine cooling.
•Remove dirt and dust from between fins to let cooling air pass easily.
Muffler
Screen cover
Spark arrestor screen
MUFFLER SPARK ARRESTOR
•Remove air cleaner cover and remove spark plug lead.
•Remove spark arrestor screen cover and screen from muffler body.
•Clean carbon deposits from muffler components.
•Replace screen if it is cracked, or has holes burned through.
•Assemble components in reverse order.
NOTE
Carbon deposits in muffler will cause drop in engine output. Spark arrestor screen must be checked periodically.
Adjusting screw | Decrease | Increase |
AUTOMATIC OILER
•The discharge volume of the automatic oiler is adjusted to 4 mL/min approximately at 7000 r/min, prior to shipment from factory.
-To increase the delivery volume, turn the adjusting screw counterclockwise.
When the screw touches stopper and stops, this position indicates maximum discharge volume. (13 to 14 mL/min at 7000 r/min)
-Do not turn the adjusting screw beyond the maximum or minimum limit of volume adjustment.
26 |
