
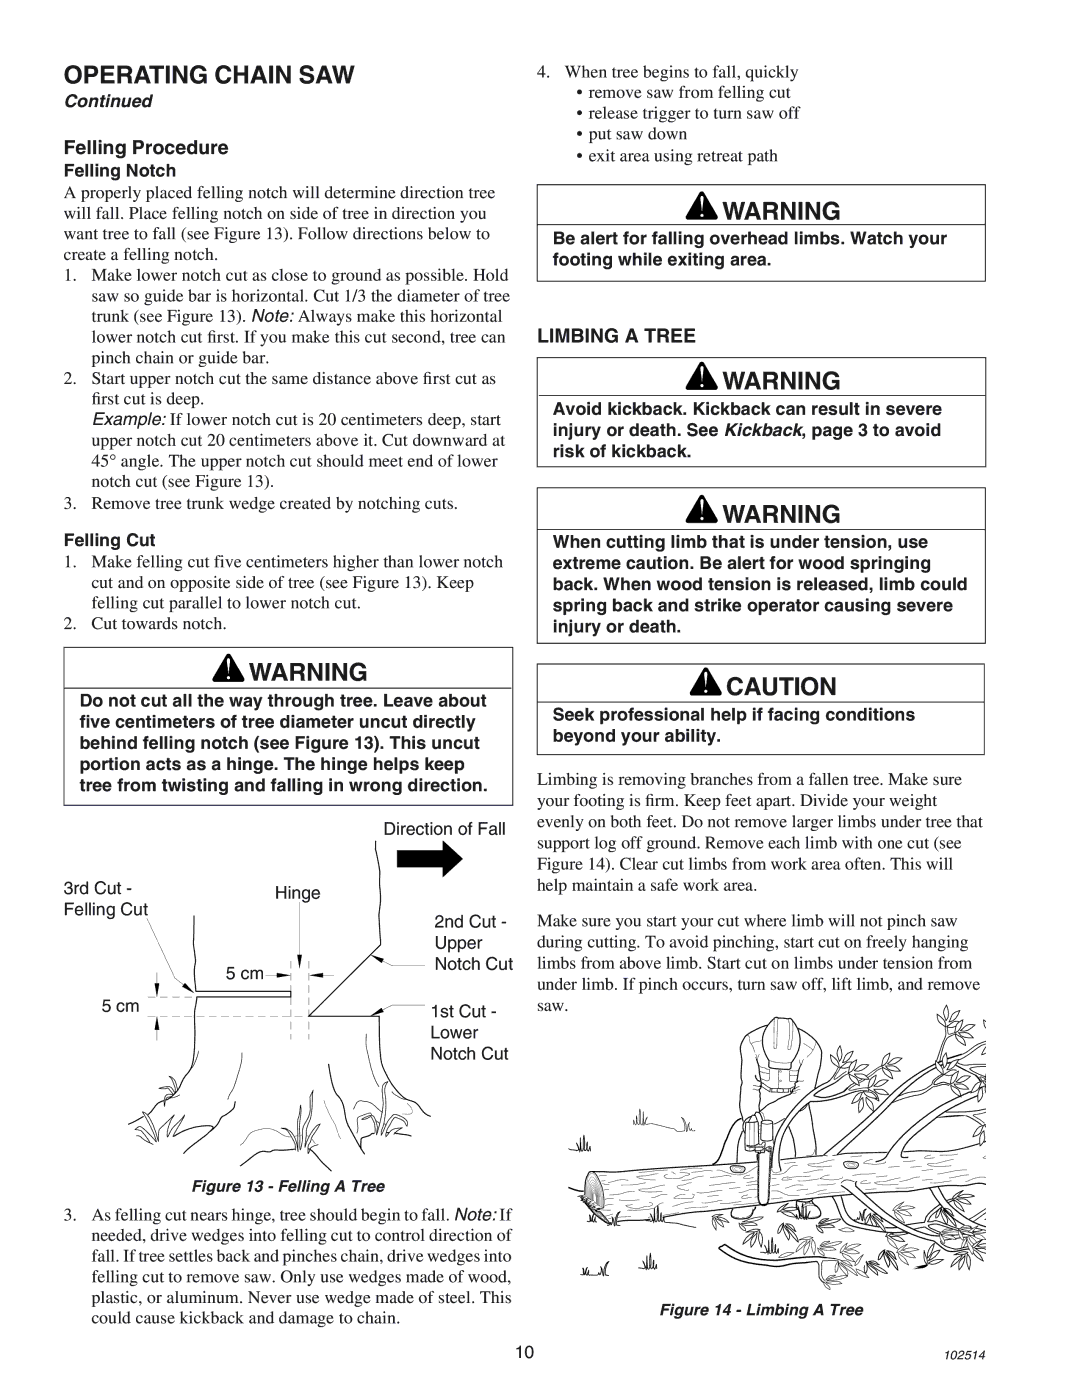
ECS-2000 specifications
The Echo ECS-2000 is a versatile and powerful chainsaw designed to meet the needs of both professionals and enthusiasts in the realm of outdoor power equipment. With its combination of advanced technologies and robust features, the ECS-2000 stands out as a reliable choice for various cutting tasks.One of the main features of the ECS-2000 is its high-performance engine. Powered by a 20.1 cc, 2-stroke engine, this chainsaw delivers impressive cutting power while remaining lightweight and easy to maneuver. The engine is engineered to provide efficient fuel consumption, reducing emissions and making it an environmentally friendly option for users who prioritize sustainability.
The ECS-2000 also incorporates Echo's Advanced Vibration Reduction (AVR) technology, which minimizes vibrations during operation. This feature not only enhances user comfort, allowing for longer periods of usage without fatigue, but also contributes to better precision and control when making cuts. The comfortable grip design further complements this feature, ensuring a secure hold even in challenging conditions.
Another notable characteristic of the Echo ECS-2000 is its adjustable automatic oiler. This innovative system allows users to customize the oil delivery based on the material being cut, optimizing chain lubrication and extending the life of the chain. This ensures optimal performance during operation and reduces the frequency of maintenance, making the ECS-2000 a low-maintenance option.
The chainsaw is equipped with a lightweight yet durable chassis, constructed from high-quality materials that are designed to withstand rigorous use in various environments. This durability is complemented by a chain brake system for added safety, providing instant stopping power if kickback occurs.
The ECS-2000 also features a tool-less air filter cover, allowing for quick and easy access for maintenance and cleaning. This user-friendly design ensures that operators can keep their equipment in top condition with minimal effort.
In summary, the Echo ECS-2000 is a powerful and efficient chainsaw that balances performance with user comfort and safety. Its advanced engine technology, ergonomic design, customizable oiling system, and overall durability make it an excellent choice for anyone looking to tackle demanding cutting tasks with ease. Whether for professional use or home garden projects, this chainsaw delivers the reliability and efficiency that users expect from Echo.