
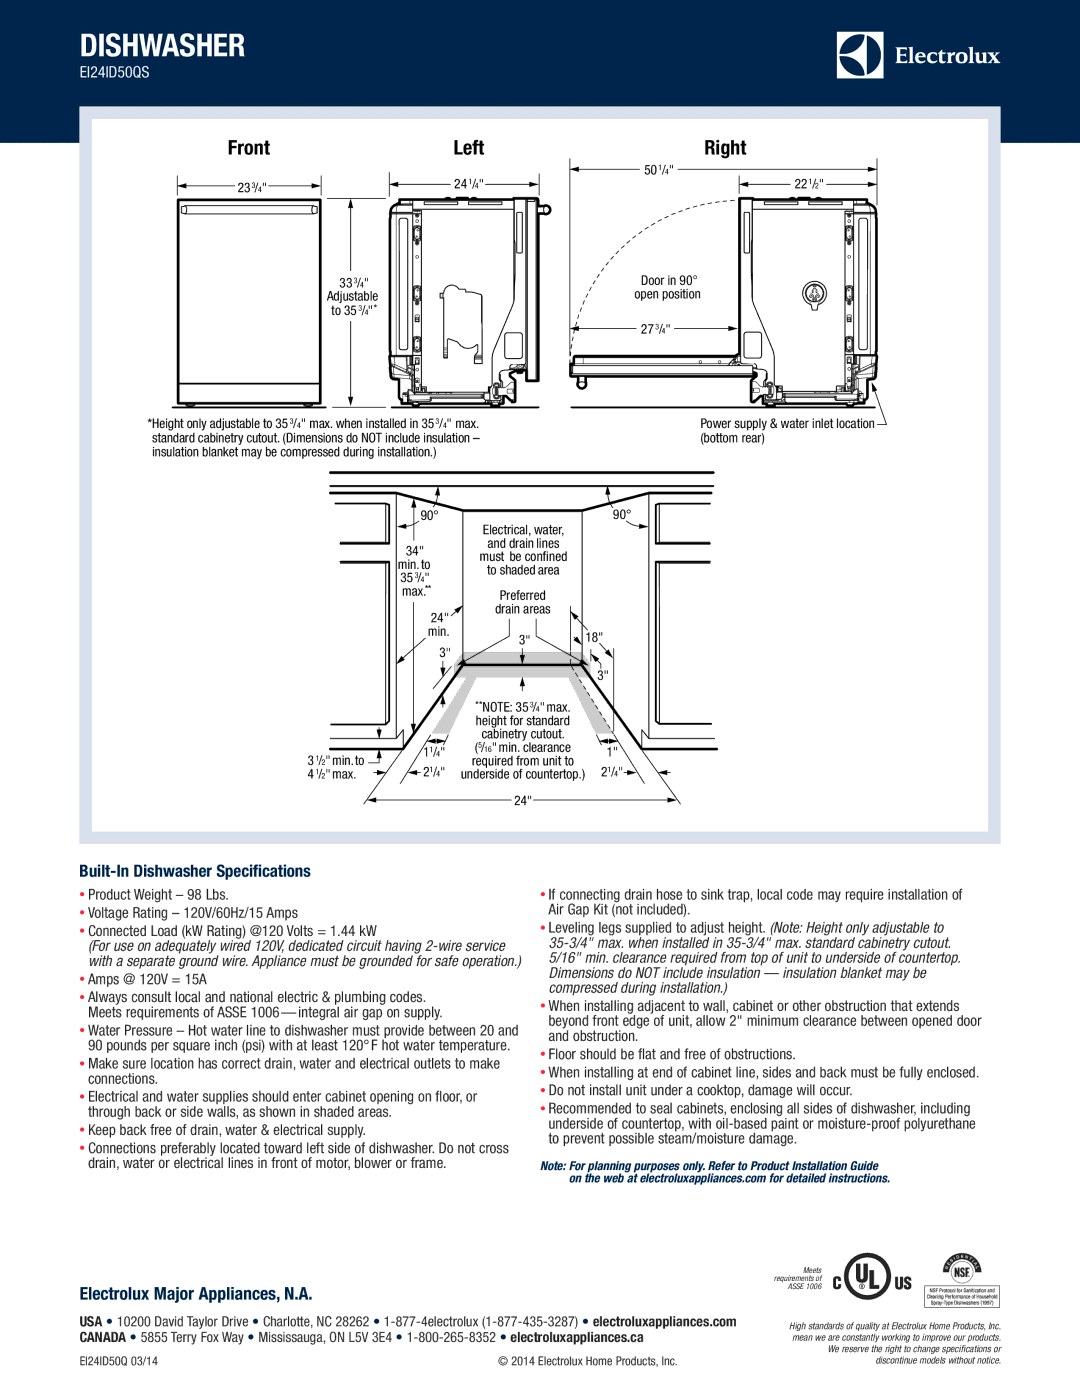
EI24ID50QS specifications
The Electrolux EI24ID50QS is a state-of-the-art built-in dishwasher that combines functionality, efficiency, and a sleek design to elevate your kitchen experience. This premium appliance is engineered to seamlessly fit into your kitchen cabinetry while delivering exceptional cleaning performance and user-friendly features.One of the standout characteristics of the EI24ID50QS is its spacious interior, accommodating up to 24 place settings in a single load. This makes it perfect for larger families or those who frequently entertain guests. The flexible loading options are enhanced by adjustable racks, allowing you to customize the space according to your needs. The third rack feature provides additional space for utensils, making it easier to load and unload while ensuring a more efficient wash.
In terms of cleaning technology, the Electrolux EI24ID50QS utilizes a proven combination of powerful jets and smart sensors. The DishSense technology automatically adjusts the wash cycle based on the soil level of the dishes, ensuring optimal cleaning without wasting water or energy. With multiple wash cycles, including a dedicated gentle wash for delicate items, this dishwasher caters to various cleaning needs while protecting your valuable china and glassware.
Energy efficiency is another critical aspect of the EI24ID50QS. It boasts an ENERGY STAR rating, meaning it meets strict energy efficiency guidelines set by the EPA. This not only helps reduce your environmental impact but also lowers utility bills, making it a wise investment for the eco-conscious consumer.
Noise reduction is a key feature of the Electrolux EI24ID50QS. It operates at a whisper-quiet 44 dBA, making it one of the quietest models on the market. This allows you to run your dishwasher anytime without disturbing your household activities or conversations.
The sleek stainless steel finish of the EI24ID50QS adds a touch of elegance to any kitchen decor while being resistant to fingerprints and smudges, ensuring that your appliance maintains its pristine appearance. Smart features, including a delay start option and a convenient control panel, enhance usability, allowing you to manage your dishwashing tasks smoothly and efficiently.
In summary, the Electrolux EI24ID50QS combines spacious design, intelligent cleaning technologies, and energy efficiency, all wrapped in a stylish package, making it an excellent choice for modern kitchens. Its innovative features and high-performance specifications ensure that your dishes come out sparkling clean every time.