Manuals
/
Elite Screens
/
Computer Equipment
/
Projector Accessories
Elite Screens
WhiteBoardScreen
manual
Installation, C x D X
Models:
WhiteBoardScreen
1
3
12
12
Download
12 pages
54.67 Kb
1
2
3
4
5
6
7
8
Install
Parts list
Warranty
Page 3
Image 3
Page 2
Page 4
Page 3
Image 3
Page 2
Page 4
Contents
Rev. 093009‐JA
WhiteBoardScreen Series
Dual Purpose Projection Screen
User’s Guide
Parts List
Parts List for WhiteBoardScreen
C x D X
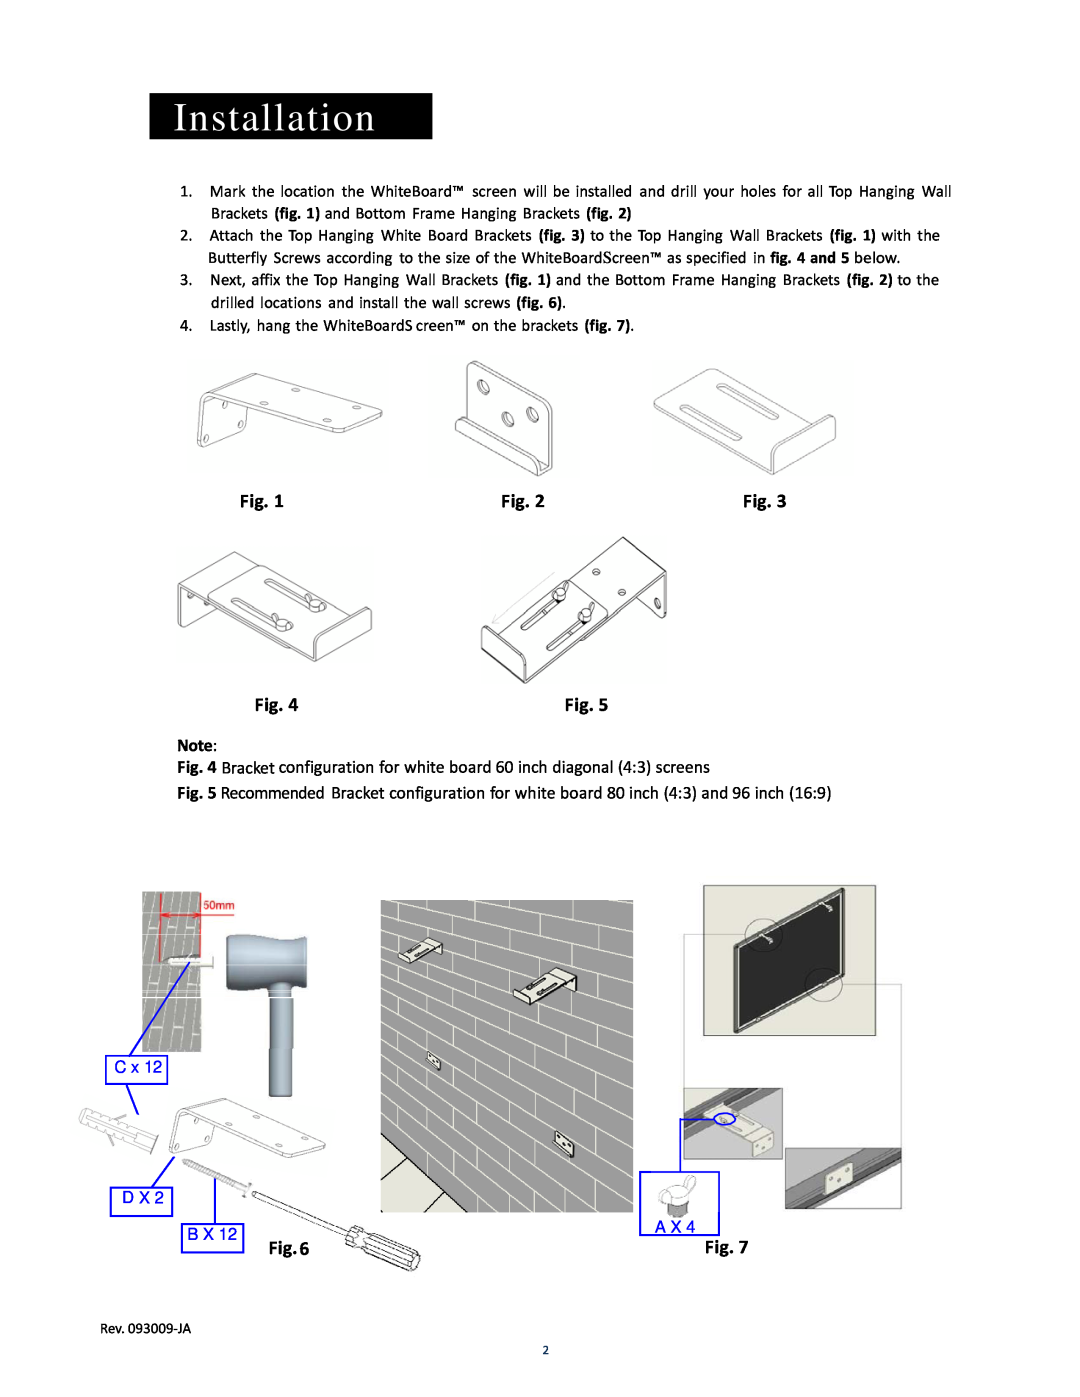
Installation
Desktop Projector Mode
Overhead Projector Mode
Rev. 060809‐JA
Desktop projector installation
Standing View
Sitting View
1230.0
Standing View Sitting View
WB80V
1630.0
User selectable average recommendations
The basis of height is from an average height
Relation between C1, F1 and θ1 Relation between C2, F2 and θ2
WB60V
installation
Overhead
Projector
2750 ‐
WB80V
1630.0
2340
WB96H
Overhead installation explanation
RMA numbers are valid for 45 days from the date of issue
Warranty Policy
info.ea@elitescreens.com
Please contact us at service@elitescreens.com.cn
Please contact us at service@elitescreens.com.tw
erik.garcia@elitescreens.com
Top
Page
Image
Contents