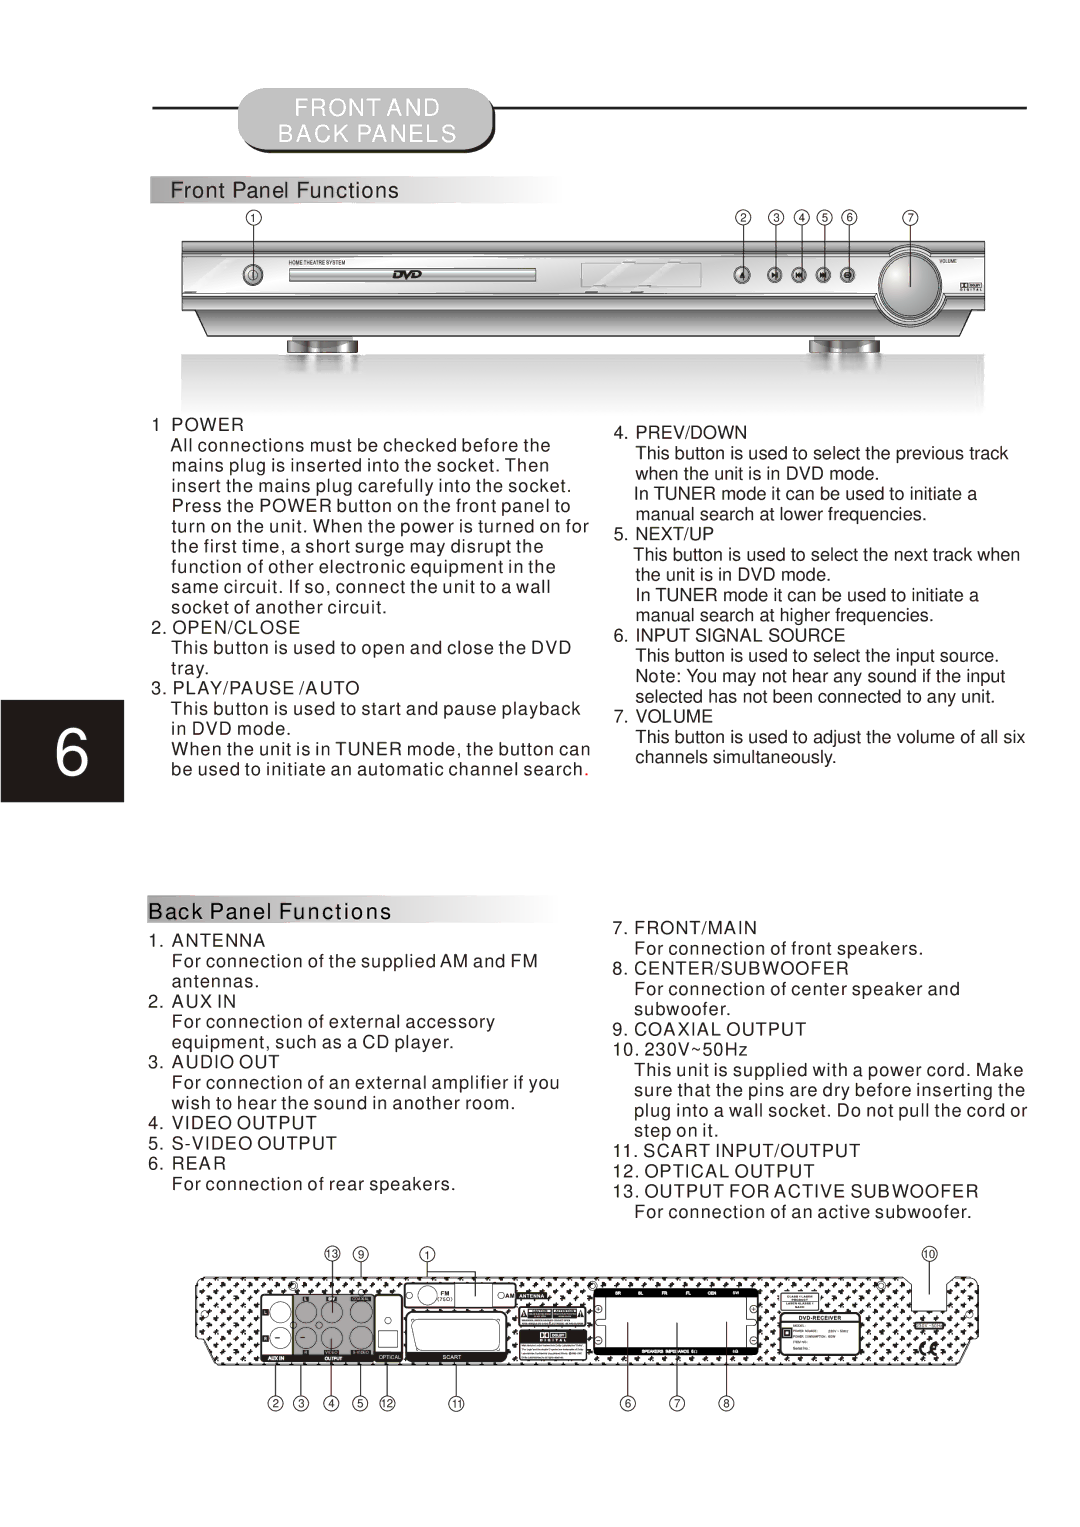
Cinema DVD Home Theatre System Vision DVD Home Theatre System specifications
The Eltax Cinema DVD Home Theatre System is a sophisticated and immersive audio-visual solution designed to enhance the home entertainment experience. This system combines advanced technologies with user-friendly features to provide a cinematic atmosphere from the comfort of your living room.At the heart of the Eltax Cinema system is its powerful DVD player, which supports various disc formats, including DVD, CD, and even MP3 discs. This versatility allows users to enjoy a diverse array of media, catering to all tastes and preferences. The integrated progressive scan technology ensures that images are displayed with enhanced clarity and reduced motion blur, making movies and shows come alive on screen.
Accompanying the DVD player is a set of high-quality speakers engineered for rich sound quality. The system typically includes multiple satellite speakers, a center channel speaker, and a powerful subwoofer. This setup provides a surround sound experience, allowing users to be enveloped in sound from all directions, enhancing the emotional impact of scenes. With a total power output that exceeds expectations, the Eltax system ensures that dialogue is clear and the action-packed sequences are powerful.
Connections and compatibility are crucial aspects of any modern home theater system. The Eltax Cinema features HDMI outputs for high-definition video and audio transmission, as well as composite and optical outputs to connect to various devices. Additionally, it supports MP3 and WMA playback, which allows for easy access to music collections. The inclusion of USB ports enables users to play media directly from flash drives, further expanding the range of content available.
Another notable feature is the user-friendly interface, designed for easy navigation through menus and options. The system typically includes a remote control that provides access to all functionalities without needing to leave the comfort of your seat. Enhanced sound and video settings allow users to customize their experience based on personal preferences or the acoustics of the room.
Overall, the Eltax Cinema DVD Home Theatre System merges functionality with style, making it an excellent choice for anyone looking to elevate their home entertainment system. With its emphasis on quality, versatility, and convenience, this system provides a complete cinematic experience that is sure to impress family and friends alike.

