Optical Wireless Mouse Quick Installation Guide
Important Information
-For Windows® 98SE operating system, please go to http://www.btc.com.tw/ website to download and install the “MouseMaestro Input Device Driver” to have the mouse 4th button and 5th button functions.
-For Windows® ME, Windows® 2000 and Windows® XP operating system, you could use the mouse immediately after connecting the mouse to your PC. If you want to enjoy the full potentiality function of the mouse, please visit our website at http://www.btc.com.tw/ to download and install the “MouseMaestro Input Device Driver”.
System Requirements
1.Available USB port
2.Microsoft® Windows® 98SE, Windows® ME, Windows® 2000 or Windows® XP operating system
3.
4.Standard sound card (for CD or Video operation)
5.Microsoft Office 97 or later version
6.Microsoft Internet Explorer 5.0 or later version (for the Internet keys)
Hardware Installation
1.Just directly plug the USB connector into the USB port on PC.
USB Connector
2.Make sure the batteries of the mouse are installed correctly. Please follow the polarity signs in the battery compartment.
Driver Installation
USB Device Driver
The USB device driver is included in Windows operating system.
During initial installation of the USB device, the system will automatically detect a new hardware being added, and then bring up "Add New Hardware Wizard" dialogue box. Please follow the Wizard's USB driver installation steps. Once this installation step is completed the basic functions of the USB device will work under the operating system. The additional functions are provided only after the MouseMaestro application is installed.
 MouseMaestro Input Device Driver
1.After you download the driver, please find the “SetupKey.exe” in the directory and
2.Then follow the
3.The driver icon ![]() will show at the
will show at the
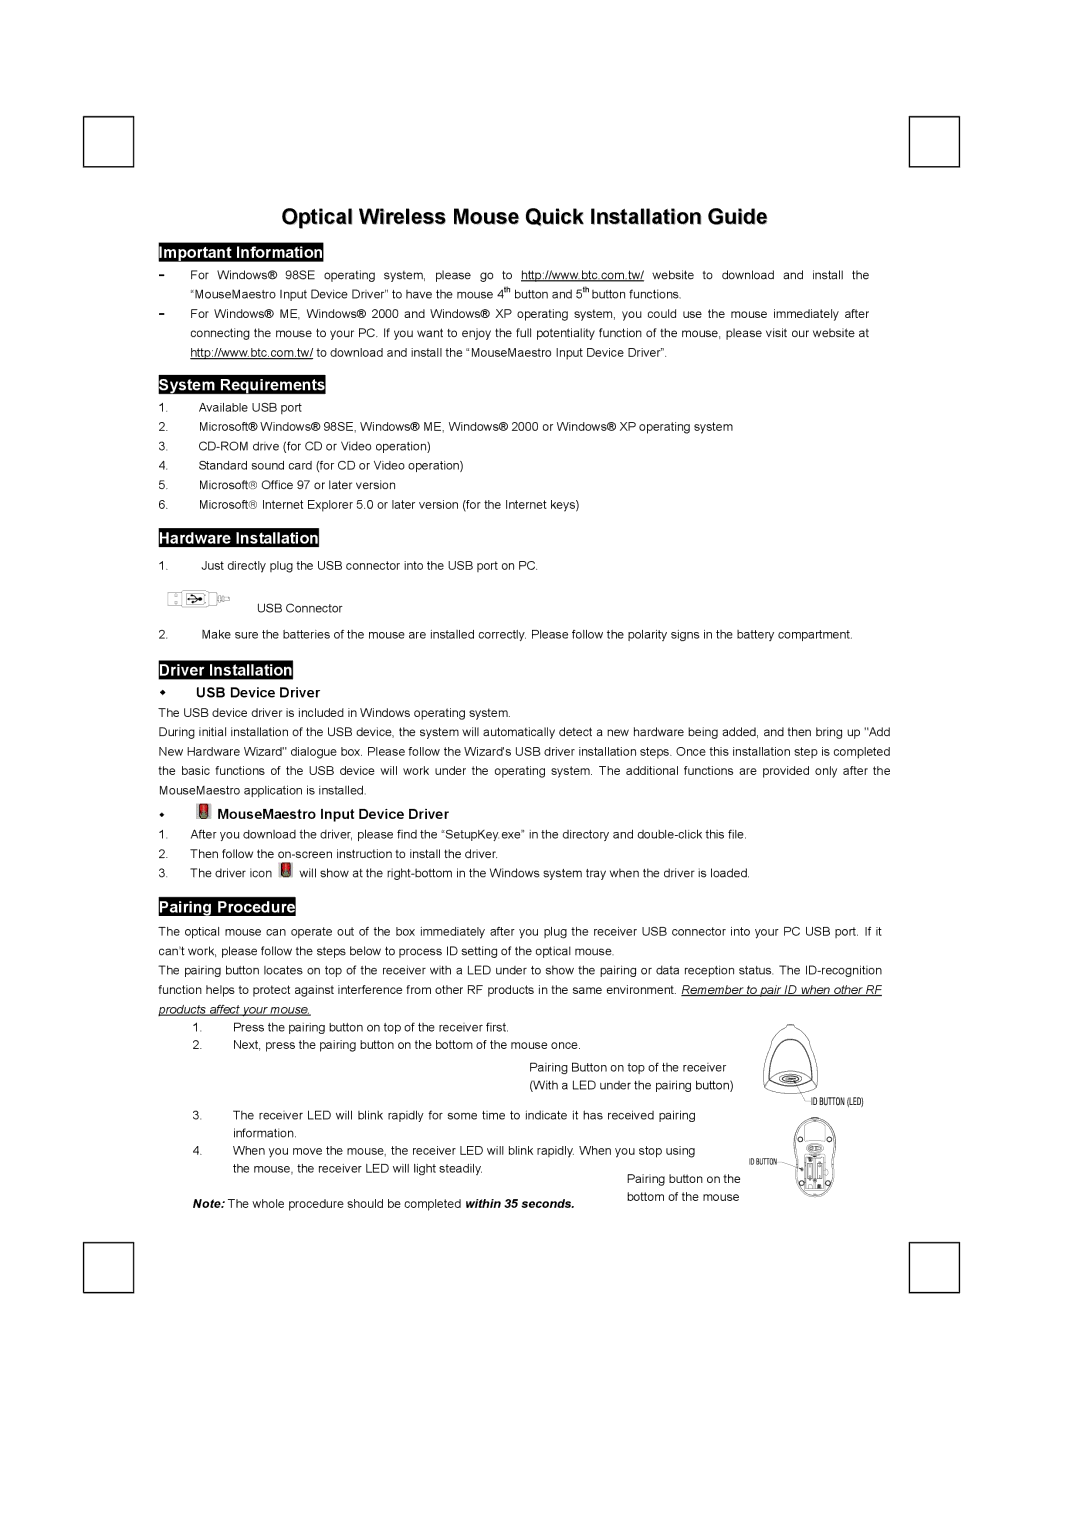
Pairing Procedure
The optical mouse can operate out of the box immediately after you plug the receiver USB connector into your PC USB port. If it can’t work, please follow the steps below to process ID setting of the optical mouse.
The pairing button locates on top of the receiver with a LED under to show the pairing or data reception status. The
1.Press the pairing button on top of the receiver first.
2.Next, press the pairing button on the bottom of the mouse once.
Pairing Button on top of the receiver (With a LED under the pairing button)
3.The receiver LED will blink rapidly for some time to indicate it has received pairing
information.
4. When you move the mouse, the receiver LED will blink rapidly. When you stop using the mouse, the receiver LED will light steadily.
Note: The whole procedure should be completed within 35 seconds.