Epson C120/C110 Printer Setup Instructions
◄
◄
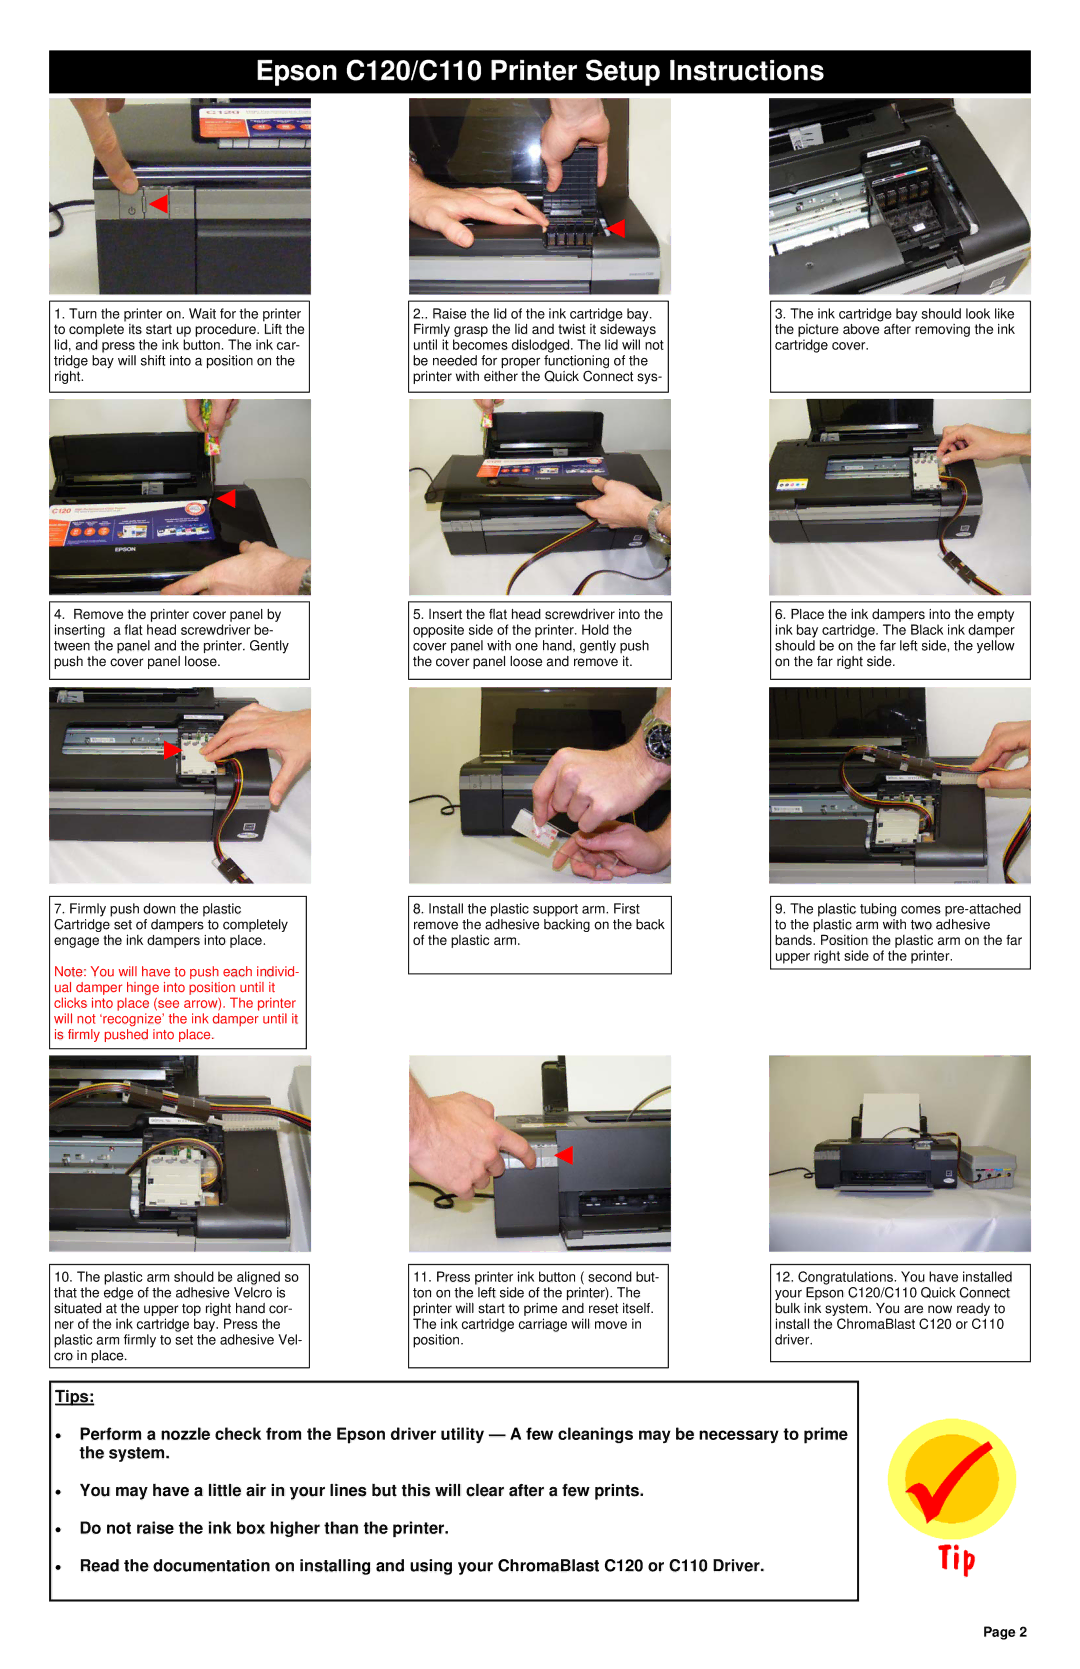
1.Turn the printer on. Wait for the printer to complete its start up procedure. Lift the lid, and press the ink button. The ink car- tridge bay will shift into a position on the right.
2..Raise the lid of the ink cartridge bay. Firmly grasp the lid and twist it sideways until it becomes dislodged. The lid will not be needed for proper functioning of the printer with either the Quick Connect sys-
3.The ink cartridge bay should look like the picture above after removing the ink cartridge cover.
◄
4.Remove the printer cover panel by inserting a flat head screwdriver be- tween the panel and the printer. Gently push the cover panel loose.
►
7.Firmly push down the plastic Cartridge set of dampers to completely engage the ink dampers into place.
Note: You will have to push each individ- ual damper hinge into position until it clicks into place (see arrow). The printer will not ‘recognize’ the ink damper until it is firmly pushed into place.
5.Insert the flat head screwdriver into the opposite side of the printer. Hold the cover panel with one hand, gently push the cover panel loose and remove it.
8.Install the plastic support arm. First remove the adhesive backing on the back of the plastic arm.
6.Place the ink dampers into the empty ink bay cartridge. The Black ink damper should be on the far left side, the yellow on the far right side.
9.The plastic tubing comes
◄
10.The plastic arm should be aligned so that the edge of the adhesive Velcro is situated at the upper top right hand cor- ner of the ink cartridge bay. Press the plastic arm firmly to set the adhesive Vel- cro in place.
11.Press printer ink button ( second but- ton on the left side of the printer). The printer will start to prime and reset itself. The ink cartridge carriage will move in position.
12.Congratulations. You have installed your Epson C120/C110 Quick Connect bulk ink system. You are now ready to install the ChromaBlast C120 or C110 driver.
Tips:
•Perform a nozzle check from the Epson driver utility — A few cleanings may be necessary to prime the system.
•You may have a little air in your lines but this will clear after a few prints.
•Do not raise the ink box higher than the printer.
•Read the documentation on installing and using your ChromaBlast C120 or C110 Driver.
Page 2