Fig | Fig | Fig |
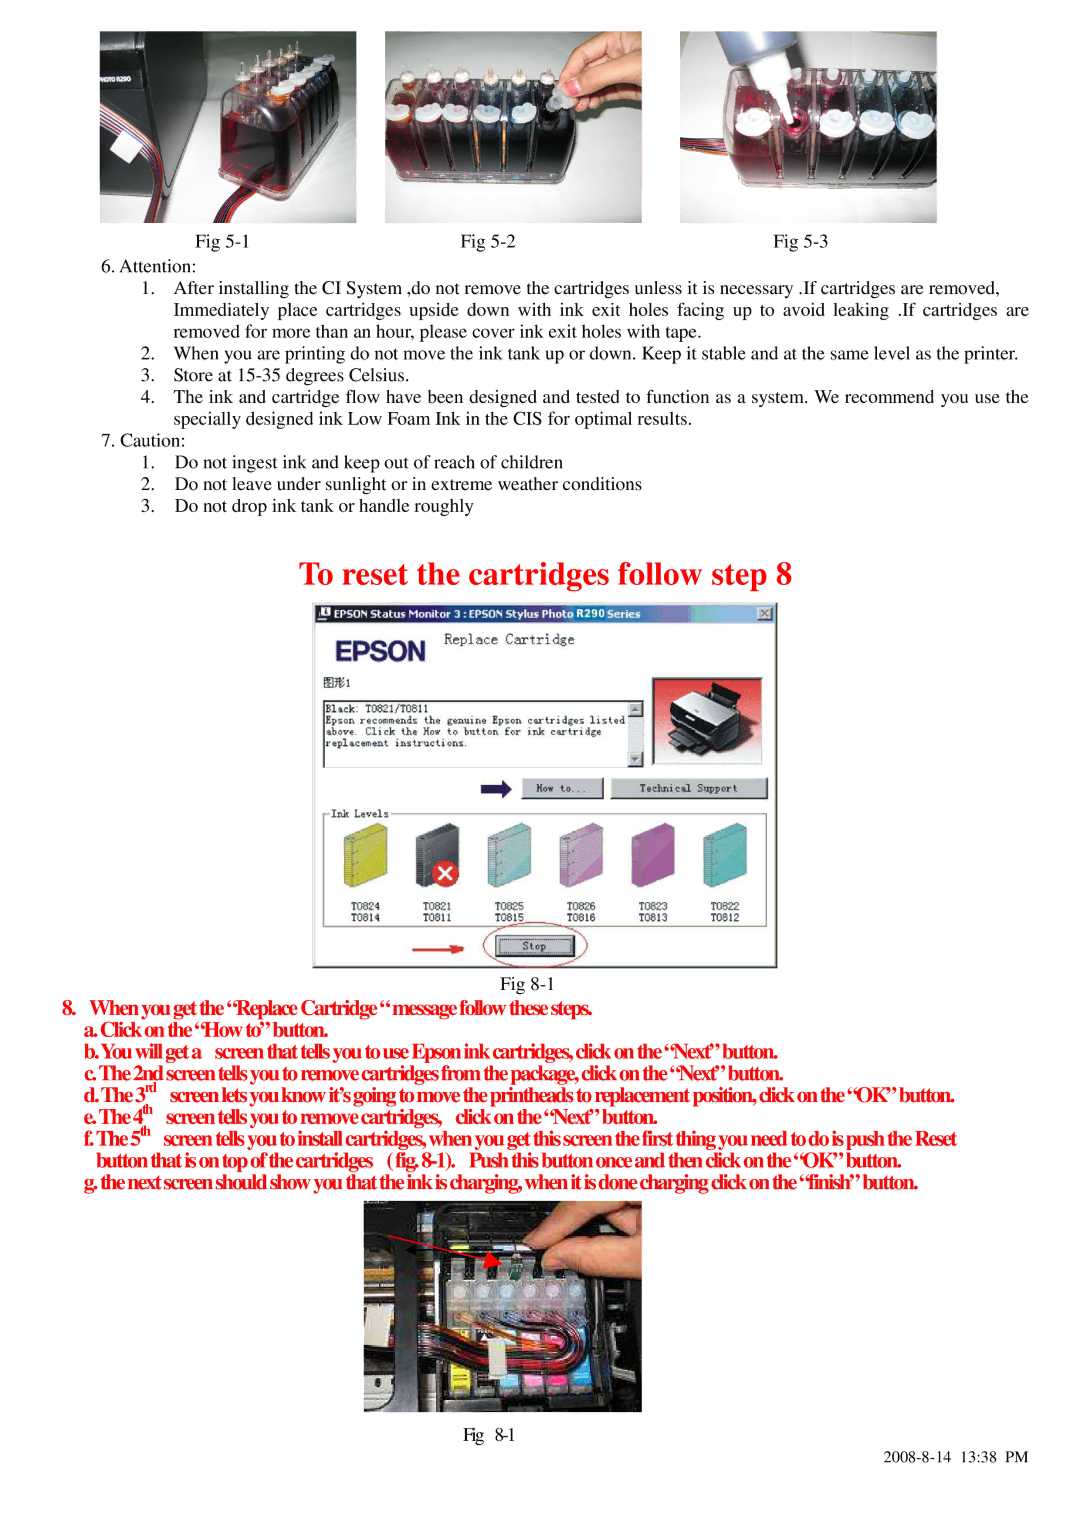
6.Attention:
1.After installing the CI System ,do not remove the cartridges unless it is necessary .If cartridges are removed, Immediately place cartridges upside down with ink exit holes facing up to avoid leaking .If cartridges are removed for more than an hour, please cover ink exit holes with tape.
2.When you are printing do not move the ink tank up or down. Keep it stable and at the same level as the printer.
3.Store at
4.The ink and cartridge flow have been designed and tested to function as a system. We recommend you use the specially designed ink Low Foam Ink in the CIS for optimal results.
7.Caution:
1.Do not ingest ink and keep out of reach of children
2.Do not leave under sunlight or in extreme weather conditions
3.Do not drop ink tank or handle roughly
To reset the cartridges follow step 8
Fig
8.When you get the “Replace Cartridge“ messagef ollow these steps. a.Click on the “How to”button.
b.You will geta screen that tellsyou touseEpson ink cartridges, click on the“Next”button. c.The2nd screen tellsyou to remove cartridgesfromthe package, click on the“Next” button.
d.The3rd screen letsyouknow it’sgoing tomove theprintheads to replacement position, click on the“OK”bu tton. e.The4th screen tells youto remove cartridges, click on the “Next”button.
f.The5th screen tells you to install cartridges,when you get this screen thefirst thingyou need todois push the Reset button thatis on top of thecartridges (fig.
g. thenextscreen should show you thattheink is charging,when itis donecharging click on the“finish”button.
Fig