Euphonix Max Air Control Surface Manual
Changing the ID of a CM416 Module
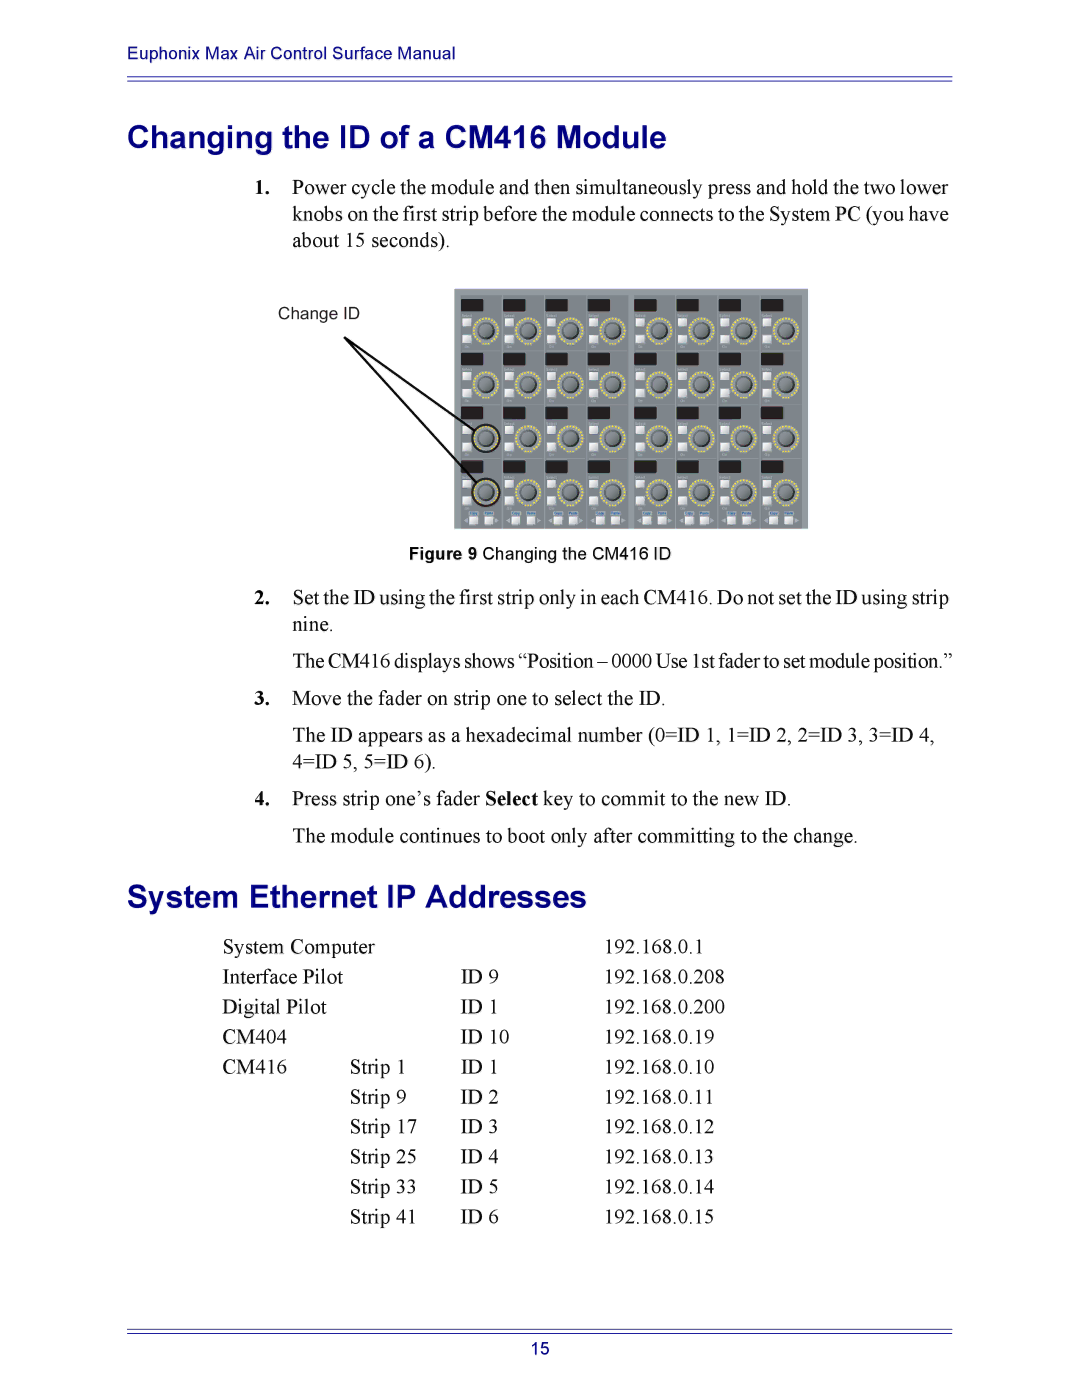
1.Power cycle the module and then simultaneously press and hold the two lower knobs on the first strip before the module connects to the System PC (you have about 15 seconds).
Change ID
Select | Select | Select | Select | Select | Select | Select | Select |
On | On | On | On | On | On | On | On |
Select | Select | Select | Select | Select | Select | Select | Select |
On | On | On | On | On | On | On | On |
Select | Select | Select | Select | Select | Select | Select | Select |
On | On | On | On | On | On | On | On |
Select | Select | Select | Select | Select | Select | Select | Select |
On | On | On | On | On | On | On | On |
Copy Paste | Copy Paste | Copy Paste | Copy Paste | Copy Paste | Copy Paste | Copy Paste | Copy Paste |
Figure 9 Changing the CM416 ID
2.Set the ID using the first strip only in each CM416. Do not set the ID using strip nine.
The CM416 displays shows “Position – 0000 Use 1st fader to set module position.”
3.Move the fader on strip one to select the ID.
The ID appears as a hexadecimal number (0=ID 1, 1=ID 2, 2=ID 3, 3=ID 4, 4=ID 5, 5=ID 6).
4.Press strip one’s fader Select key to commit to the new ID.
The module continues to boot only after committing to the change.
System Ethernet IP Addresses
System Computer |
| 192.168.0.1 | |
Interface Pilot |
| ID 9 | 192.168.0.208 |
Digital Pilot |
| ID 1 | 192.168.0.200 |
CM404 |
| ID 10 | 192.168.0.19 |
CM416 | Strip 1 | ID 1 | 192.168.0.10 |
| Strip 9 | ID 2 | 192.168.0.11 |
| Strip 17 | ID 3 | 192.168.0.12 |
| Strip 25 | ID 4 | 192.168.0.13 |
| Strip 33 | ID 5 | 192.168.0.14 |
| Strip 41 | ID 6 | 192.168.0.15 |
15