ASSEMBLY INSTRUCTIONS
FOR THE ASSAULT OUTFITTER:
Component List:
1 Tent Body, 1 Fly, 3
NOTE: Do not drop tent bag or pole bag on its end. Do not bounce tent bag on its end to get the tent out. These actions may cut the shock cord and/or damage the pole ends.
1.Unpack the tent bag and separate the components. Unfold the tent and lay it out with the floor on the ground and with a grommeted web in each corner. Pull the tent into a rough rectangle. Do not stake down the tent just yet; but in windy conditions, stake down one corner that faces into the wind.
2.Assemble the three shockcorded tent poles. Carefully seat each section. Try to keep the poles from snapping together as this can damage the rod ends.
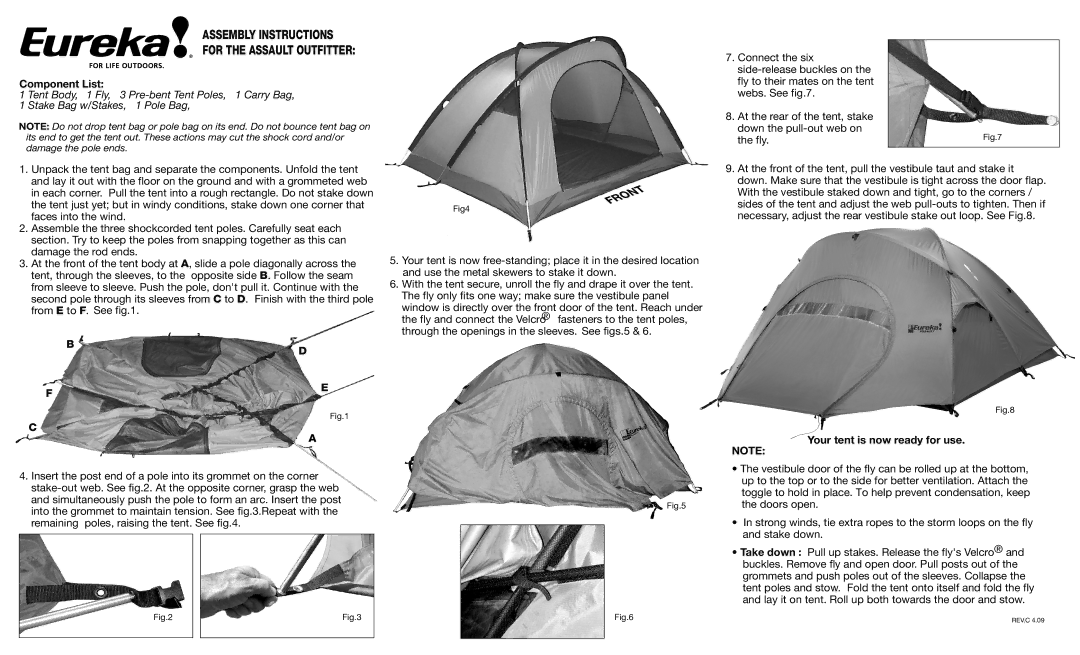
3.At the front of the tent body at A, slide a pole diagonally across the tent, through the sleeves, to the opposite side B. Follow the seam from sleeve to sleeve. Push the pole, don't pull it. Continue with the second pole through its sleeves from C to D. Finish with the third pole from E to F. See fig.1.
| B | D |
|
| |
F |
| E |
|
| |
|
| Fig.1 |
C |
| A |
|
|
4.Insert the post end of a pole into its grommet on the corner
Fig.2 |
| Fig.3 |
|
|
|
Fig4
5.Your tent is now
6.With the tent secure, unroll the fly and drape it over the tent. The fly only fits one way; make sure the vestibule panel
window is directly over the front door of the tent. Reach under
®
the fly and connect the Velcro fasteners to the tent poles, through the openings in the sleeves. See figs.5 & 6.
Fig.5
Fig.6
7. | Connect the six |
|
|
| |
| fly to their mates on the tent |
|
| webs. See fig.7. |
|
8. | At the rear of the tent, stake |
|
| down the | Fig.7 |
| the fly. |
9.At the front of the tent, pull the vestibule taut and stake it down. Make sure that the vestibule is tight across the door flap. With the vestibule staked down and tight, go to the corners / sides of the tent and adjust the web
Fig.8
Your tent is now ready for use.
NOTE:
•The vestibule door of the fly can be rolled up at the bottom, up to the top or to the side for better ventilation. Attach the toggle to hold in place. To help prevent condensation, keep the doors open.
•In strong winds, tie extra ropes to the storm loops on the fly and stake down.
•Take down : Pull up stakes. Release the fly's Velcro® and buckles. Remove fly and open door. Pull posts out of the grommets and push poles out of the sleeves. Collapse the tent poles and stow. Fold the tent onto itself and fold the fly and lay it on tent. Roll up both towards the door and stow.
REV.C 4.09