ASSEMBLY INSTRUCTIONS
SCENIC PASS 2 TENT:
Component List:
1 | Tent Body, | 2 Tent Poles, 1 Tent Fly, 1 Carry Bag, |
1 | Pole Bag, | 1 Stake Bag/ Stakes |
Unroll and unfold the tent with the floor on the ground. Remove the fly and set it aside. Do not stake the tent down yet. In windy conditions, we recommend that a narrow end should face into the wind and that you stake down one corner of this end. See fig.1
Join the
into each plain end.
C
DB
fig. 1
| A | |
At the front corner of the tent; |
| |
| ||
[with the yellow web]- A, fit |
| |
the post end of one of the |
| |
aluminum poles into the web |
| |
grommet. Angle the pole to |
| |
the opposite corner; A to C. |
| |
At corner B, repeat with the | fig. 2 | |
second pole B to D. | ||
| ||
|
|
Start at the front of the tent at
D and grasp the end of the pole in one hand and the web loop in the other. Push the pole from D to B creating an arc. Insert the post into the web grommet to tension the tent across the diagonal. Repeat with the other pole; C to A. See fig. 2 & 3.
REV A 4.09
CB
D | fig. 3 | A |
|
Raise up the tent poles and attach the peak of the tent to them. Capture both poles where they cross, with the loop and dog bone. See fig. 4 & 5.
fig. 4
fig. 5
Attach all the clips to the poles. Your tent is now
fig. 6 | fig. 7 |
|
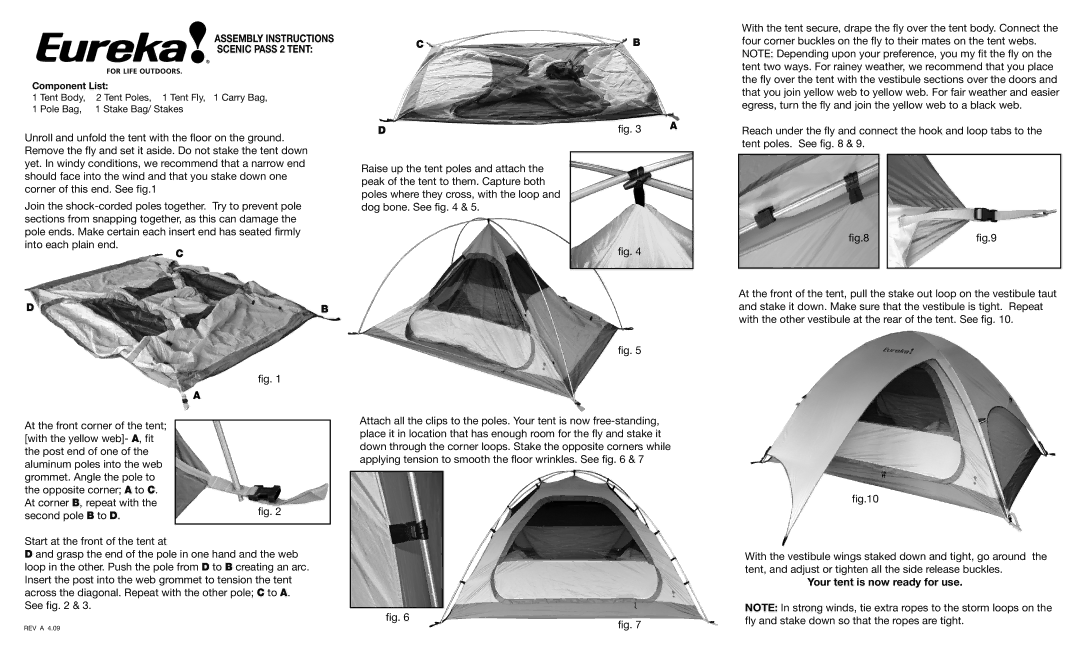
With the tent secure, drape the fly over the tent body. Connect the four corner buckles on the fly to their mates on the tent webs. NOTE: Depending upon your preference, you my fit the fly on the tent two ways. For rainey weather, we recommend that you place the fly over the tent with the vestibule sections over the doors and that you join yellow web to yellow web. For fair weather and easier egress, turn the fly and join the yellow web to a black web.
Reach under the fly and connect the hook and loop tabs to the tent poles. See fig. 8 & 9.
fig.8 |
| fig.9 |
|
|
|
At the front of the tent, pull the stake out loop on the vestibule taut and stake it down. Make sure that the vestibule is tight. Repeat with the other vestibule at the rear of the tent. See fig. 10.
fig.10
With the vestibule wings staked down and tight, go around the tent, and adjust or tighten all the side release buckles.
Your tent is now ready for use.
NOTE: In strong winds, tie extra ropes to the storm loops on the fly and stake down so that the ropes are tight.