EP187H specifications
The Euro-Pro EP187H is an innovative addition to the world of home cleaning solutions, designed to enhance the efficiency and convenience of routine cleaning tasks. This vacuum cleaner stands out due to its advanced technology and user-centric features, making it a popular choice among homeowners seeking an effective and reliable cleaning tool.One of the main features of the Euro-Pro EP187H is its powerful motor, which delivers strong suction capabilities. This ensures that even the most stubborn dirt and debris can be lifted effortlessly from various surfaces, including carpets, hardwood floors, and upholstery. Additionally, its compact design allows for easy maneuverability around furniture and tight spaces, making it perfect for thorough cleaning in every nook and cranny of the home.
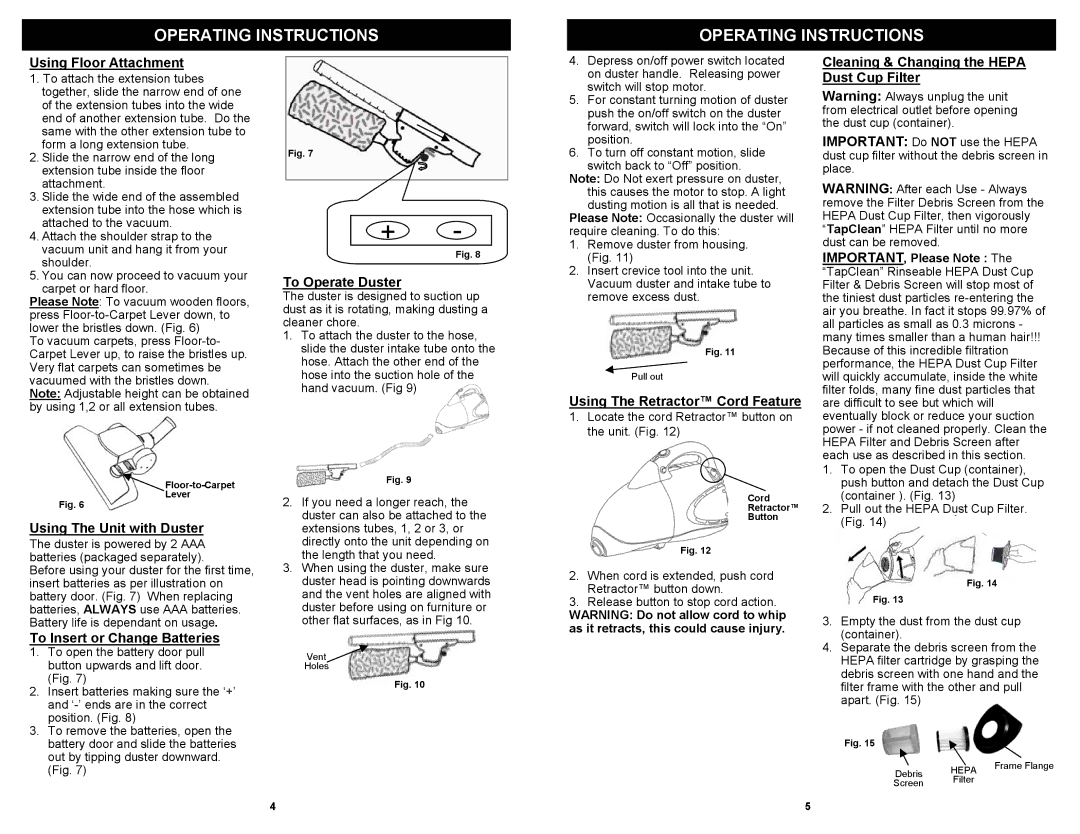
The EP187H is equipped with a multi-stage filtration system that effectively captures dust, allergens, and other microscopic particles. This technology is especially beneficial for allergy sufferers, as it helps to improve indoor air quality by minimizing the circulation of harmful particles. The HEPA filter, a key component in the filtration system, is designed to trap up to 99.97% of dust and allergens, ensuring that your home remains clean and healthy.
Another notable characteristic of the Euro-Pro EP187H is its versatile cleaning tools. The vacuum comes with a range of attachments, including a crevice tool for tight spaces, a dusting brush for surfaces, and an upholstery tool for furniture. This versatility allows users to tackle various cleaning tasks efficiently, from vacuuming carpets to dusting delicate surfaces.
In terms of ease of use, the Euro-Pro EP187H features a lightweight design, making it easy to carry up and down stairs or to different rooms within the home. The vacuum also has a sizable dustbin that can be easily emptied, reducing the hassle of frequent emptying and allowing for extended cleaning sessions without interruption.
Additionally, the vacuum is designed with a retractable cord, which not only keeps the cord neat but also adds to the overall convenience of storage. Its quiet operation ensures that cleaning can be done without disturbing others in the household.
In conclusion, the Euro-Pro EP187H is a powerful, efficient, and versatile vacuum cleaner that combines advanced technology with user-friendly features. Its strong suction, effective filtration, and range of attachments make it an excellent choice for anyone looking to simplify their cleaning routine while maintaining a healthy living environment.