
EP602H specifications
The Euro-Pro EP602H is a versatile and innovative vacuum cleaner designed to provide efficient cleaning solutions for both home and office environments. This model stands out with its combination of powerful performance, advanced technology, and user-friendly features, making it a popular choice among consumers seeking an effective cleaning apparatus.One of the key characteristics of the Euro-Pro EP602H is its strong suction capability. This vacuum is equipped with a robust motor that delivers exceptional suction power, allowing it to easily capture dirt, dust, and debris from a variety of surfaces. Whether it's carpets, hardwood floors, or upholstery, users can count on the EP602H to provide thorough cleaning with minimal effort.
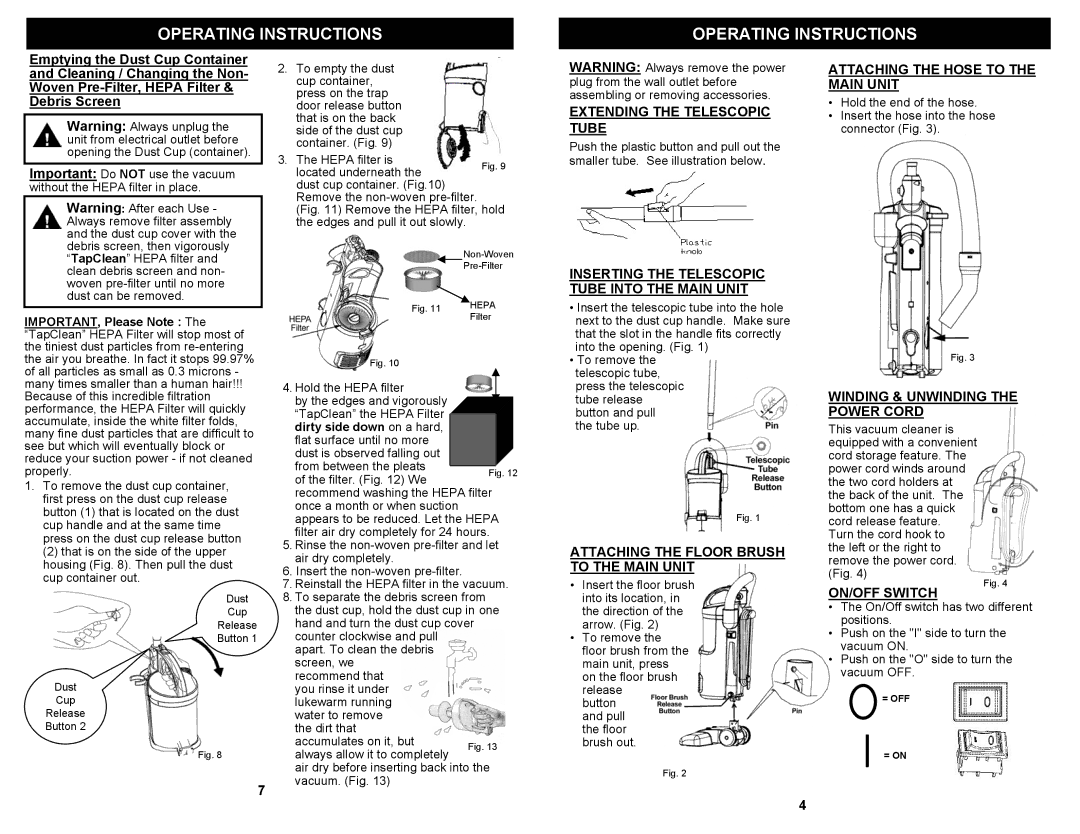
The Euro-Pro EP602H incorporates a multi-cyclonic filtration system, which not only enhances suction performance but also minimizes the need for frequent filter replacement. Unlike traditional vacuum cleaners that rely on bags, this model uses a transparent dust canister that allows users to see when it needs to be emptied. This feature promotes hygiene and convenience, ensuring that users can maintain optimal cleaning efficiency without the hassle of dealing with messy disposal.
Another notable technology featured in the EP602H is its adjustable height settings, which enable users to customize the vacuum's performance based on the type of flooring being cleaned. This adaptability ensures effective cleaning on various surfaces, significantly improving the user's experience.
The vacuum is designed with user comfort in mind, featuring an ergonomic handle that provides a comfortable grip during extended cleaning sessions. Additionally, its lightweight design makes it easy to maneuver around furniture and lift for transport between different areas of the home or office.
The Euro-Pro EP602H is also equipped with specialized attachments, including a crevice tool and dusting brush. These accessories enhance the vacuum's versatility and allow users to tackle tight spaces, corners, and delicate surfaces with ease.
In conclusion, the Euro-Pro EP602H combines powerful suction, advanced filtration technology, and convenience features, making it an excellent choice for those in need of a reliable vacuum cleaner. Its adaptability to various surfaces, ease of maintenance, and user-friendly design truly set it apart in the competitive cleaning equipment market. Whether for everyday cleaning tasks or deeper sanitization efforts, the EP602H ensures a spotless and healthy environment.