OPERATING INSTRUCTIONS
CONSIGNES D’UTILISATION
Changing the HEPA Dust Bag Warning: Always unplug the unit from electrical outlet before opening the dust bag cover.
Important: Do NOT use the vacuum without all the filters and HEPA dust bag in place.
Important, Please Note: The HEPA Dust Bag will stop most of the tiniest dust particles and airborne allergens from re- entering the air you breathe. In fact it stops 99.97% of all particles as small as
0.3microns - many times smaller than a human hair!!! Because of this incredible filtration performance, the HEPA Dust Bag will accumulate many fine dust particles that are difficult to see. Be assured that the HEPA Dust Bag is doing the job. HEPA bags are not
1. Push the power on/off switch to the “OFF” position to disconnect the power.
2. Depress the dust bag cover release button and remove the dust bag. (Fig. 14)
Dust Bag Cover
Fig. 14
3.Remove the HEPA dust bag from the holding slot, do not let dust fall out of HEPA dust bag. (Fig. 14)
4.Dispose of used HEPA dust bag, and replace with a new HEPA dust bag.
Never reuse the HEPA dust bags.
Replacing and Cleaning the Filters
Pre-Motor Filter
Your vacuum is equipped with a filtration system to reduce dust in your home as you clean. The
Check the
To remove the pre- motor filter, first remove the dust bag cover and the HEPA dust bag. Lift out the
Fig. 15
1.To clean the
dryer to dry them. Air dry only. Never operate the vacuum cleaner without all the filters in place.
2.When dry, replace
3.Insert the HEPA dust bag holder over the filter and then place HEPA dust bag into holder ensuring that it is in place and locking lever has engaged.
4.Replace the dust cover. Important: Both the
Assemblage de Votre Aspirateur
Remarque: Retirez toujours la fiche d’alimentation de la prise murale avant d’installer ou de retirer des accessoires.
Pose du Boyau Souple à l’aspirateur
1.Insérez le boyau souple dans l’entrée d’air.
2.Branchez le cordon d’alimentation à son réceptacle sur l'aspirateur. (Fig. 1)
Fig. 1
3.Pour retirer le boyau souple, débranchez le cordon d'alimentation du boyau, appuyez sur les 2 boutons de blocage et retirez le boyau. (Fig. 2)
Fig. 2
Bouton de verrouillage
Insertion du Sac à Poussière HEPA Avertissement: Afin de réduire les risques d’électrocution, le cordon d’alimentation et le boyau doivent être débranchés avant de changer le sac
ou avant de procéder à l’entretien ou au dépannage.
1.Débranchez le cordon d'alimentation du boyau souple et retirez le boyau.
2.Enfoncez le bouton de relâche du couvercle du sac à poussière et ouvrez le couvercle. (Fig. 3)
3.Tout en tenant le sac à poussière HEPA dans la main,
Couvercle
de sac à poussière Bouton de relâche
Fig. 3
Sac à poussière
boyau
Fig. 4
4.
Fig. 5
5.Fermez le couvercle du sac. (Fig. 5) Remarque: Le couvercle de l'aspirateur ne fermera pas si le sac HEPA n'est pas inséré dans le
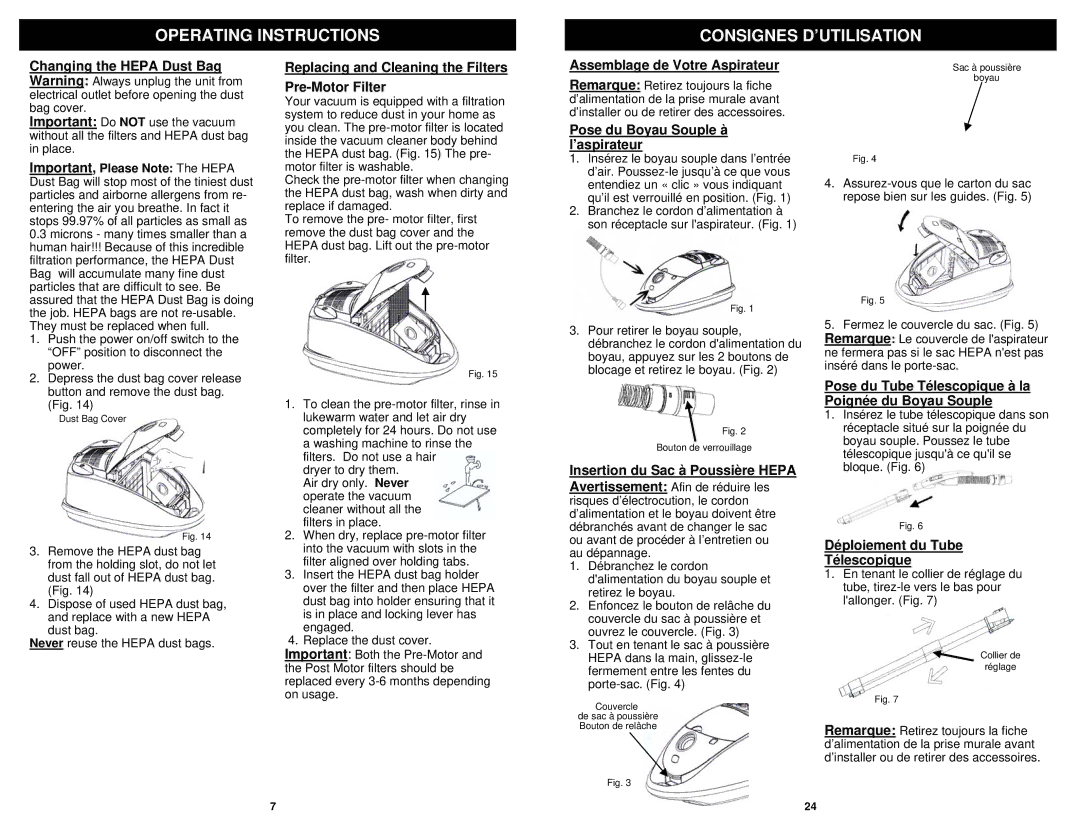
Pose du Tube Télescopique à la Poignée du Boyau Souple
1.Insérez le tube télescopique dans son réceptacle situé sur la poignée du boyau souple. Poussez le tube télescopique jusqu'à ce qu'il se bloque. (Fig. 6)
Fig. 6
Déploiement du Tube
Télescopique
1.En tenant le collier de réglage du tube,
Collier de
réglage
Fig. 7
Remarque: Retirez toujours la fiche d’alimentation de la prise murale avant d’installer ou de retirer des accessoires.
7
24