OPERATING INSTRUCTIONS
OPERATING INSTRUCTIONS cont.
How To Assemble & Use
IMPORTANT: Always insure that the unit is “UNPLUGGED” from the wall receptacle prior to initial filling or
Step 1: Before filling the steam cleaner, make sure that the unit is NOT plugged in.
Step 2: Turn Safety Cap counter clockwise until removed.
Step 3: Add 20 fl. oz (600 cc) of water using the filling flask provided. Do not overfill. Replace Safety Cap by turning clockwise - press down firmly to tighten. Heating time is approximately 6 minutes. Filling the boiler with hot water will shorten heat up time.
Step 4: Plug the unit into a standard 120 volt wall receptacle. The power “On” light (Red) will light up.
Step 5: Allow approximately
Step 6: At the start, some water will come out from the nozzle. This is normal.
NOTE: Disconnect steam cleaner from wall outlet before refilling. It is time to refill your steam cleaner when there is no more steam coming out of the nozzle. Because the water tank is pressurized, use caution when opening to refill. Depress the trigger button while you unscrew the safety cap counterclockwise. Always let unit cool for 5 minutes before refilling the unit with water.
CAUTION: When refilling the appliance while it is still hot, the first drops of water might bubble up.
Using the Locking Trigger Button
The steam cleaner has a locking trigger button. As you push down on the trigger you will get more steam. The trigger will lock when you have pushed it all the way. To unlock the trigger, just press down on the trigger release and the trigger will pop up, stopping the flow of steam.
Refilling With Water
Step 1: Disconnect electrical power cord from wall outlet.
Step 2: Press trigger button until all pressure has been released. Carefully unscrew safety cap.
Step 3: Allow the unit to cool for approximately 5 minutes before refilling with water.
Step 4: Slowly pour water using the filling flask into the boiler.DO NOT Fill Under a faucet, use the filling flask provided. DO NOT OVERFILL. Always leave approximately 2 1/2 inches between the top of the unit and the water level.
Step 5: Release the locking trigger.
Step 6: Screw safety cap back on t he appliance and plug appliance back into wall outlet. Steam will start to be produced as before.
WARNING: This appliance is under pressure. After every use, press trigger button until all pressure has been released before removing safety cap. Either concentrator nozzle or hose must be connected in order for the trigger to operate. Allow unit to cool for three (3) minutes before refilling.
ATTACHMENTS
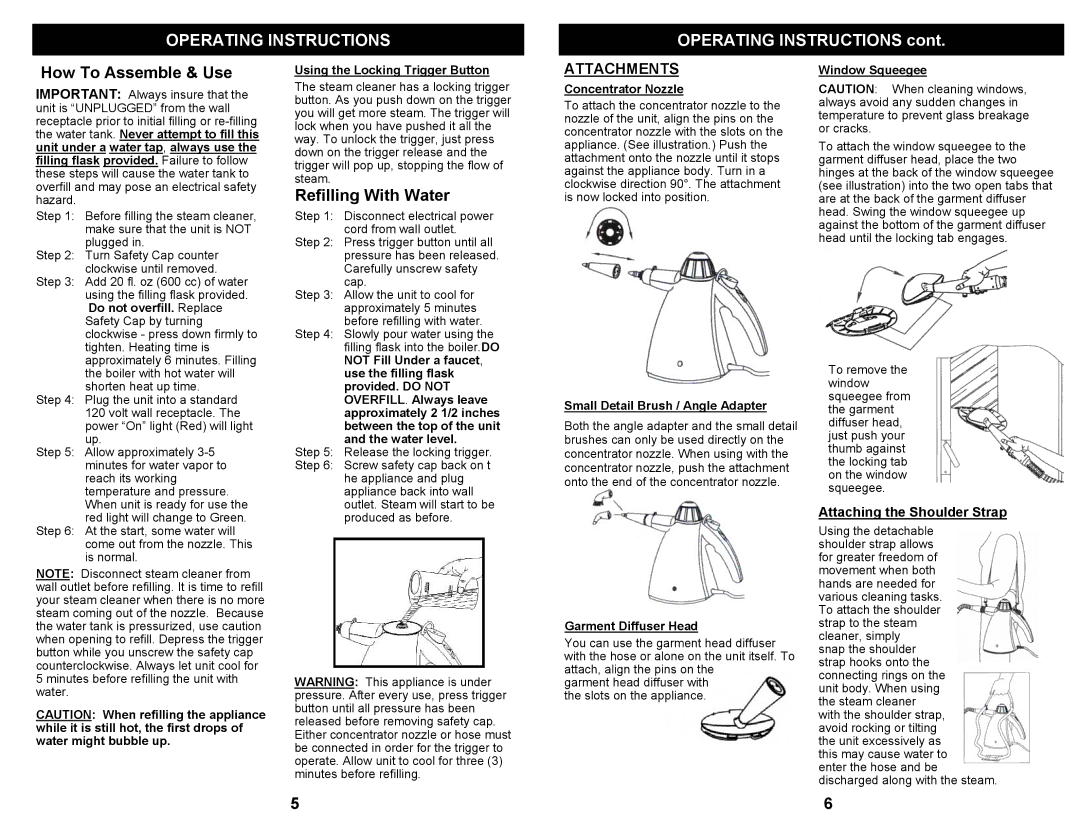
Concentrator Nozzle
To attach the concentrator nozzle to the nozzle of the unit, align the pins on the concentrator nozzle with the slots on the appliance. (See illustration.) Push the attachment onto the nozzle until it stops against the appliance body. Turn in a clockwise direction 90°. The attachment is now locked into position.
Small Detail Brush / Angle Adapter
Both the angle adapter and the small detail brushes can only be used directly on the concentrator nozzle. When using with the concentrator nozzle, push the attachment onto the end of the concentrator nozzle.
Garment Diffuser Head
You can use the garment head diffuser with the hose or alone on the unit itself. To attach, align the pins on the
garment head diffuser with the slots on the appliance.
Window Squeegee
CAUTION: When cleaning windows, always avoid any sudden changes in temperature to prevent glass breakage or cracks.
To attach the window squeegee to the garment diffuser head, place the two hinges at the back of the window squeegee (see illustration) into the two open tabs that are at the back of the garment diffuser head. Swing the window squeegee up against the bottom of the garment diffuser head until the locking tab engages.
To remove the window squeegee from the garment diffuser head, just push your thumb against the locking tab on the window squeegee.
Attaching the Shoulder Strap
Using the detachable shoulder strap allows for greater freedom of movement when both hands are needed for various cleaning tasks. To attach the shoulder strap to the steam cleaner, simply
snap the shoulder strap hooks onto the connecting rings on the unit body. When using the steam cleaner with the shoulder strap, avoid rocking or tilting the unit excessively as this may cause water to enter the hose and be discharged along with the steam.
5
6